Just finished my second pair of chaps. This is a pair of Arizona Shotgun chaps, after patterns by Bob Klenda, Klenda Custom Saddlery. I’m not sure where the designation “Arizona Shotgun” came from, but it may be the fact that there is no zipper or mechanical closure. These are true shotgun chaps, with fully closed leggings, but rather than using a mechanical closure of any kind, the legs are laced permanently together with a 1/2″ leather lace. Well, they can be unlaced, if necessary, but you don’t do it every time you put them on or take them off.
Arizona shotgun chaps are put on by turning the legs backwards, so that the toe of the boot is toward the laces, The natural bend of the leggings, as well as the way they are laced, allow the boot to slide down into the chaps easily. The leggings are then twisted around and pulled up into place, then secured with the belt.
Whereas most chaps use an assortment of hardware, buckles, snaps, rings, conchas, rosettes, etc, to hold them together and keep them in place, Arizona shotgun chaps use only one piece of hardware: a 1-1/4″ cart buckle for the belt. Of course, any similar belt buckle can be used, but the cart buckle is specified by Bob, so that’s what I used. I purchased the buckle online from Sheridan Leather. Sheridan only carries that particular buckle in solid brass, which, in my opinion, is perfectly appropriate for these chaps.
The Arizona shotguns were much simpler to make than the batwings I recently made, both from a pattern perspective, as well as from my own additional touches. Whereas on the batwings, I used 7/8 oz skirting leather for the yokes, pocket flaps, and belt parts, and then tooled them to taste, on the shotguns I used chap leather, turned rough-out, for the yokes and pocket flaps. I used an old belt blank I had for the belt parts and tooled them with a small basket weave pattern. For the chaps themselves, I used 5/6 oz oil-tanned chap leather from The Leather Guy. As before, I am very satisfied with the leather. It was exactly as described on the website. As with the batwings, everything was hand-stitched together. They went together quickly.
While the batwings pattern was coincidentally made in my size, I had to increase the upper thigh measurements for the shotguns. That was easy to do, simply by adding an inch to the side of the pattern that wraps around back of the leg. As per instructions written by Bob Klenda on the patterns, if length (outseam) must be adjusted, care must be taken to add or subtract equal parts from above and below the knee of the pattern, so that the knee of the chaps remains at the knee of the customer.
I felt like I made the legs of the batwings just a tad loose, although they were comfortable in the saddle, so for the shotguns I decided to fit them a little tighter. Once I tried them on, I wished I had given them one more inch at the upper-most thigh measurement. They are a bit snug, but still comfortable. After making two pair of chaps, I have determined that when measuring for size, one should measure the thigh measurements (upper thigh at crotch, mid-thigh, and above the knee) with a cloth tape, and it should only be pulled as snug as you wish your chaps to fit. Measure over pants you would normally wear in the saddle. A snug fit with the tape will result in a snug fit of the chaps. While chap leather will conform to the leg, even if tight, getting them on is a hassle, as you have to pull them up, then reach down and pull your pants down inside the legging, while holding the legging up at the same time. Even so, once I get my shotguns on, they are comfortable. I was able to adjust them just a little, by leaving the top lace a little loose.
All-in-all, I really like these chaps. They were easy to make, don’t have any zippers or other hardware to break, rust, or freeze up while out on the trail, and they are a little lighter than the batwings. They are very comfortable, as well.
I expect I’ll be wearing these on a lot of future horse pack trips.
Finished! Well, almost. I just have to apply a leather finish to them.
My first pair of chaps
The chaps are batwings, made from patterns from Bob Klenda Saddlery. Bob is a well-known saddle maker, who makes some beautiful custom saddles. As I recall, one of his saddles once sold at auction for $20,000. Yet, when you call his shop, he answers the telephone and is more than happy to help you get just what you want and offer all the help and advice you need. I ended up asking all sorts of questions about leather, hardware, fitting, etc, and he never once made me feel like I was wasting his time. A very pleasant and helpful man. I hope I get a chance to meet him in person sometime.
24 sf of 5/6 oz chap leather
The leather I chose is 5/6 oz chap leather with a pebble-grain finish, which I purchased online from The Leather Guy. The leather offered on that website is generally #2 leather, which has some blemish or other, so they are priced accordingly. They have a large selection and show very good pictures of the actual piece you are buying. Mine has a large brand on it, which I thought was sort of novel. I situated it to show up on the wing of the chaps. I am pleased with the quality of the leather. It is exactly as described on the site. I also purchased leather for two more pairs of chaps at the same time.
I bought the hardware for the chaps from Sheridan Leather. I looked all over the Internet to find a place that sold all the pieces I needed, so I wouldn’t have to pay shipping from several vendors. I couldn’t find anybody who had all the items, so I finally called Bob Klenda to see where he gets his stuff. He recommended Sheridan Leather. They had everything I needed to make Bob’s chaps, and a lot besides.
These chaps required eight 5/8″ spring clips (also called chap clips), eight 5/8″ rings, eight 1-3/8″ leather rosettes, eight 1-5/8″ leather rosettes, and a 1-1/4″ cart buckle (sometimes called a chaps buckle). Sheridan only carries the 1-1/4″ buckle in brass. I ended up ordering several other leathercraft-related items as well. Their prices are good and they shipped quickly. There was an error on my first order, but it required only a phone call to straightened it out to my satisfaction. I appreciated their quick and courteous service.
Yokes and pocket flaps
The yokes and pocket flaps are made from 7/8 oz skirting leather, which is a little less expensive than tooling leather, but takes tooling just as well. I purchased it from an eBay seller named “leather_alternative”. The price was right, shipping was reasonable and quick, and the leather was quite good. I bought about 14 square feet of it, but only needed a little of it for the chaps. I plan to use the rest to re-cover an 1860’s McClellan-type saddle tree.
I figure the set of chaps cost me a little under $100 to make. Not bad, when I see equivalent chaps (maybe a little better than mine in the fine details) going for $275. For about $300 I bought enough leather for three sets of chaps with some left over. The hardware for all three sets of chaps I intend to make came to about $60.
After taking the appropriate measurements for my legs, I realized quite happily, that the chaps pattern was made for my size. That was by coincidence, though, and instructions are provided on the pattern for adjusting it to size.
My first step, in making the chaps caused the most anxiety: Deciding where to place the pattern on the leather for marking and cutting. The side I bought was wide enough to allow me to place the yoke of the pattern at the back and the batwings at the belly area for both legs, which gives you consistent thickness and stiffness for the entire length of both legs of the chaps. However, since I wanted the brand mark on the leather to end up in a particular position on the batwing, I reversed that and put the belt in the belly area and the batwing in the stiffer back area. The leather was sufficiently consistent throughout that it turned out fine. Some sides of leather won’t allow this, so you must turn the pattern long-wise on the side to fit both legs of the chaps within the side of leather. Try to choose the position of each leg, so that you get consistent stiffness and color for similar portions of the chaps. In other words, don’t cut one yoke from the stretchy belly area and the other yoke from the stiff neck area of the side. Try to make the left and right legs of the chaps consistent in stiffness and texture.
Once the position of the pattern was decided, I positioned the paper pattern on top of the side of leather and used an Osborne #5 overstitch wheel to trace the pattern. The points of the overstitch wheel marked the leather through the paper without cutting it, so I was able to retain the pattern and all it’s written instructions intact. After marking one leg, I cut it out, then used that one as the pattern for the other leg, marking the leather by following around it with the tip of an awl. Make sure you make a right and left leg! A mistake here can be very costly, since you won’t likely have enough of the side left to make a third leg!
I cut out all the leather pieces with a utility knife, because it takes less talent and experience to use than my roundknife. Make sure you have plenty of fresh blades, because you want to change them out often, or the knife edge will begin pushing and deforming the chap leather as it cuts. After cutting out all the parts, I edged and burnished the edges of all the parts made of the 7/8 oz skirting leather, using an Osborne #3 edger and a burnishing tool. I then prepared the decorative parts for tooling.
For the yokes, pocket flaps, and belt parts, I wet the leather with a sponge, or quickly dipped it in water, and let it sit while I prepared my tools and work area. The leather is ready to tool when it begins to return to its original color. You really have to get the moisture content of the leather right in order to do the decorative tooling well. If it is too dry, the stamp will not imprint deeply enough, and will damage the grain of the leather. If it’s too wet, the leather gets sort of rubbery and the stamping will cause it to stretch and distort, and will cut too deep. I tooled the yokes, pocket flaps, and belt with a basket weave pattern I like. I used a good weighted mallet, and a worktop of 1-1/4″ granite, which helps get consistent hits on the tools, to make the stamps cut to a consistent depth. This is a talent that takes development (I’m not very good at it yet, but learning).
Craftool stamps
I laid out the pattern on the leather, starting with the border. I traced the border lightly on the damp leather with a divider, then cut it in with a Craftool swivel knife. The border needs to be wide enough to accommodate a stitching groove, wherever there will be stitching. Then I did the basket weave stamping, beveled the border around it, then added a border stamp to edge the basket weave pattern. The stamping tools I used are the basic Craftool swivel knife with a 1/2″ blade, and Craftool #B200 beveler, #534 Basket Weave stamp, a #511 Basket Weave stamp (a little smaller for the belt), and #431 Border stamp.
Yokes and pocket flaps
For the areas that would be stitched, I used a Craftool stitching groover to create a groove in the center of the border to receive the stitching. This keeps the stitches below the surface of the leather, decreasing wear from use on the stitches. It also makes the stitches easier to keep straight and even. I then used the overstitch wheel in the groove to mark where each stitch would go. The parts are then glued in place with contact cement (read the instructions on the cement), prior to stitching.
I used a diamond shaped blade in a stitching awl to punch the holes for stitching the pockets, however, I tried something different for the yokes, pocket flaps, and belts parts, which were made of 7/8 os skirting leather. I used a technique taught by Dusty Johnson, in his book, Saddle Making Construction and Repair Techniques. I pre-drilled all the holes with a Dremel tool and a 1/16″ drill bit. The bit automatically centers in the stitching groove and the divot left by the overstitch wheel. The resultant stitching looks very straight and even. The only cautions are that each hole must be drilled quickly, to avoid burning the leather with the hot drill bit, and the dremel tool must be held perfectly perpendicular to the leather, so that the stitching line on the backside is straight and in its groove. I used a scrap of wood as backing, so as not to drill into my worktable. The process goes very quickly and makes stitching go more quickly as well.
Hand stitching
I hand-stitched everything together, using 5-strand linen pre-waxed thread and #517 harness needles. I clamped the parts to be stitched in a stitching clamp I am making, but haven’t yet completed. It is very difficult to hand stitch without a stitching clamp and have it turn out nicely. Once stitched, the yokes were trimmed even all around.
I made “cowboy buttons” for the pockets. They are strips of leather rolled tight, with the tapered tail passed through the middle of the roll. The tail is then attached to the pocket by weaving it through three holes. I like the looks of them and they are quite functional.
Cowboy rolled leather button
Cowboy buttons
I made all the miscellaneous strings and straps from scraps of the chap leather with an Australian lace cutter. One string 1/4″ wide X 24″ long and eight 1/2″ wide by 12″ long were required.
Aussie lace cutter
I then assembled parts and gave the whole thing an application of 100% neatsfoot oil. I will likely give it two more applications, to make sure the finish is an even color, then finish the chaps with Feibing’s Tan Kote. If you decide to follow what I did for a finish, make sure to use 100% pure neatsfoot oil. Other leather products labeled as “neatsfoot oil compound” are combined with petroleum product additives that are harmful to leather and can accelerate deterioration. Also, avoid over-oiling the leather. I use a rag soaked in neatsfoot oil, wetting the leather until it is dark and wet, then wipe off the excess. I oil both the grain and flesh sides where possible. I let it sit until it appears dry, anywhere from one to several hours. If the color is not even, or not as desired, I apply additional coats until I am happy with it.
As this is my first pair of chaps, and since I haven’t worn chaps since I was a kid, I wasn’t sure how to fit them, so I made them a little large, figuring I could cut them down if necessary. I think they came out pretty close to the right size, although I probably could have tightened up a couple of the leg snaps a bit. I’m looking forward to trying them in the saddle to see how they feel. They are pretty heavy, but I wanted them for packing and other work use, not as show chaps. I selected the leather for weather and puncture resistance. I think I got that.
My first pair of chaps (Click on photo for full-size)
My first pair of batwing chaps, Bob Klenda style
Final notes:
I made a few rookie mistakes on the tooling. It was a learning experience. You can see where the tooling pattern runs out at the top of the pocket flaps. I got it pretty close to right on the yokes, though. Laying out the initial lines is more than simply laying down a diagonal line and starting to stamp. Learning to strike the stamping tool with consistent pressure, to get consistent depth and definition on the leather, and getting the pattern straight and even, are part of the learning process, as well, and simply take practice and experience to master. I’m still a long way off the mark on that score, but I’m confident I’ll get there…eventually.
Up next, a pair of Arizona Shotgun chaps.
P.S.: The hat you see me wearing belonged to my great grandfather. It is an original Stetson, likely over 100 years old, which I had restored last year by Shorty’s Hattery, http://shortyshattery.com/ . They did a nice job on it.
I have one of my married daughters and a grandson visiting for Father’s Day (2014). Got me remembering a horse I once had.
I picked up Max from a horse trader, who informed me Max was a 5-year old mustang (not a branded BLM mustang, but a mustang nonetheless) who was taken off the range and gelded a few months before I came across him. He was stout, not too tall (about 13.3 hands), good hooves, and looked like a tough little gelding. Just what I wanted. When I bought him he had obviously been “cowboy broke” and really didn’t know much of anything. He was submissive, but not trusting and not completely gentled. He has a handful on the ground because of that.
Soon after I bought him, my young daughters (ages about 11 and 9) wanted to come see him. Of course they also wanted to bring some of their friends. I agreed and gave them all a dress code of long pants and shoes (no sandals or flip-flops). I stopped by the feed store on the way and bought several brushes. I had an idea.
I haltered Max and walked him out to the round pen and tied him pretty short to a solid post. I messed with him until he settled down a bit. I then gave each girl a brush and warned them about getting stepped on. I then gave each one instructions as to what I wanted them to do. I started working on getting Max to let me lift his hooves while each girl picked a different spot on him to brush.
At first Max didn’t know what to think, but since there were so many people working with him at one time, on so many different parts of him, he couldn’t focus on any one thing to worry about, and since it all felt pretty good, I suppose, he quickly settled down an spent the better part of an hour just letting the girls mess and brush while I worked on getting him to let me lift and clean each hoof. He was truly relaxed and seemed to be enjoying the experience completely. I have read that the Nez Perce indians, who were known for their horsemanship and gentling methods, used a similar technique after capturing a wild horse. By the time we were done, he was a different horse. I think we became his “herd” that day.
Max in training, when I first got him
It was amazing what that short little gentling session did for Max. He and I still had our go-rounds as we figured each other out (he was the second horse ever to put me in the dirt more than once), but he turned out to be a very good trail horse and a good friend to me. He was always hard to handle for other riders, but for me he was just what I needed at that time of my life. I had a lot of good rides on him.
When he was about 10, I was transferred out of country. Had to leave him. I gave him to the daughter of the people who owned the pasture I kept him in. She loved him, but was afraid to ride him. He lived in a 40-acre pasture with about 4-8 other horses, depending on the year, and I don’t think he was ever ridden again. I visited him about three years later, with two of my daughters. We drove out into the pasture and parked. I whistled for Max, the way I used to, and was pleased to see his head come up and his ears perk. He immediately started our way, leaving the small herd of horses without hesitation.
There we were, with no halter, no lead rope, no brushes, but we all got around him and just rubbed and petted him. It was obvious he missed that. The older daughter (age 16 then), asked if she could get on him. I told her I didn’t think that was a good idea, since we had no halter or lead, and I didn’t know how he would react, since I was sure he hadn’t been ridden, or even handled, since the last time I rode him years before. She insisted, so I told her that if he reacted, she was to simply slide off his side and into the grass, and not try to stay on.
I gave her a leg up and she slid easily onto his back. Max simply stood there and seemed to be pleased. My youngest daughter (age 9), seeing that, wouldn’t be left out and insisted she be allowed to get on behind the first. So I gave her a leg up and she slid up behind. Old Max didn’t seem to mind at all.
Back when Max was my horse, when I couldn’t ride I would often take my kids out to see him, put them on his back, and lead him around the pasture at a walk – of course, with a halter and lead rope. With him standing there so calmly, I wondered if he would remember. I started walking away from him, with my two daughters on his back, bareback, with no halter or lead rope. Max simply turned and followed. I walked all over that pasture, through the trees, over the irrigation ditch, around the pond, with Max contentedly following at my shoulder, and my girls smiling all the while.
That was the last time I saw my old mustang Max, and it was a good day.
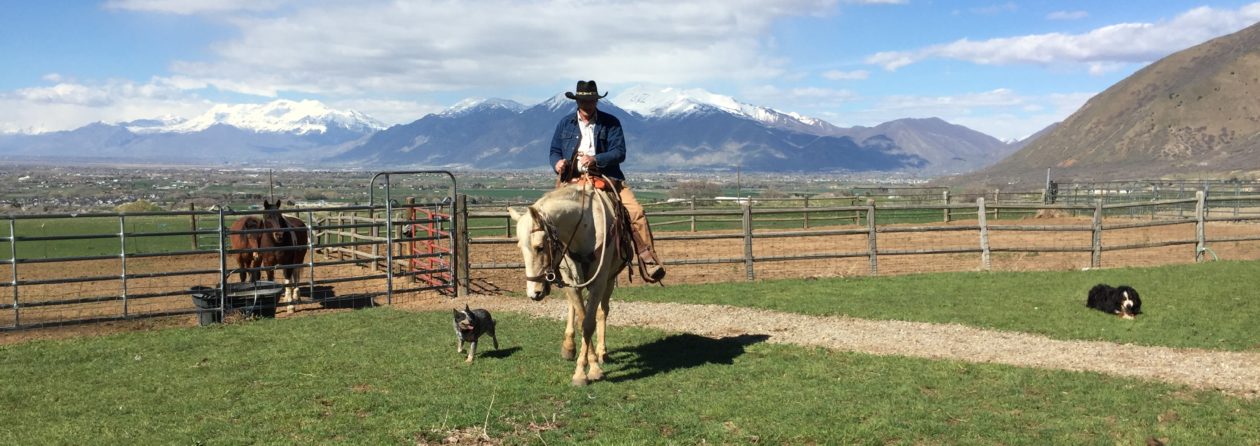
Max and Ed, taken during a horse camping expedition with one of my daughters


 Arizona shotgun chaps are put on by turning the legs backwards, so that the toe of the boot is toward the laces, The natural bend of the leggings, as well as the way they are laced, allow the boot to slide down into the chaps easily. The leggings are then twisted around and pulled up into place, then secured with the belt.


You must be logged in to post a comment.