Way back when, quite a while ago, I bought a couple nose bags to test them out before my dad and I set off to begin our big Mexico-to-Canada pack trip. I wrote a blog post on them. I ended up buying another feed bag, this one from Outfitter’s Supply, just before the trip. Here’s my evaluation of all three feed bags.
Before I start, I should let folks know that Kevin, at Outfitter’s Supply gave me a nice discount on a fairly large order I placed with him, including this nose bag. However, the facts of the matter will speak for themselves. My evaluation was not influenced by the discount.
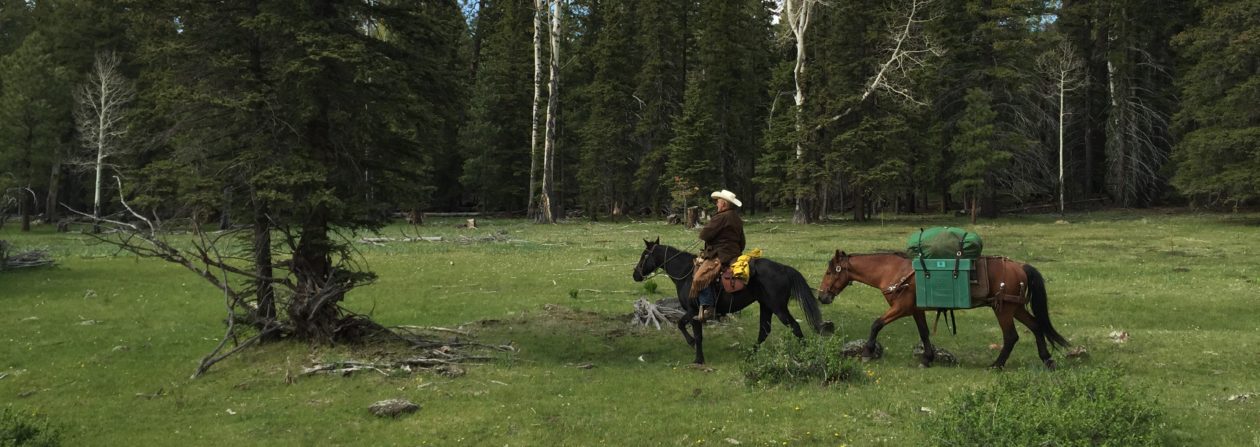
I guess the first question to answer is this: Why use nose bags? I have used a number of ways to feed horses while on pack trips or overnighters. Dad and I, over the years have settled on feeding some form of pelletized alfalfa feed to our stock while on outings. We particularly like Equidine. Pelletized feed is easy to load and haul in a truck or trailer and far less messy than hay. It is easy to pack on a pack animal, whether packed as bags in manties or simply poured into the bottom of paniers. It can even be used as protection for other items that can be placed down into the pellets inside the paniers. We have fed alfalfa pellets by pouring a pile on top of a saddle pad or simply right on the ground. However, our experience tells us that the best way to feed pelletized feed on a pack trip or campout is to use nose bags.
When we head out for a pack trip or overnighter, we seldom know what sort of accommodations we will have for our horses at night. On our pack trip we normally tied one horse to a nearby tree or shrub and let the rest roam. We had no problem with horses trying to leave the group. On other trips we have had horses tied separately to trees, on a highline, staked, or even tied to a trailer. We have found that no matter how the horses are secured, when fed on the ground or on a saddle pad, there is waste. They seem to be able to scatter the feed until they cannot reach it all, then they trample it into the ground. When they are allowed to roam, the alpha horse will move from place to place, sampling each of the feed piles and causing the rest of the horses to move from place to place as well, resulting in the horses fighting and the one on the bottom of the totem pole getting less feed. With nose bags, waste is almost totally eliminated. Horses tend to feed more calmly and take their time feeding. They cease to move around as much and they do not fight over feed. So, for our pack trips and other outings with horses, unless we are feeding hay, we always use nose bags.
Nose bags from Trailhead Supply
The first nose bag is a nylon mesh bag with nylon straps and plastic buckles, which I knew as soon as I received it that it would not be sufficiently durable for our pack trip. It is, however, perfectly fine for a weekend outing or for short pack trips where a failed nose bag would pose no problem. The price I paid for it, $14.95, from Trailhead Supply reflects that as well, so I was not disappointed in it, just realistic in understanding that it was not made for what I was intending to use it for. You can read my writeup on it in the blog post I linked above. For my purposes here, just know that particular nose bag did not go on the pack trip with us.
Breathing panel a little low on the bagSteel adjustment buckle
The other nose bag I bought from Trailhead Supply, however, was much more substantial. You can read my initial impressions in the same blog post linked above. This nose bag was priced at $21.95 when I bought it in February 2013, however it no longer seems to appear on their website. This feedbag has a leather bottom and a leather vent for breathing. It has a heavy leather hanger that is adjustable via a nickel plated steel buckle. At the time I bought it I questioned the wisdom of having the breathing vent so low on the bag, as I figured it would get covered by feed. I was told by an experienced packer that the vent was located low on the bag to prevent the horse from drowning, should it try to drink with the feed bag on its head. While that explanation made sense to me, I still wished the vent were a little higher. I have seen horses stop eating because they had a hard time breathing with feed in the bag.
This nose bag just barely fit the horse with the smallest head
This bag did, in fact, go with us on the trip. However, shortly before I left on the trip, I found it was way too small for the head of my 16-hand Missouri Fox Trotter gelding. In fact, it barely fit on the head of my smaller Fox Trotter mare. This nose bag fit my mare on the last hole on the hanger strap. Even on her, the bag fit so tightly around her nose that I was concerned that she would not feed with it on. Those fears were unfounded, however, as she did fine with this bag and it made the entire trip without problem. This nose bag simply would not fit a mule. It would be adequate for a small horse.
Outfitter’s Supply’s canvas/leather feedbag
The fact that this nose bag would not fit my gelding, necessitated that I look for another brand of nose bag for my gelding. Eventually, I settled on the top-of-the-line nose bag from Outfitter’s Supply. This nose bag carries a premium price, at $64.95, but Kevin was gracious enough to give me a substantial discount to help us get outfitted for the trip.
This nose bag is everything I think a nose bag should be. It is made of heavy canvas, large enough for even a mule, with plenty of adjustment in the heavy leather hanger. The hanger straps are stitched the full length of the bag, tying into the heavy leather bottom. Large copper rivets reinforce all critical points. The breathing vent is situated well above the bottom, providing plenty of room for a good scoop of alfalfa pellets and room for the horse to breathe.
This one fit the largest horse we had
I can also attest that the vent is low enough on the bag to allow for drainage of water. Our horses all drank from the troughs, streams, ponds, etc, almost every time they were fed, with the bags in place. My big Fox Trotter was no exception. The water drained off with no problems and no anxious moments for the horse.
The one complaint, if you can call it that, was that the hanger on this nose bag would occasionally unbuckle itself while I was putting it on the horse. I think that is due to the roller buckle. While roller buckles are normally seen as an upgrade from regular buckles, in this case I think a regular buckle might work better, because they aren’t so easy to unbuckle. The fact is, you don’t often need to re-size a nose bag. Still, that is a very minor criticism, and I bow to the fact that Outfitter’s Supply makes these bags to suit the U.S. Forest Service specifications, after having handled repairs on their nose bags for a number of years. I expect this nose bag to be part of my horse packing inventory for many years to come.
Dad’s homemade nose bags aren’t pretty, but they work like a charm
Incidentally, my dad happens to have a heavy-duty industrial sewing machine and a large supply of heavy canvas. Dad sewed up his own nose bags for the rest of our remuda.
They weren’t very pretty, but they did the job and lasted the entire trip….and they were priceless…er…I mean “free”.
Dad’s homemade nose bags aren’t pretty, but they work like a charm
This one fit the largest horse we had
This nose bag just barely fit the horse with the smallest head
This is essentially the second part of my gear review of the pack saddles Dad and I used on the first leg of our Mexico-to-Canada pack trip we started in April. This post, however, is specifically about paniers vs manties.
Decker-style pack saddle with mantied cargo
For the neophyte, a manty is a heavy canvas tarp, normally about 15 oz. canvas, about seven feet wide by eight feet long into which a cargo load is wrapped up like a package and tied with a manty rope, which is a half-inch diameter rope about 25 feet long. One mantied load is tied to each side of a Decker-style pack saddle. A panier is a large canvas or nylon bag or hard-sided box into which items are packed. One panier is then hung on each side of either a Decker or crossbuck pack saddle by straps or Decker hooks. Crossbuck pack saddles are specifically made to handle paniers, while a Decker-style pack saddle can handle either.
Utah-style paniers on a Decker-style pack saddle
To summarize what I said in my last post about this topic, Dad and I made 355 miles in 28 days with five horses and a mule. We rode one horse each day and packed the other four animals, two under crossbuck pack saddles with paniers and two under Decker-style pack saddles with mantied loads. By the end of this first leg of our trip, we both came to the conclusion that for our purposes, mantying our loads was simply an extra chore every morning and was far more difficult and time consuming than packing paniers. By the end of the trip we had sent two pack horses home, along with our manties, and continued with two pack horses, each carrying Utah-style paniers.
Crossbuck pack saddle on our mule, Honey
Decker-style packing and tying up cargo in canvas manties came into vogue in the northwestern U.S. during the first twenty or so years of the 20th century and has continued to reign supreme for all kinds of packing and outfitting there. However, in the southwestern U.S., crossbuck pack saddles with paniers has remained the standard, carrying on the traditional style of packing that far predates Decker-style pack saddles. When I made the decision to use Decker-style pack saddles and manties on our pack trip, it was partially from a desire to broaden my packing experience, but also with a question in mind as to why Decker-style packing has never taken hold in the southwestern United States. By the end of our trip, I had gained the experience I wanted, and I think I answered the question – at least to my satisfaction. Keep reading.
After packing about 200 miles through the low deserts of southeastern Arizona, through the Chiricahua Mountains, and on up through the volcanic mountains between Safford and Clifton, I came to the realization that each time I laid out a manty on the ground to start packing, I ended having to brush all manner of “ouchies” from the manties as I wrapped them around my load. Now, for those unfamiliar with the desert southwest, in the immortal words of Rooster J. Cogburn, “Everything out here will either bite you, stick you, or stab you!” Unless you have actually experienced horse or other kinds of packing and camping in the desert southwest, you really cannot comprehend the full truth of that statement.
There is no square foot of ground, at least not that I have seen, in the desert southwest that is not covered with all manner of seeds, thorns, insects, cactus, and other pricklies, each with its own means of causing pain and discomfort to the human hand. Unless, that is, you are in pure sand…which then presents its own set of problems. In other words, every morning I found myself picking stickers and cactus spines out of the manties, out of our gear, out of the ropes, and out of my hands, as I tied up the manty packs. I have never encountered that kind of nuisance in the mountains of the northwest, or even in the higher mountains of Arizona. I am convinced that this is the primary reason that Decker packing and manties never took hold in the southwestern United States. A secondary reason might possibly be, though I have not researched it, that in the northwestern areas there are more national forests, national and state parks, and other forested areas managed by the US government, wherein materials such as building materials, gravel, lumber, etc, have had to be hauled into remote areas by mule trains for the construction of ranger stations, bridges, trails, etc. Decker-style packing lends itself much better to cargoing odd-shaped loads than paniers.
Take a look at this short youtube video I made, in the mountains near the Double C Ranch, just south of the Gila Box State Park, southwest of Clifton, Arizona, about 200 miles into our trip. You’ll have to turn the volume up, as I didn’t have an extension microphone for the GoPro camera. In this video I demonstrate how I tie up a manty to prepare a sack of feed to be loaded onto a Decker-style pack saddle.
In preparation for our trip, I purchased two manties from Outfitter’s Pack Station, at $54 apiece. They are the 7’X8′ size, with hemmed borders. I also purchased from them a pair of Utah Paniers, which they call Utah Meat Bags, priced at $250. Wade and Simone gave me a substantial discount on these items, for which I am grateful. I already had a pair of 18 oz canvas tarps measuring 6’X8′, which I used for the second set of manties. Dad had an old pair of canvas panier bags for our second set of paniers.
Every morning, for the first 25 days of the pack trip, I tied up four manties and Dad and I loaded them onto two pack horses with Decker pack saddles. We then loaded four paniers, including my Utah bags, and lifted them into place on the crossbuck pack saddles. We agree that loading and unloading the paniers is much easier than manty packs. I found that tying up manties was terribly hard on my bare hands. The rubbing and chafing of the ropes and canvas while tying up the manties left my hands swollen and painful until they finally toughened up about two weeks into the trip. That was not because my hands are soft. I am a wood worker, a leather worker, a horseman, I do general construction, electrical, plumbing, and about anything else a “Jack-of-all-Trades” does, and I purposely do these things bare-handed, specifically to keep my hands tough. I am here to tell you that tying up manties every morning is TOUGH on the hands!
There is one thing in which manties have an important safety factor over paniers. That is in crossing water. There is a danger with paniers, particularly when they are not covered with a tarp and diamond hitch, in crossing water. If the horse loses its feet, or if the water is sufficiently deep to rise above the top of the paniers, the paniers will fill with water, effectively becoming a “sea anchor”. Pack animals have been swept downstream and drowned due to this. A manty, on the other hand, is quite water resistant when tied properly, and will resist filling with water while a pack animal regains its feet or crosses a deep spot. Not that items within will not get wet, but the pack will not fill with water. We had one instance in which a pack horse laid down in the Gila River, in water about 18″ deep, and tried to roll his pack off. One manty pack was completely submerged for a second or two. The pack remained in place as we got the horse up and the contents were dry when we unpacked them that evening.
The Utah Meat Bags are huge bags, measuring about 32″ tall, 23″ wide, and about 10″ deep at the bottom (deeper at the top). These bags are made of a very heavy woven nylon fabric, commonly known as “iron cloth.” They have very heavy leather adjustable straps, with steel roller buckles, as well as heavy leather corner reinforcements. These are perfect for hauling game meat, ergo the name, as they are easily washed with soap and water. Blood and other contaminants wash right out without leaving a stain. For our purposes I was impressed with the size of the bags, which easily contained the gear we had to fill them. Once the top strap was tightened, the bags closed over our gear, thus eliminating the need for a cover tarp and diamond hitch…at least when the weather was clear. The adjustable hanger straps allowed us to adjust the height at which the bags hung from the pack saddle, which was important when we switched the bags from our crossbuck saddles to the Decker saddles. This made it possible to hang the bags at the most comfortable height for the pack animal.
I was very pleased with the quality of construction of the Utah bags. We really put them through their paces. They were rubbed on rocks, poked by tree branches of burned trees, rubbed on blackened, rough tree bark, brushed against cholla cactus, run into gate posts, and rolled on. The handled all this with no problem, no tears, no fraying. The only hole in them came from a metal grill that poked a small hole in one bag. There was no fraying or propensity to unravel. The hole remained a simple small hole throughout the trip. Eventually…if I ever remember to do it…I will take a heated nail and melt the edges of the hole to ensure it will never get worse. Dad’s canvas paniers have lasted almost 40 years, but they are nearing the end of their useful life. He has patched and stitched them so many times that they resemble a patchwork quilt in some places. They are a true testament to the durability of canvas paniers, however, I believe my iron cloth paniers will outlast them.
My manties, on the other hand, sustained several small rips and tears from rocks and branches. They also became quite soiled from dirt and rubbing against burned trees in the Chiricahuas. These rips and tears will continue to fray throughout the life of the manty, as they cannot be sealed with heat. I have a rip-stop fabric glue for them, but in my experience, that will only work for a limited time and will need reapplication occasionally.
My Utah Meat Bag paniers hung from a Phillips Formfitter pack saddle
As I mentioned before, by the end of the trip, we let the manties go home early with a couple horses, and we put a Decker-style Phillips Formfitter pack saddle on my mustang, Jimbo, and hung the Utah Meat Bags on it. For our style of packing, we found this much easier than tying up manties every morning.
For my kind of horse packing, I expect I will be putting a lot of miles on my Utah bags over the coming years.
Those of you who have been following my blog awhile know that I did quite a bit of research on various configurations of pack saddles before finally settling on the Decker-style Phillips Formfitter pack saddles, from Outfitters Pack Station, for our Mexico-to-Canada horse pack trip. As Dad already had two crossbuck pack saddles, we ended up using my two Deckers with manties and Dad’s two crossbucks with Utah-style paniers. It’s time for my comparison and evaluation.
Crossbuck pack saddle tree
To provide a little background, crossbuck pack saddles, sometimes called sawbuck pack saddles, have been used in North America for at least a couple hundred years. They consist of two crossed wooden “crutches”, similar to the way a sawbuck is built, which is where the name comes from (a sawbuck is two crossed beams over which a log is laid to be cut with a saw). Paniers, which are large bags or hard-sided boxes, are hung by straps from the crossbucks. Traditionally, soft paniers, often called “Utah Paniers” were used. These paniers are often covered with a tarp, which is tied in place with a diamond hitch, which improves the water-resistance of the pack and holds items tied on top of the packs.
While hard-sided paniers are available and quite utilitarian, we decided to go the traditional route. That’s what Dad and I have always used and we saw no reason to change. However, during our passage through the Chiricahua mountains, one of the riders who joined us for a few days packed hard paniers on his mule and I was much impressed. In camp, these hard paniers could be converted into seats or tables. I expect I’ll eventually get a set of these and give up on my traditional bent. Also, there are bear-resistant hard paniers available from a number of suppliers, for those areas where they may be required.
Sometime around the turn of the 20th century, a new-style of pack saddle was invented, which is now commonly called the Decker-style pack saddle. The Decker pack saddle, characterized by metal bows, or arches, to which loads are strapped, has proven its usefulness over the past century, due to its versatility. One can hang about any kind of load imaginable from a Decker-style pack saddle with a little ingenuity. This style of pack saddle eventually became the standard in the northwestern United States, while the crossbuck has remained king in the southwestern U.S.. Why this is so, I think I discovered during our pack trip and I will discuss that in another post.
Our mustang, Jimbo, with the mantied load on a Phillips Formfitter pack saddle
For the kind of loads we carried on our pack trip, manties are used to contain the cargo, which are then tied to the Decker pack saddle. Manties are heavy canvas tarps, normally measuring about 7 X 8 feet, in which the cargo is wrapped and tied into a pack. One manty pack is tied to each side of the pack saddle to balance the load. Manties of uneven size and/or weight may be balanced by adjusting the way they are tied to the saddle. While top packs may be tied to these pack saddles, it is not commonly done, however the manties may be tied as large or small as required. The pack saddles I finally settled on have arches that are made to handle not only manties, but also Utah Paniers.
Phillips Formfitter
The Phillips Formfitter pack saddle also has other features that attracted me, such as the adjustable-angle saddle bars and the fleece pads attached to the bars. My reasoning for this selection was that the adjustable bars would answer the problem of the different conformations of the several horses on which we intended to use them. Our remuda consisted of two Missouri Fox Trotters, two Quarter Horses, one mustang, and one mule, ranging from 16 hands to 13, all with very different backs among them.
My concerns with regard to this pack saddle were limited to two things: Would the adjustable saddle bars be able to hold the pack loads in place like a solid pack saddle would? And, would the narrow saddle bars, configured similar to a riding saddle’s bars, sufficiently distribute the loads on the horses’ backs, so as to avoid pressure points and saddle sores?
Before the trip, I discussed these and other concerns about the pack saddles with Wade, at Outfitters Pack Station. We also discussed whether double cinchas, such as are commonly used on crossbuck pack saddles, might be better for our trip. I decided to go with the single cincha, since that is the configuration I have seen on most Decker-style pack saddles. I figured that if they proved insufficient, I could order the double cincha rigs at the end of the first leg of our trip. On the Phillips Formfitter, the cincha rigging is changeable by simply unbuckling one and replacing it with the other. Wade also gave me some advice on setting up the rigging to ride properly on the pack animal.
During the first 200 miles or so of our trip, we knew we would be packing feed for the horses, since there is little feed available for grazing along our route in the lower desert areas of Arizona. We decided on Equidine pellets in 50 pound sacks, as it would be easy to pack in manties and to balance as a load. We started our trip with 400 pounds of feed, split among two pack horses, packed in manties on my Phillips Formfitter pack saddles. With the help of friends, we were able to re-supply with feed as needed. The rest of our gear was packed in paniers on Dad’s crossbucks. Our plan was to have two animals under riding saddle, two packed heavy, and two packed light, then rotate every day or so to keep all the horses adequately rested. We also planned for two rest days per week. On the first day, all the animals were packed pretty heavy, but the feed went down at a rate of nearly 120 pounds per day, so the packs lightened up quickly.
I set my pack saddles up according to Wade’s advice, however, both Dad and I felt the 3/4″ wool felt pack saddle pads we had were insufficient for the loads we were packing on the horses. We decided to place a regular saddle pad over top of the pack saddle pad for extra protection for the pack animals’ backs. As it turned out, that was a mistake with the Phillips Formfitter.
The first day we made approximately 10 miles. In that distance we had to re-settle the decker pack saddles several times. I was beginning to believe I had made a serious mistake in not ordering the double cinchas. By the end of the second day, in which we made over 16 miles, we had stopped and re-settled the Decker pack saddles a number of times. It seemed they would start to turn every several miles, regardless of how well balanced and tied the load was, or how tight the cinch was. We had no such problems with the crossbuck pack saddles, which were padded in the same way.
Saddle sore on the QH Daisy
By the end of the second day, our large, heavy-built Quarter Horse mare had developed a saddle sore high on her withers. After looking at the location of the saddle sore and considering how often we had to re-settle her Decker pack saddle, we determined that we had over-padded the pack saddles, causing them to “woggle” on the horses’ backs. After that, we packed the Phillips Formfitter saddles without the additional saddle pads and had no further problems with the saddles turning or with saddle sores on any of the other horses. After that point, the Formfitter pack saddles stayed in place with the single cincha and performed very satisfactorily. Lesson learned: Do not over-pad with these pack saddles.
Incidentally, we continued to double-pad the crossbuck pack saddles on the mule and one Quarter Horse and had no trouble with the saddles turning or saddle sores.
I was very pleased with the quality and adjustability of the rigging on the Phillips Formfitter pack saddles. I was able to make the saddles fit properly on my 16-hand, tall-withered, short-backed, tall-spined, deep-chested, bony-hind quartered, Missouri Fox Trotter gelding, as well as the 15-hand, long-torso, flat-backed, broad-chested, wide-rumped, Quarter Horse. As for the mustang, he was fairly in-between the other two and we had no trouble at all with fitting the pack saddles to his conformation.
The one horse that had problems with the Phillips Form Fitter rigging was my 4 year-old Missouri Fox Trotter mare. This mare, Lizzy, has a walk to die for under saddle, but it is that same walk that makes her unsuitable as a pack horse. Her long-strided, swinging walking motion caused her to get rub sores from both the breast strap and the breeching, despite the fact that Wade makes those straps with the edges rolled with a light, soft leather. I found Lizzy also got rub sores from my riding saddle breast strap, so it wasn’t the pack saddle rigging at fault, but simply that my mare has such movement in her strides that she simply gets rub sores. Consequently, Lizzy spent more time than anticipated under my riding saddle with the breast strap stowed in the packs. My other Fox Trotter, Ranger, had no such problems and ended up under the pack saddle more than planned.
On the Fox Trotters, we had to set the spider way up on the croop to avoid rub sores
The one piece of rigging on the Phillips Formfitter saddles that caused problems on both Fox Trotters, was the spider, which is the piece that holds the breeching in place on the croop of the horse. It should ride about half-way between the point of the croop and the horse’s tail. This piece had rubbed deep sores on both my Fox Trotters’ rumps before I noticed it. I had to adjust the spiders so that they rode right on top of the horses’ croop to alleviate the problem. When adjusted as it is supposed to ride, the motion and conformation of the Fox Trotters caused the front edge of the spider to dig into the hair and subsequently the flesh of the horses. I think this problem could be remedied with a slight re-design of the spider. The spider is made with two layers of heavy leather with fairly sharp edges. I think a fleece pad under the spider, a different shape, or possibly rolled edges like the breast strap and breeching have, would fix the problem. I must say, however, that the only horses that experienced this problem were the Fox Trotters. The Quarter Horse and the mustang had no problem with the spider, or any other part of the rigging, as-is. I intend to design a removable fleece pad for my saddles, for use with my Fox Trotters.
The Packer’s Field Manual, by Bob Hoverson
I used the book “Packer’s Field Manual,” by Bob Hoverson, as a guide for setting up and using my Decker pack saddles. I found his book to be quite complete and useful. I learned to tie up manties quickly and well, using the knots and hitches he shows in the book. I set up each pack saddle with two “sling ropes” of about 28 feet length attached to the front saddle arch with a loop. Each rope runs through the rear hoops and is looped around each pack in a way that suspends it solidly from the saddle arches. The packs are weighed and balanced using a pack scale before loading, however, if one pack ends up slightly larger or heavier, balance can be achieved by setting the heavy pack a little higher on the saddle, thus changing its center of balance and making the load to ride balanced.
Decker-style pack saddles differ from traditional crossbucks not only in the way they are made, but also in the way they are equipped. While our crossbucks were pretty bare and light on rigging, the Phillips Formfitters were heavy on rigging. They also, as do all Decker-style saddles, use a protective canvas and wood shield, known as a “halfbreed” or “Arapajo”, apparently named for one of the men who originally designed and used this type of pack saddle. The halfbreed is a canvas layer that fits over top of the Decker pack saddle and has sideboards of 1 X 4 pine that protect the horse’s sides from the packs and spread the load. This is particularly important when packing items such as lumber, fence posts, or gravel. By the time we finished the first leg of the trip (355 miles), both Fox Trotters and one Quarter Horse were starting to show the beginnings of saddle sores where the side boards rode against their sides from the heavy loads of the feed sacks. The mustang, on the other hand, showed not a single mark…anywhere.
The Phillips Formfitter pack saddle is made with a leather skirt covering the saddle bars, with wool fleece on the underside. This fleece is intended to increase the padding and keep the saddle in place better. In comparison, our crossbuck pack saddles are simply made of wood. For the most part we had no trouble with the Phillips Formfitter staying in place…at least once we learned not to over-pad them, however, on our mustang we had a problem with the saddle pad crawling out from under the pack saddle. We had to stop and reset his saddle at least twice during the trip to move the saddle pad forward. We did not experience this on any other horse.
One of our crossbucks on Honey
Again, our crossbuck pack saddles were very sparse on rigging. Just a strap for the breast strap and a couple more for the breeching. They were simple to place, rig, load, and remove. They caused no saddle sores on any of the animals, and never threatened to turn and dump a load, despite our mule’s propensity to roll every time we stopped for a rest. We used the crossbucks on both of the two Quarter Horses and the mustang with similar results. Having said that, I must also add that the heaviest load we ever put on the crossbuck pack saddles was about 170 pounds and they often carried under 150, whereas our Phillips Formfitters were often loaded with up to 200 pounds of feed.
One problem we had with Dad’s old pack saddles was the fact that they are both in dire need of having all the leather replaced. Still, they made it through our trip with only one broken strap – a breast strap, which we repaired with a piece of nylon webbing we found along the trail.
Over the 28 days, Dad and I tried to streamline our morning camp-breaking ritual a number of ways, but we found that with four pack animals, and having to pack our camp and make up four manty packs and four paniers, we simply could not do it in less than about four hours. We discovered that packing the paniers was a simple matter of placing things in the bags in a fairly even manner, then weighing each panier with the pack scale and adjusting as necessary, normally a matter of removing an item from the heavy panier and placing it in the light one. Making up manties, on the other hand, was a matter of building two manties at one time, so that we could estimate that each would be fairly equal in size and weight, then wrapping each one and tying it up. Then, after they were completely done, weighing them to make sure the two packs were within one pound or so of each other. If they were significantly different in weight, they were unpacked, adjusted, and repacked. It was easy to balance them when a pack consisted of one or two bags of feed, but when they contained items of camp gear, after the feed was used, then it was a pain. Additionally, tying up the manties is very hard on the hands. The canvas and rope chafed and rubbed my hands to the degree that it became quite painful for about the first two weeks of the trip, until my hands toughened up.
The one thing we found handy about the manties was that we used the canvas tarps as a ground sheet and bed cover (we prefer sleeping out in the open and did not take a tent). By the end of the trip we had decided that for our kind of pack trips, mantying was simply an unnecessary chore. I can see how they would be the way to go for an outfitter with odd-sized items to pack, but for us, it just isn’t practical.
Utah-style paniers on a Phillips Formfitter pack saddle
For the last three days of the trip we decided that we would go with two pack animals and send one crossbuck pack saddle and one Phillips Formfitter home with our two mares. We also decided that mantying packs was a tedious task we could do without. We finished our trip using four paniers, two of which hung on either side of a Phillips Formfitter pack saddle.
In the final analysis, after 355 miles and 28 days on the trail, we learned that while Decker-style packing is very versatile, making up four manties every morning was terribly time-consuming, tedious, and very hard on the hands. Yes, Decker-style packing is versatile, but panier-style packing is much easier and takes less time and effort to pack, unpack, and load on the pack animal. Even with a cover and diamond hitch, the paniers were easier to pack than the manties. Hard paniers would be an even simpler option.
As for my Phillips Formfitter pack saddles, I am pleased with them and they performed well – once we learned the lesson about over-padding them. They are very well made, both with regard to materials and workmanship. However, I cannot say they out-performed the old traditional crossbuck pack saddles. Though, had we loaded up the crossbucks with the weights with which we loaded the Formfitters at times, things might have been different.
I will continue to use the Phillips Formfitter pack saddles due to their adjustability and versatility, but I will use them with paniers unless it is absolutely necessary to use manties. They will go with us when we start again next spring. While we had two horses that experienced saddle sores and rub sores, I cannot blame that on the pack saddles and do not believe they are at fault. These saddles allow me to choose between panier packing, with both soft and hard paniers, or to go with manties for odd-shaped loads.
For the type of horse packing Dad and I do, panier packing will remain our standard. Consequently, as far as utility is concerned, it is a wash between the Decker and Crossbuck pack saddles. While the Deckers are definitely more versatile in the ways they can be packed, we will be using them for handling paniers, which the crossbucks are specifically made for and do very well. Knowing what I know now, I would choose a standard crossbuck pack saddle over a standard Decker pack saddle for the kind of packing I do.
As far as the Phillips Formfitters are concerned, the quality of workmanship and materials, and the adjustability of the rigging and saddle bars are important to me and I remain pleased with them. I will use them pretty much as I would use a crossbuck pack saddle in the future, but will still have the added versatility when needed. In my opinion, the price tag of $699 for a fully outfitted Phillips Formfitter pack saddle is an excellent value when compared with prices for other brands and styles of pack saddles similarly outfitted. I expect mine will cover many miles on my pack animals before I hang up my spurs.


You must be logged in to post a comment.