I’m excited to be working with Viking Bags, Elite Sports and Born Tough to try out their products! Viking Bags makes motorcycle gear, but they have a backpack that I think might make a great overnight bag for my horse pack trips and trail rides. They have agreed to send me one for a product test.
I will write up a review post once the product testing is done
Keep an eye out for these updates.
Several years back, my dad and I were out on a two-week horse pack trip in central Arizona, up on the Mogollon Rim. At night, we would allow some of our five-horse string to graze, while the others were tied. While none of our horses ever left us, they often moved around quite a bit while grazing. It didn’t take too many nights for rub sores to start developing on their pasterns from the 1-1/4″ nylon flat-braid hobbles. Those hobbles were well-used and soft, but still left marks on the horses. We tried fastening the hobbles tighter and putting them up on their cannon bones, but no matter what we tried, they always ended up down on their pasterns making sores.
One afternoon, as we were moving along the Arizona Trail, somewhere between Flagstaff and the Rim Road above Payson, Dad stopped and picked up a piece of soft braided nylon rope he found alongside the trail. That evening in camp, Dad took a few minutes and tied that piece of rope into a couple pairs of hobbles. He tied them so they would hang loose around the coronet area, low on the horses’ pasterns, but wouldn’t come off the hoof. He also tied them a little long, giving the horses a little more room to take steps. We found that leaving a little extra room for movement, discouraged the horses from learning to gallop with the hobbles on. They can still do it, but generally, they seem to prefer to take small steps rather than gallop. Best of all, no more chafe sores on their pasterns.
We quickly discovered these hobbles were the best we had ever used and I’ve been using them ever since.
Chief and Copper sporting my homemade hobbles on a pack trip
These homemade hobbles are easy to make. Just take two lengths of soft rope, I prefer about 3/8″ diameter nylon braided rope, 48″ long and tie them together with a few simple over-hand knots. Nothing to it!
Here’s a short instructional video I made, showing you how. It will take you all of 10 minutes…and that’s if you’re slow!
After making that video, a subscriber told me a better way to make these hobbles. Rather than starting at the ends and tying the inner knots last, he started with the inner knots first, setting the desired distance between the horse’s feet. He then moved to each end, tying those knots as desired, making the hobbles loose enough to fit loosely around the horse’s pastern, but tight enough not to be able to slip off the hoof. Also, the diameter of the rope (I suggest 3/8″ diameter soft nylon or braided utility rope) and the type of rope greatly affects the length required. Starting with two lengths, say, in the 60″ range, and starting with the inner knots first, one can tie the outer knots and then cut the ropes to the proper length.
I was just looking through old posts on my blog and discovered this post I composed nearly 5 years ago that inadvertently never got published. So I’ll just make a few additional comments and get it out there anyway.
The post was originally composed in about April of 2015. Since then I have absolutely no complaints about my saddlebags, after probably 2,000 trail and pack trip miles. Sadly, it appears these saddlebags, sadly, are no longer offered on the Outfitter’s Supply website. They now show an upgraded version, however, that have leather covers and straps, with brass buckles. The price is nearly $100 more than the ones I bought in 2015, at $149.95 (currently on sale, though), but they look like good, tough saddlebags.
ORIGINAL POST:
One of the indispensable pieces of gear for any trail ride or pack trip is a good pair of saddle bags. Over the years I have used a number of saddle bags of various sizes and materials, but the ones I keep coming back to are canvas saddle bags in the size range of 12″ X 11″ X 4″, or thereabouts. As I was preparing for the upcoming pack trip, I shopped around for a pair of saddle bags, as my old ones are just plain worn out.
Some of the things I look for in a canvas saddle bag or reinforced seams, leather straps, and steel buckles. Up until recently, all of the offerings I have looked at and seen in online stores are made of thin canvas and have nylon straps and plastic buckles. While these saddle fittings might be perfectly satisfactory for the casual trail rider, they simply don’t hold up to what I put them through. While leather saddle bags are pretty and nice, when I compare prices with the canvas bags and consider what I put them through on my pack trips, I have preferred canvas over leather. Well made canvas bags are durable and I don’t cringe every time they get jabbed by branches or scraped on rocks while on the trail.
I recently purchased a pair of bags from Outfitter’s Supply. I had spotted them unexpectedly in their online store and had to try them out.
When I received them, I was pleasantly surprised with the quality workmanship. They, of course, bear the Outfitter’s Supply Trail Max brand. The canvas is quite heavy, probably in the 15 ounce range, and all the seams are reinforced with nylon webbing. Straps of nylon webbing reinforce the canvas connecting the two bags and heavy-duty grommets reinforce the saddle string holes. The holes are well-placed for attaching the bags to the saddle with the saddle strings for both my saddles. They also have a D-ring attached to the forward side of both bags, for additional attachment points for saddle strings or clips at the sides of the saddle below the cantle. The bags have two closure straps, made of good quality latigo leather that run completely around the opening side of the bags bags and are well-stitched in place at the top and bottom. They have chromed steel buckles, which completes the heavy duty nature of these saddle bags.The bags are large and roomy, measuring 12″ X 11″ X 4″. They can hold a lot of gear without being overly bulky.
Outfitter’s Supply canvas saddle bags on Lizzy
At $54.95, these bags are quite a bit more expensive than other canvas bags offered by other vendors, however, these are very well made and have all the heavy-duty features I have been looking for. I am very pleased with these saddle bags and expect they will be the last saddle bags I ever need to buy for my packing needs…that is unless I need a second pair. That, for me is worth paying the higher price. You only have to pay it once.
I’ve had my share of lesser canvas saddle bags. I am happy with these.
END OF ORIGINAL POST
After 5 years of hard use, my Outfitter’s Supply Trail Max canvas saddlebags are still going strong. As I said before, I have absolutely no complaints. The buckles and straps are still in good shape, the canvas is wearing well. The seams are holding, with no fraying, and they are easy to clean. I expect I’ll be putting these through many, many more trail miles ahead.
I recently read a post on a facebook group page I frequent, in which a member asked for advice on buying a “good” trail saddle in the “under $1,000” price range. Reading many of the responses was almost physically painful to me! It was painfully obvious to me that there are many, many people out there who have absolutely no idea what a good trail saddle is. It was also quite obvious that many responders have a very narrow perspective from which they judge what a good saddle is, but promote or defend their view almost with religious zeal!
I read recommendations ranging from people who apparently consider a half-hour ride around the neighborhood to be a trail ride, to those who consider 50-mile endurance rides as trail rides! Most riders fall somewhere in between these extremes, and therefore, the saddles they should consider also fall somewhere in between the recommendations of these two extremes. A fairly large “grain of salt” is in order here.
The fact that a saddle is comfortable on a half-hour ride can’t be extrapolated to the conclusion that the same saddle will be comfortable for the horse and rider after 8 hours in the saddle. Nor can the fact that an endurance saddle didn’t sore the rider or horse after five hours and fifty miles on an endurance ride be conclusive evidence that this same saddle will work well for a horse that is in less-than top condition and a rider who might be a bit overweight on a 20-mile ride over 8 hours or 100 miles over 5 days.
I decided to add my two-cent’s worth to the fray. After posting it, I realized that I, too, have a fairly narrow perspective from which I judge what a good trail saddle is. Still, maybe some of my readers will find it of value.
Disclaimer: This is not a discussion about saddle fit. That is an entirely different religious and political argument!
So, here goes.
To start off, let me just take a few lines to make sure the reader understands the perspective from which I judge a good trail saddle. I ride long, hard miles, through some very difficult country. A trail ride less than half-a-day in duration is not common for me, other than the occasional short group ride or training rides. I have, on occasion, ridden 40 miles in a day with no trail, through difficult country (measured by GPS) with horses loaded with game meat and personal gear. I often carry up to 30 pounds of gear hanging from my saddle.
My saddles must have multiple attachment points for gear, such as saddle bags, pommel bags, breast collar, crupper, canteen, bedroll, coat, slicker, rifle scabbard, limb saw, axe, and more. My saddles must be heavy-duty and have a strong saddle tree with no flex to cause pressure points on my horses’ backs.
My limb saw
The covering material must be strong, durable, resistant to foul weather, and comfortable to both myself and the horse. For my needs, lightweight saddles made for endurance, or inexpensive saddles with plastic trees and fabric covers, or flexible trees, are simply ruled out. That doesn’t mean my saddle must be heavy, just that it must be heavy-duty.
Having these parameters in mind, there are some things that must be considered when I select a saddle to fit my requirements. While price is a limiting factor for me, it can certainly be an indicator of quality. However, I consider price to be a consequence of quality craftsmanship, rather than a determinant of it. Time can temper price, often making used saddles the best option if price is a limiting factor, as it is for me. One can easily find quality used saddles, in need of a little care, that far outstrip the quality and durability of a similarly priced new saddle.
We have all heard and read the many recommendations extolling the merits of saddles with flexible trees or even without trees. The party line (it’s very much like a political argument) is that the saddle tree (or lack thereof) allows the saddle to flex to conform to the shape of the horse’s back, making it comfortable to the horse. Anyone must admit that this sounds like a good and reasonable assumption, and it is clearly used to market such saddles, but if you really analyze it logically, this idea fails.
Stop and consider what happens when a flexible piece of wood, such as a popsicle stick, is held by the ends and a weight is placed in the middle. It flexes down in the middle. Right in the middle. Where the weight is. This is exactly what happens with a flexible saddle tree. It flexes down into the horse’s back exactly where the weight on top of it is! Now, this may not be a problem for a horse that is ridden for two or three hours at a time, as the flexible tree will, in fact, spread the rider’s weight and it may actually be comfortable for the horse. But, for a horse that is on the trail for 20 miles, climbing and descending, with a rider that weighs 180 pounds, like me, and with another 20 pounds of gear hanging on it, it is easy to see that a saddle tree that flexes will flex the most where the most weight is placed on it and will impart pressure points into the horse’s back. It is simple physics.
The worst saddle sore I ever saw on a horse was from a heavy rider on a saddle “made for gaited horses” with short skirts and a flexible tree (he was riding a large Tennessee Walker), for which he paid in excess of $1,500. During a long difficult ride, the saddle tree flexed, spreading the bars apart, allowing the cantle to essentially sit on the horse’s spine. Despite the heavy wool-felt saddle pad, by the time we stepped down from our saddles at the end of the day, the sore was ugly and raw. The following year, the same horse on the same ride with the same rider and similar gear, now sporting a well-made saddle with a rawhide-covered wood tree, not only showed less fatigue, but no sores or tenderness at all.
Again, for my requirements, a flexible tree or treeless saddle is not even in the running. If you are a heavy rider or if you make long rides through difficult terrain, this is something you should consider.
I prefer saddles with rawhide covered wood trees. Despite the sales pitches to the contrary, these are the trees the best custom saddle makers still use. A wood tree allows a very small amount of flexion, just enough to keep the saddle tree from being brittle, and a well done rawhide covering is one of the toughest materials known to man.
Rawhide covered trees have been around for over 200 years and there are saddles still in use with these trees that are over 150 years old. I am not afraid of new technology nor am I saying newer manufacturing techniques may not be equally tough or better. I am only saying that a well made rawhide-covered saddle tree is a proven commodity, and, according to the best saddle makers, still the king.
There are good quality saddles that use trees that used to be called “ralide” trees. These trees are plastic or fiberglass. Some brands that have used these trees are Simco, Bona Allen (sold by Sears and Montgomery Ward), Colorado Saddlery, among others. These trees are a big step down from the rawhide-covered wood tree, but they can still be the basis for a good trail saddle. These “plastic” trees are far better than a wood tree without the rawhide covering, like some older production-line saddles had.
Tree partially covered in rawhide – poor quality
I wouldn’t recommend them for the kind of riding I sometimes do, but for what most people call a “trail ride” they are perfectly sufficient and are essentially the same kind of tree that many medium-quality, moderately priced ($700-1,500) saddles are built on.
The problem with these plastic trees is that they tend to flex more than a wood tree and they generally have less surface area in the bars. In other words, the tree bars, which spread the weight on the horse’s back, tend to be about 2″ shorter and 1/2″-1″ narrower than rawhide/wood saddle tree bars on saddles of similar seat length and size. This means there is less surface area to spread the weight over a larger area of the horse’s back. A good, heavy leather in the skirts can mitigate this somewhat, although most saddles made with plastic trees are also made with lighter, lower quality leather than saddles with rawhide-covered wood trees. They are, however pretty tough and often carry a manufacturer’s warranty that far exceeds that of a rawhide/wood tree.
In recent years, certain tree manufacturers are making fiberglass-covered wood trees. I have read some good things about these trees, but they are still not as popular among the best saddlers as the rawhide-covered wood trees. Could just be tradition, though. My experience is limited here.
“Vintage” Simco saddles (photos from Pinterest)
Years ago, my father purchased a half-dozen or so Simco saddles for a riding school our family had. These all had Ralide trees. Many years later, we still had a couple of those saddles. The tree on one saddle failed and my father called Simco to see whether we could get a new tree for the saddle. The company told us to send the saddle to them and they would take care of it. Dad shipped the saddle off and several weeks later received a completely refurbished saddle from them at no cost to us! Simco is no longer in business (although their brand name is still used), but the older Simco saddles, made in the 60s and 70s, are still sought after as a good quality used saddle. They are easy to find in the $350 to $500 price range and are worthy trail saddles if the leather is in decent condition.
Endurance saddles are made for a specific purpose: To ride far and fast in a very short time. They are built on very small, lightweight trees, not intended to carry heavy gear and not intended to carry a heavy rider. A good endurance saddle, such as the Tucker pictured below, is a well-made saddle. However, it would not be suitable for a horse pack trip. Nor would it be suitable for a heavy rider for a long ride. There just isn’t enough surface area under the saddle to adequately spread the weight of a heavy rider with gear over a long ride on a horse that isn’t in top condition. I consider “Aussie” saddles to be in this same category, although there is a very wide range of build quality in these as well.
Fabric-covered saddles are, by definition, “cheap” saddles. They may be comfortable to ride for those on a tight budget, but they are not durable. These are not saddles that will ever be handed down as family heirlooms. Nor should they be considered for those riders who are heavy or who intend to put a lot of miles in the saddle on horses they care for. Saddles made with fabric coverings are very lightweight saddles. They are comfortable to ride and much easier to lift onto and off of the back of a horse for a person with physical limitations, than my 40 pound saddle. However, they should not be considered in the same vein as lightweight endurance saddles. In my mind, these fabric-covered lightweight saddles are analogous to wearing flip-flops on a five-mile hike; comfortable at first, but less so as the miles pile up. These saddles use lightweight trees, as well as fabric sweat flaps for the stirrups. This material tends to wear on riding clothing and eventually wears out itself. A much better option would be to look for a good used leather saddle in the same price range.
Several years ago, in preparation for a month-long horse pack trip, I was searching for a good trail saddle. I found what I was looking for in the local classified ads. I was able to purchase an excellent saddle made by the Utahn Saddle company of Vernal, Utah (long out of business) that was probably made in the 1960s. I paid $380 for this saddle, a rifle scabbard, a couple good saddle pads, a bridle, and a second saddle that was in dire need of repair. You can read about that score here. I have since put a couple thousand miles on that saddle.
My Utahn Saddle, fully loaded for a trip
The other saddle, that was essentially a freeby in that deal, I refurbished into an excellent trail saddle that became a gift to my niece. It required a lot of work, but I was able to do it myself at very little expense and I learned a lot in the doing of it. You can read about that experience here.
Refurbished used saddle
I will acknowledge here that as I age, lifting my 40-pound ranch saddle onto and off of my 15-2HH horse is starting to feel like hard work. I intend to make a lightweight, yet heavy-duty, saddle for myself. I have already purchased the tree, from Timberline Saddle Trees, Vernal, Utah, which is their Timberline Wade tree. I intend to cover it with high-quality leather, but minimizing the amount of decorative leather and keeping things in the 25-30 pound range. I have researched some designs and I wrote up some of my musings here.
Saddle by Out West Saddlery, Pagosa Springs, CO
So, what do I look for when I buy a used saddle (other than size and design)? I look first at the tree. I lift the skirts to make sure it is a rawhide-covered wood tree and that the rawhide is in good condition. I don’t mind if a stitch or two of the rawhide lacing has broken, as long as the rawhide itself is in good shape. I make sure the horn and cantle are tight and there is no movement that might indicate a broken or cracked tree or cantle. Next I look at the condition of the leather from an overall perspective. Leather that is dried and curled or scratched can be revitalized with careful cleaning and oiling with saddle soap and PURE Neatsfoot oil. However, leather that is cracked and checked may not be so easy to revitalize.
Sun damage
That is sun damage and it cannot be undone. Sometimes it is so bad that I feel the saddle is not worth attempting to revive. Other times, I can live with it and it can be somewhat mitigated and it’s life extended with cleaning and oil.
Leather that is torn or cut may be repairable inexpensively at a saddle shop or you may be capable of repairing it yourself, as I do.
Next I look at the fleece. Is it in good condition? Is it original or has it been replaced? If it was replaced, was it done well? Is it actually real fleece? Some cheap saddles have fake fleece that is not durable. Stay away from these. That fake fleece is indicative of the overall quality of the leather and tree. See this post.
Some old saddles had felt instead of fleece on the skirts. That isn’t a problem. Fleece on a saddle is not actually intended as padding. It is there to keep the saddle from sliding around and keep the saddle pad under it. I don’t worry too much if the fleece is in poor condition, because I can replace it without too much effort for about $100. You can have a saddle shop do it for around $350. It makes a good bargaining point, though.
Is a good cinch included? Are the stirrup leathers, stirrups, and buckles in good condition? These things can be replaced, but, again, make good bargaining points.
Worn out Hamley saddle
Repairs to the Hamley saddle
The above saddle is a Hamley, nearly 75 years old, still a sought-after saddle. It was handed down to me from my wife’s family. I refurbished the saddle and it is very comfortable and strong. It fits my narrow-built horses well. Hamley, Pendleton, Oregon, is one of the oldest surviving saddleries in the country and their saddles are very hard to come by…at any price.
In summary, the time factor brings excellent, well-made saddles, maybe in need of a little refurbishment and care, into the realm of possibilities for those, like myself, who may be restricted by price limitations. It is not difficult for one to find in the local classified ads, a saddle that was once a high-priced, sought after saddle, priced lower in the current market than the cheapest new saddle, made in India or China (read very low quality), that you can find on eBay. Very often, the quality and durability of those older saddles is still there. It may be hard to see sometimes, and may require a little elbow grease and maybe some repair work at a local saddle shop, to bring it out, but, dollar-for-dollar, they far outstrip the quality and durability one will get out of any sub $1,000 new saddle you will find marketed under any brand. All it requires is a little patience, a little searching, a little care, and only a little cash.
Just my opinion, based on my knowledge and experience. Your mileage may vary.
I noticed a couple weeks ago that the fleece on my old Utahn Saddlery ranch saddle is worn out. I bought that saddle well-used in the spring of 2015 and have put a lot of miles on it since then. I’ve replaced all the saddle strings and many of the conchos, but now the fleece needs to be replaced. That got me to considering that I should build myself a new saddle.
Over the past 10 years or so, I have accrued the necessary basic tools for saddle making and have done minor and major repairs to a number of saddles. I have learned all of the various skills necessary to complete a saddle, but just haven’t yet made one from start to finish. That’s something I have aspired to and I think it’s time.
So, the first step is to decide what kind of saddle I want to build. It seems to be something deeply rooted in my soul to have a love of traditional…even old…ways and things. I absolutely love the 1870s style western stock saddles. The half-seats in particular. So, my first saddle will be a half-seat, similar to this one, built by Kevin Sonmor.
He has a wonderful video of him building this beautiful saddle on his YouTube channel, Agar France:
I plan to use a tree from Timberline Saddle Trees, their Old Style Visalia model, with a 15-1/2″ seat length.
I doubt I’ll make it as beautifully carved as Kevin’s saddle, because my leather carving skills aren’t quite as well developed as his, but I’m going to make it a very nice saddle, one I can be proud of.
Recently, I have had a lot of association with horse folks in my own age group and older. I have found that many of them struggle to lift the traditionally heavy saddles onto the backs of their horses. My own Utahn saddle weighs in at around 45 pounds. It seems to be quite common for us older folks to have trouble with our shoulders and I am no exception. Some people have had to resort to some of the very low-end saddles on the market, which are made with plastic trees and inferior materials in order to find a saddle they can comfortably lift. These saddles might be comfortable for short rides, but over the duration of a long, strenuous trail ride, they can not only become uncomfortable for the rider, but also for the horse. And, due to the inferior quality of the materials from which they are made, they don’t last very long, either.
It occurred to me that I might be able to design a saddle that was light, yet built on a high-quality tree, with just enough leather to make it comfortable for both horse and rider, and useful for trail riding.
This would be a saddle that would be durable, comfortable to ride on long trail rides, and be comfortable and safe for the horse, while being light enough for anyone to lift onto the back of their horse. My goal would be to make this saddle come in under 30 pounds, hopefully in the 22-25 pound range.
It might look something like an 1830s Santa Fe style saddle, such as the one below.
Or, it might be a little more elaborate, yet simple, such as this one by Out West Saddlery (I’m leaning more toward this design).
The goal, again, being to build a comfortable, durable, yet light saddle, made of high-quality materials.
The tree I have been considering for this lightweight saddle build, is another one from Timberline. It is the Timberline Wade, again in 15-1/2″ seat length.
Both of the trees I am considering are bullhide-covered wood trees, built to my specifications, very strong and very high quality.
I will be ordering leather and other supplies from Montana Leather, from whom I have bought leather in the past. I have been very satisfied with their leather, their prices, and their service. Other parts and hardware will come from various other places. The total price tag for the supplies alone for the saddle to be built on the Visalia-style tree will be over $1,000. The cost for the lightweight saddle will be a little less, as there is less leather involved.
Once I get these saddles built, I plan to allow some of my riding friends to use them for a ride or two to let me know how they ride and make suggestions for improvements. That’s one of the benefits of making my own saddles: I can rework the design to suit my needs and desires perfectly.
And who knows? I might just find a niche market for the lightweight saddles! We’ll see what happens.
TH
P.S.
Don’t worry, I plan to re-fleece my old Utahn saddle and it will continue to get a lot of miles put on it. It’s a very well-built and comfortable saddle.
After the successful repair of my buddy’s old youth saddle,
I decided to pull another old saddle out of my “to-do” bin and take a look at it.
It needed the same kind of repair as my buddy’s saddle: the front of the left side saddle tree bar had broken off from the stresses imposed by the cinch rigging. The last repair went so well, I decided it was time to get this saddle out of the bin, repaired, and get it sold to someone who could use it.
So, I started taking it apart. Here’s what I found:
This is a very cheaply made off-the-shelf saddle. Some previous repairs were evident: conchos and saddle strings had been replaced and everything reattached with screws. The seat was made in several pieces of leather, rather than one piece of high-quality firm leather. The ground seat is padded with upholstery padding, the skirts are made of several pieces of tooled leather stitched onto a heavier backing piece, to which is glued and stitched fake fleece on cloth backing (which is also in very poor condition). The machine stitching on the skirts has cut clean through the skirt backing leather, so that the backing leather must be replaced.
The tree was made to appear to be a high-quality bullhide-wrapped wood tree, but in fact, the tree was only partially wrapped in paper-thin rawhide, which was then tacked, rather than stitched, to the tree. The tree itself not only has the front of the left bar broken off, but the right bar is split through most of its length. This tree would have to be glued back together, then wrapped in fiberglass to be considered “repaired.”
This is a saddle that was made as fast and cost-effectively as possible, to then be sold as an inexpensive saddle. It was not intended to be an heirloom. It is dressed up like a good trail saddle, but it simply was not made to last. This is the kind of craftsmanship one should expect in the $500-$800 price range for today’s western saddles. In fact, the plastic trees this price-range of saddle is normally made on is superior to the tree this one was made on. Do not interpret that to mean those plastic trees are good saddle trees, just better than this one.
In the final analysis, I could put 8-10 hours into repairing the tree and replacing various leather parts, repairing the skirts, re-fleecing the skirts with real fleece, making a new horn and wrap, making a new ground seat, and re-installing all the outer leather, a total of around $4-500 in materials and labor…and the saddle would still be a cheap old saddle.
I guess sometimes you just have to say it’s not worth it.
A couple weeks ago, I saw an old saddle in my buddy’s tack room. It was obviously an older saddle, probably from around the 1940s or so, with small sweat leathers and the stirrup leathers exposed on the outside of the sweat leathers. It was a small saddle, measuring 14-1/2″ on the seat, and built like a youth saddle. The leather was dry and cracked and in need of a good cleaning and oiling. As I looked closer, I saw that on the left side (on-side), the front of the tree bar, to which the left side of the cinch rigging had been attached, was broken. The bar had split and departed. The rigging attachment was missing altogether and the rigging ring was held in place by a couple leather boot laces tied around the pommel and through the hand-hole – obviously a “just-get-me-back-home” kind of repair.
My buddy has several grandkids he likes to get out on horses every chance he gets, so I asked if he would like to have that saddle repaired. Looking rather doubtful, he said, “Sure, if it’s worth saving!” I told him I’d give it a shot.
The following week, I tore the saddle apart to see what I could do. I was immediately sorry I had forgotten to take a “before” photograph. Oh well, you can see from the photos of the repair process what needed to be done.
The first thing was to remove enough of the leather to assess whether the tree was, in fact, repairable. I was disappointed in what I found. The tree was not rawhide covered, but was made as cheaper saddles were made “back in the day.” The wood tree was covered with a cloth mesh, not unlike what we call “cheese cloth” and that was painted with a thick glue-like varnish to seal the tree. The cloth mesh adds little or no strength to the tree, but helps in the adhesion of the glues used to attach the leather to the tree. I found the tree itself to be loose at all the joints. In other words, it was not in very good shape.
I decided that I could repair the broken tree bar by gluing and screwing a piece of pine in place of the missing piece, then milling it to match the other side – not a difficult thing, since the tree was not covered with rawhide. I have both the tools and the skills as a woodworker to do that repair easily. In a couple hours I had the repair done and was pleased with it. I further strengthened the tree by drilling pilot holes and driving in 2″ screws through the bars and into the cantle and pommel. It is now quite firm and all the joints are tight.
I reinforced the repaired bar with a single layer of fiberglass bi-directional cloth over the length of the bar. It didn’t go on very well, as you can see, but it will be strong enough for its purpose. I also painted a layer of resin over the rest of the tree to seal and strengthen it. The resin doesn’t have much strength in itself, but it tends to soak into the surface layers of the wood and adds some strength there and it would also add a little reinforcement to the cloth mesh and varnish already on the tree. Regardless, it would be stronger than it was when it was made.
The next step was to sand the whole tree smooth, since the fiberglass resin made every little string and sliver hard and prickly. Once smoothed, it was time to start replacing all the saddle leather.
I started with the gullet leather. It went on easily.
The ground seat was next. Most saddlers use a tin “strainer” as the foundation for a ground seat, while some higher-end saddlers make a ground seat entirely of leather. This saddle originally had a tin strainer, so I reused it. All the old nails had loosened, so I reattached it with zinc-coated roofing nails, which should hold it much better than before over the long-haul.
After the strainer was in place, the ground seat was completed with the same leather as before. I wanted to re-use all the leather that came on the saddle, as far as possible, so that I wouldn’t have trouble with the outer leather not fitting back on the saddle properly.
Next was the saddle horn. The old one was worn out and loose. The leather was stretched and the stitching was coming loose. The original horn was quite small, but it looked right in proportion to the saddle, so I made a new horn and wrap pretty much as it was made originally…at least size-wise. I used better leather than was used originally. I think it came out pretty well.
Next came the rigging. I decided to go with a Stohlman-style 3/4 rigging, which would be immeasurably stronger and more durable than what came on the saddle and would be less likely to put undue stress on the tree bars and break the repaired area again. I made paper patterns, based on patterns provided in The Stohlman Encyclopedia of Saddle Making, Volume One. The original rigging was pretty close to a “full-rigging”, but I moved it back, so that it would allow the cinch to ride a little farther back for my friend’s Fox Trotter horses. I attached the rigging with three 1″ screws, front and rear each side. This rigging will still be strong when all the rest of the leather on the saddle has rotted away and is useless.
Once the rigging was in place, it was time to start replacing the outer leather. I started with the pommel cover, which is standard operating procedure. Next came the seat leather. Since this is an old-style saddle, it has a total of 16 leather conchos (sometimes also referred to as conchas) and 8 saddle strings. This is sometimes called an “8-string” saddle. More modern saddle designs are 6-string, because they combine the front jockeys with the seat leather as one piece. Personally, I like the 8-string design. It imparts a traditional look, I think.
I cut and prepared the 16 conchos, 8 at 1-3/4″ and 8 at 1-1/2″. I applied neatsfoot oil and Fiebings Chocolate colored stain to them to make them look a little closer to the color of the original leather.
Here is where I changed things a little. I hope the changes are stronger and yet invisible to the casual observer. When I repair a saddle, I try to make improvements where possible without detracting from the original design and patina of the old saddle. If I know a repair is there, but I can’t see it, I feel like I have done well.
The original saddle skirts were attached to the tree bars with a few nails here and there, but mostly with saddle strings that passed through the tree bars in various places, then through the saddle leather, and were finished with a bleed-knot. You only see them as saddle strings on the outside. This is the traditional method for attaching saddle skirts to the tree bars. It has worked well for a couple hundred years.
More modern saddles, particularly show saddles no longer have any need for saddle strings and some prefer not to have them at all. On these saddles, the skirts are attached with screws and nails only, with a few leather tags to hold the ends of the skirts tight to the bars. Saddle strings passing through the tree bars are entirely eliminated. This obviates the need to drill holes through the saddle leather and through the tree bars. Some feel these holes weaken the tree bars, but I have seen little evidence of that when care is taken to make sure all the holes are drilled properly in the right places.
For this saddle, however, I decided the best method was to use screws. Not all the holes in the original tree bars were drilled in the right places and putting everything back as original would have been a mistake in my estimation. The saddle skirts originally had leather patches sewn to them on both ends, which was pulled up over the front and rear of the bar and attached with nails. This was to keep the ends of the skirts tight to the bars. Only one of the leather patches remained. It was on the rear of the left skirt. I made a similar patch from scrap leather and used my industrial sewing machine to stitch it to the rear of the right skirt.
With the new rigging in place, this method would no longer work on the front of the saddle skirts, so in the front of each skirt I punched 1/4″ holes and installed two leather thongs on each side. These I pulled tight over the front of the bars and fixed them with nails through the rigging leather and into the wood of the bars. I then put nails and screws in all the appropriate places to ensure the skirts never move and provide another few years of good service before they need to be re-fleeced.
This being a trail saddle, however, means it should have saddle strings. So, on the upper side of the saddle, I strung the saddle strings through existing holes in the saddle leather, then slid the large concho into place. I then used an awl to make a pilot hole in the concho, through the saddle leather, and through the center of the saddle string. I then set a #10 X 1-1/4″ wood screw through all that and into the saddle tree wood. This method firmly fixes the saddle leather to the tree and creates a very strong substrate to give strength for the saddle string. The small concho is then set in place over the large concho, covering the screw head. The saddle strings are then finished with the traditional bleed knot.
Some saddlers attach the conchos and saddle leather to the tree in this method, but use a small D-ring to attach the saddle strings. I prefer the traditional look of the bleed knots and no D-ring.
As I reassembled the saddle, I oiled each piece of leather with a heavy coat of 100% neatsfoot oil, which it absorbed thirstily, and then went over each piece with Fiebings leather stain in Chocolate color, to blend the new and the old as much as possible. You can see the difference in the following photos:
Speaking of D-rings, I forgot to mention that I added D-rings to the front rigging for a breast strap attachment point. I also added a D-ring to the left rear, under the concho at the cantle, for the attachment of a rifle scabbard strap or anything else one might wish to attach there. On that D-ring, I made an attachment from tin and slid it up under the rear jockey leather, to make it as unobtrusive as possible. The screw that holds the saddle leather and concho in place passes through it as well, so it will be a very strong attachment point for a rifle scabbard. After installing it, I decided to go back and attach a similar D-ring on the other side as well, so one has a choice of which side to carry the rifle scabbard. I’ll get to that tomorrow.
I still need to make a new rope strap that attaches to the pommel and a stirrup keeper strap, as well.
There are few things in life that bring me more pleasure than taking something old and broken and making it work again.
This still an old saddle, but it is now ready for another 20 or so years of riding service for my buddy’s grandkids!
Well, I guess it’s about time I got a few posts up about my 2019 Alaska moose hunt. I’ll start off talking about some of the gear I took.
This year’s trip was a little different than last year’s. First of all, I had a lot more time to prepare. I knew I was going to go on this trip for a full year. Last year I didn’t know until about two weeks before the trip. Plus, having been on last year’s trip, I knew what to expect, so I was able to prepare with foreknowledge. That’s a big deal on a trip like this.
On last year’s trip, for footwear I took my favorite heavy-duty riding boots. They are Hathorne Explorer packer boots, made by White, the same company that is known for their excellent fire-fighter and logger boots. I seldom ride in any other boots. They have very heavy rubber soles, cowboy heels, and heavy leather uppers. I treated them with neatsfoot oil and Fiebing’s Snow-Proof Weatherproofer to prepare them for the dampness they would carry me through. I had no idea, then, just how much water they would encounter and I ended up living with wet and cold feet almost from the start of the trip to the end. I spent nearly every evening trying to dry out my wool socks and the boots over the camp fire. I’ve said before that there is no way to keep water from penetrating leather with prolonged exposure. I knew that! What was I thinking?
These boots have a waterproof heavy rubber foot with a leather upper and a heavy Thinsulate boot insert. The soles are configured to allow for easy insertion and removal from a stirrup. They fit into my stirrups and have a cowboy heel to keep them from going too far into the stirrups. They also have a good spur shelf. Just what the doctor ordered for a trip like this, right?
Well, here’s the test report.
Our hunt camp is 20 miles back into the backcountry of southeastern Alaska, in the Wrangell-St. Elias National Park. Our trailhead is actually in Canada, at Beaver Creek, Yukon Territory. We cross the border into Alaska after about 16 miles in the Yukon, by following Beaver Creek. There is no trail. We just follow the river bed. We crossed the river numerous times en route to our camp. My Kenetrek boots kept my feet warm and dry…at least for the first couple of miles. After that the leather uppers, despite my treating them with the Fiebing’s Weatherproofer beforehand, began to soak up the water and pass it through to the Thinsulate liner and eventually my wool socks like a sponge. The leather initially repelled the water, but after a few good wet river crossings in which they got splashed pretty well, they simply allowed water to pass through them almost unrestricted. Again, I had two “soakers” for much of the trip.
I had thought the leather uppers of the Kenetrek pac boots was silicone impregnated and would offer a high degree of water repellency, but that was not the case. They are simply high-quality heavy leather with almost no water resistance.
I will allow, however, that even though my feet were wet, the heavy Thinsulate inserts kept my feet warm. The thickness and absorbency of the heavy inserts and my wool boot socks, in combination with my poly liner socks, kept my feet less wet than my leather Hathorne boots, but they were wet nevertheless. At least they weren’t terribly cold, which kept me from getting chilled.
Additionally, the Kenetreks, being pac boots, are not made for hiking around. They are very comfortable in the saddle, but quite heavy and bulky for walking around in camp or hiking around the hills. I normally wear a 9 or 9-1/2 D width boot, depending on the boot. When I plan on heavy socks, I sometimes go for size 10. Depends on the boot and the fit I want. I ordered my Kenetrek boots in size 10, as half-sizes were not offered. They were quite roomy, but felt good with heavy boot socks on, especially while in the saddle. They felt a little large and ungainly while on the ground.
The liners are removable, so I spent some evenings holding them over the fire to dry. However, drying out the inside of the rubber boot foot was difficult. There was no way to safely heat them up over the fire, without fear of overheating the rubber. There is an insole inside the boot that soaks up water and does not allow one to dry out the inside of the boot by using a towel. The insole is not removable. All I could do was to dry out the liner and just let it soak up the remaining moisture in the boot foot.
I have worn these boots on winter rides where there was snow on the ground and they performed perfectly, keeping my feet toasty warm and dry. That is what they are designed for. No complaints at all for that.
They are not well suited to direct exposure to water, at least not above the level of the rubber foot. These boots are, indeed, well-made boots, but they are most definitely not waterproof.
If I had a recommendation to Kenetrek to improve their boot, it would be to line the leather uppers with Goretex. For boots that price out at above $300, I would think that would not be too much to ask. They might also offer a Goretex boot liner sock to go over the boot liner as an accessory. In fact, I have been looking for an appropriate liner sock to do exactly that. So far I have only found Goretex socks that go over a bare foot.
So, I will give the Kenetrek Cowboy pac boots five stars if they are used for their intended purpose, which is pac boots for riding and work in cold weather and snow. But, for water resistance, they get 2 stars. They are not water resistant at all above the rubber foot, but they still kept my wet feet from getting too cold.
By the way, these Kenetrek Cowboy pac boots are also offered in women’s sizes.
This is the fourth in a series of posts about gear for horse packing. Again, a reminder that my kind of horse packing is not normally packing in to a base camp, but is packing from point to point, from a specific point of origin to a point of destination, sometimes hundreds of miles away. Understanding that makes a difference in gear one takes along on the trip. Things one is not sure they will need are left behind, as a general rule.
This post will deal with personal gear, things each individual will need for their personal needs, as well as a few things that are just handy to have, while on the horse pack trip.
Personal gear (other than what is worn to begin with):
Doc kit (personal hygiene items)
toothbrush and paste
medications
fingernail clippers
deodorant
chap stick
sun block
hand soap/shampoo
bandaids/anti-biotic ointment
hair brush
etc
Clothing
multiple changes of socks
change of shirt
change of pants
multiple changes of underclothing
thermal underwear (depending on weather)
camp shoes (if desired)
handkerchief or bandana
Jacket or coat
bathing suit
Sleeping gear
sleeping bag (suitable for weather)
water resistant sleeping bag cover, bivy bag, or small tent
camp pillow
stocking cap
sleeping pad
ground sheet (obviated if you have a bivy bag or tent)
Other
camp knife (such as a “hunting knife” with a 6″ or longer blade)
utility tool (such as a “Leatherman multi-tool)
handgun, ammunition and supporting gear
spurs
silverware, plate, cup (some folks consider these to be personal gear)
small whet stone or diamond rod
sunglasses
rain slicker
canteen(s)
chaps or chinks
smart phone/camera
extra memory cards
charging cables
preferred snack foods (particularly if you have special needs)
cigarette lighter
strike-anywhere matches in a waterproof container or flint/steel if you now how to use them
fire starters
compass
map (both paper and digital on the phone)
notepad and pen
flashlight and extra batteries
chemical hand warmers (depending on weather)
toilet paper and wet wipes
We’ll start at the top, with the “doc kit.”
I keep all my personal hygiene items in a small, durable bag I call my doc kit. It contains things such as are on the list above. In addition to those things listed, a tube of hemorrhoid cream or hydrocortisone come in handy on occasion.
My “doc kit”
I always take a pill container with Ibuprofen, Acetaminophen, and Benadryl in it. Ibuprofen relieves muscle and joint pain, Acetaminophen relieves cold symptoms, and Benadryl relieves allergy symptoms as well as helps one fall asleep at night.
A change of clothing is not absolutely necessary on a horse pack trip, but it is very nice to have, particularly on long trips. One never knows when something may happen that could result in wet, soiled, or ruined clothing. It is nice to have a spare pair of pants or shirt along.
Extra socks are important for keeping feet healthy. I like to change socks daily, although that is not always feasible. On long pack trips I carry several pairs of liner socks, such as men’s nylon dress socks. I change these often, while wearing a heavier pair of athletic or wool boot socks over them which can be worn for several days at a time. The liner socks are easily washed and refreshed and take very little drying time, as opposed to heavier athletic or wool boot socks. An additional benefit to this system is that the liner socks prevent blisters in the event one has to walk awhile in riding boots. Each night I air out the heavier socks by hanging them over my boots.
Camp shoes are an optional thing. A pair of “crocs” or running shoes can be quite comfortable of an evening, after the riding boots have been removed. They are also quite easy to slip on in the middle of the night when the call of nature comes or when something starts bothering the horses and you need to take a look-see. In all the times I have taken camp shoes on my pack trips I have rarely used them. Unless I am going on a very long pack trip, in which I will have rest days during the trip, I don’t take them.
A bathing suit is very light and takes up very little space, but is very handy for bathing and for wearing while clothes are being washed on a long pack trip. I often toss one in my clothes bag when packing for those longer trips.
Not listed above is a good cowboy hat (because I’m normally wearing mine). Many people nowadays prefer a helmet and I will say nothing against that, but my preference is a good felt cowboy hat with a decent brim. A cowboy hat keeps sun off of your ears and nose during the part of the day when the sun is most intense and I consider it a protective measure against skin cancer. I prefer a hat to sun block cream on my face, because the sun block tends eventually to get into and irritate my eyes. Also, when passing through brush and tree branches, I can just duck my head and they just slide over my hat without getting sticks and leaves and pine needles down the back of my shirt. A felt hat works much better than a straw hat or helmet in those situations.
Something else not listed above in personal clothing, which I have never tried, but which I have been told is very effective in eliminating or reducing saddle sores on riders of both sexes, is a pair of women’s panty hose worn under the riding pants. It’s worth a try, if you have concerns about rub sores on your hind quarters or knees!
For personal sleep items, of course the sleeping bag is indispensable. Make sure you select a sleeping bag that is appropriate for the place and season in which you will travel. I once took a summer sleeping bag on a pack trip through southern Arizona in April, thinking I would be fine, however, when we passed through the Chiricahua mountain range, we spent one night above 7,000 feet and our water froze before we went to bed. I passed a cold and miserable night with little sleep. You can always unzip your sleeping bag if you get too warm.
The bulkiness of the sleeping bag and weight are also things to be considered. I keep a canvas covered sleeping bag with a very nice flannel lining in my trailer bunk, simply because it is very comfortable, however, it is far too bulky and heavy to consider taking on a pack trip. My regular sleeping bag is a 4-pound fiberfill bag, which packs into a reasonably sized stuff sack. However, as I mentioned in the first post in this series, I recently learned that leaving the sleeping bag un-stuffed in a top pack works very well also.
After having tried one on a pack trip with a friend, I recently purchased a military surplus bivy bag. This bag is made of a water-resistant material (Gore Tex) and is quite tough, obviating the need for a ground sheet. The bag has both zipper and snap closures, effectively sealing out rain.
Sleeping bag, pillow, sock hat, and pad, all in a bivy bag
I keep my camp air mattress inside the bag with my sleeping bag. The whole shebang can either be rolled up and tied or left loose in the top pack. Preparation for sleeping is a simple matter, then, of preparing the ground, then laying out the bivy bag/sleeping bag combo on the ground and airing up the mattress. One drawback I found with the bivy bag setup is that, despite the breathability of the Gore Tex material, I found my bag a bit moist in the morning up around my head area, I presume from my breath. This was only the case during very cold nights when I had the bag closed over my face. A good airing-out of the sleeping bag after spending a night in the bivy bag is necessary before packing up again.
Up until I bought the bivy bag, my sleeping arrangement consisted of a canvas ground sheet (one of the manty tarps or pannier covers) on the ground, horse saddle pads on top of that (two per person), my air mattress on top of the saddle pads, my sleeping bag on top of that, and lastly, another canvas tarp over the top.
Sleeping arrangements using canvas tarps
I have used that combination for many years and stayed dry even through heavy rains. My canvas tarps are in the heavier range, about 18-ounce or so, and treated with waterproofer. This makes the ground sheet resistant to ground moisture. When moisture falls on the top canvas, the weave tightens up, creating a very stiff and water-resistant cover. One can then simply kick up under it, causing the stiffened tarp to form a domed cover over the sleeping bag, effectively running the water off. The key to remaining dry with this arrangement is to make sure the edges of the top cover extend out over the edges of the ground sheet. Also, canvas tends to wick water wherever it touches something that absorbs water, such as a sleeping bag. The waterproofing treatment helps, but doesn’t completely eliminate the problem. This is why it is important to kick up under the tarp to form the dome over the bag during rain.
I find the canvas manty tarps commonly sold by suppliers to be too small and too light for this application. They generally run about 7X8 feet and are in the 12 ounce range. Mine are 8X10 and in the 18-20 ounce range. Mine are considerably heavier in weight, though.
A camp pillow is an important item. It will greatly improve sleeping comfort. Also, a decent sized pillow will enhance the warmth of the sleeping bag immensely, as it helps prevent air movement around the head/neck area. My camp pillow is stored and packed inside my sleeping bag for travel.
A stocking cap is standard equipment for me, with regard to sleeping gear. Above 70% of body heat is lost through the head. A good stocking cap, or beanie, as they are sometimes called, will greatly improve your body’s heat retention, making the sleeping bag more effective in that regard.
For “other” personal camp gear, I have made a list of things I generally have on hand, either on my person or in my saddle bags (remember, I consider saddle bags and pommel bags to be part of my primary saddle horse gear).
I find a good camp knife to be indispensable on a pack trip. Now, this may be a hunting-type knife worn in a belt sheath or a folding belt knife, such as made famous by Buck Knives. In my experience, this knife should have at least a 6 inch blade. A pocket knife is handy, but I find them too small to handle some jobs a marginally larger knife can handle easily. I have a very large Bowie-style camp knife I used to carry, but over the years I have gone to a folding Buck Knife, due to the convenience of carrying it in a small leather or nylon pouch on my belt. The Buck is significantly lighter than my old Bowie, which I made from a truck leaf spring and and a deer horn. However, the Bowie style knife has sufficient heft to be used in place of a camp hatchet, possibly eliminating the need for that piece of gear from the pack.
I have found a multi-tool, such as those made by Leatherman or Gerber, to be very useful on pack trips for handling makeshift gear repairs. Select one that has useful tools in it, such as a knife blade with a long, sharp tip, a strap cutter, scissors, file, screw driver heads, etc. Long-nosed pliers are a must – nothing is better for removing cactus spines.
My Leatherman and rope saw
Multi-tools made for specific trades or purposes sometimes contain tools that are rather useless or ineffective for horse packing purposes. For instance, a knife blade with a short, blunt tip is useless for making holes in a strap for a buckle tongue or making a bleed knot. I normally carry my multi-tool in the saddle bag.
Another small item I routinely carry in my saddle bag is a rope saw. This is a piece of wire or chain with small embedded teeth with a metal ring or nylon strap at each end. It is useful for cutting branches that may be difficult to access with a regular branch saw. I often do not carry my branch saw, but I always have my rope saw, just in case. They are quite inexpensive, very light, and come in a handy little nylon pouch. My dad once had an experience in which a rope saw was the only possibility for getting a horse out of a tree unharmed…but that’s another story.
A small-caliber handgun is something I carry when a larger caliber handgun is not called for. As stated in another post, I often carry my .45 Colt revolver when I ride, partly because it is “cowboy” and partly for personal protection from varmints (both animal and human varieties). However, when I do not carry my revolver, I carry a small handgun, either a .22LR or 380 Auto pistol. The primary purpose is to have it in case the need should arise to have to put an animal down.
A small caliber handgun is sufficient to humanely euthanize an injured horse or mule, if properly done. I have had the unfortunate experience of having a horse break a leg during a pack trip and having to put it down. I was glad I did not have to put my .45 Colt against my faithful friend’s head. However, that would have been far preferable to having to put him down by cutting his throat due to the lack of a firearm on the trip. I know people who have found themselves in that very unfortunate position.
Chaps or chinks are always handy on a pack trip. They not only protect your legs and clothing from branches and rocks, but they help keep your clothing clean as you handle horses and gear. My chaps have pockets situated on the front of the legs that are perfect for holding such items as cigarette lighters, chapstick, and my cell phone/camera. I use batwing chaps of my own manufacture. I find them to be protective, but not too hot for even summer wear. They are, in fact, quite cool to wear. They also shed water well to supplement my rain slicker. Chinks are just short chaps that come to just below the knees. They are cooler for summer wear, but still protect the legs and pants from offending branches and rocks. Chinks tend to be made of lighter leather and are generally much lighter in weight than chaps, but do little to protect the lower legs and boots in wet weather.
Personal emergency gear is always a must for horse packing. I include matches in a waterproof container and a liquid compass in my saddle or pommel bags. I also carry a flint/steel tool that will work when matches don’t, but you have to know how to use them. Cigarette lighters are handy, but they don’t function well at high altitudes and run out of fuel at the most inconvenient times. That is why I also carry matches. I carry small homemade fire starters made from paraffin with a wick in a small cup, such as an aluminum bottle cap. There are a number of ways to make fire starters, or you can purchase them in bags and carry a few with you. These also stay in my saddle bags. The liquid compass is my “don’t get lost” insurance. Smart phones are nice, but when they break or run out of battery, they aren’t much help. On longer pack trips, I also carry a paper map to supplement the USGS topo maps I download onto my cell phone.
Speaking of cell phones, not only are they useful for viewing maps and GPS apps, they have absolutely awesome cameras in them nowadays. However, it is easy to run out of memory space on them during a pack trip. If your phone has an SD card slot, make sure you bring extra memory cards. Now, since I have an iphone and its memory is not expandable, I bring along a GoPro 4 Silver to take most of my video footage. I carry several 64G memory cards and extra batteries as well. Always bring your own cords and cables for your electronic equipment, as your buddy with the charging gear may not have what you need. I covered my electronics in this post, but some of the information (such as pricing) is outdated.
A word or two about rain slickers. For many years I used a plastic rain slicker, partly because they were cheap and partly because I didn’t know any better (being an Arizona boy we rarely found need for them). These are suitable for a pack trip only if you have nothing better. They tend to make you wet on the inside, while protecting you from rain on the outside, because they trap body moisture, and they are not durable.
I later graduated to the more durable and higher quality rubberized yellow slickers with the flannel liner. The flannel on the inside helps keep you a little drier, but the body moisture problem is still there. Better ones are made with a variety of vents to reduce the problem. I currently have three of these that I lend to friends when needed. These yellow slickers are fairly inexpensive, usually running under $50.
Several years ago I shot the wad and bought a very nice lightweight slicker made of a lightweight waterproof synthetic material, under the Muddy Creek label.
My slickers
It is a very nice slicker in a much more subtle brown color, with a vented back, vented underarms, and a zipper closure that works both directions (from the bottom and from the top). It is full-length, reaching past the tops of my boots when in the saddle or on the ground. It is full enough to cover the back of my saddle, whatever is tied behind my cantle, and most of my saddle bags. It can be unzipped from the bottom to accommodate my saddle horn while keeping my legs covered. It has velcro tabs to close the flap over the zipper for extra protection against moisture intrusion. If I have one complaint against this slicker, it is that its skirts blow in the wind, because it is so lightweight. However, it breathes very well and I find it quite comfortable in the rain or just wearing it as a wind breaker. When wearing it on the ground, care must be taken not to step on its skirts, because it is full-length. This handy little slicker ran me $199, not including shipping. Worth it? I don’t know. It rarely gets used, but when I need it, I’m glad I have it.
One thing the yellow slickers will do that my Muddy Creek will not do, is that they can be configured, using snap buttons, to split the backside and close the legs, almost like a body suit, thus protecting the legs both while on the ground or in the saddle.
I have never tried one of the “fish oil” slickers or “Aussie oilskin duster” style slickers. My dad has an Aussie style oilskin duster and he reports that under long rainy conditions, water will penetrate it.
I always carry a notepad and pen. Generally, I carry my journal with me as well, but on shorter rides, it’s just the notepad. You never know when you will need to leave a note somewhere, so that somebody knows what happened to you and where you went. A cell phone is handy, but they don’t always work out in the back country. I carry several ziplock sandwich bags in my saddle bags that may be used to protect a note left on a tree or in camp in an emergency.
My dad once ran away from home as a young boy. His grandfather told his worried grandmother, “Don’t worry! The first time he has to wipe his butt with a stick, he’ll head home!” There is wisdom in that for horse packing as well. One should never depend on anyone else for his/her own supply of toilet paper. Always keep a personal supply in a waterproof container, such as a ziplock sandwich bag, in your saddle bag. A larger supply should be included as group camp gear, but never fail to keep your own personal supply in your gear. In the same vein, wet wipes are handy to have on a pack trip as a means of personal hygiene when water is unavailable for bathing and hand washing.
The rest of the stuff is self-explanatory. I’m sure I have forgotten a few things and I’ll think of them later. I’ll edit this and the other posts in the series on horse packing gear as I think of things I forgot and insert them where appropriate. Check back now and again to see if anything new has appeared on any of the lists.
So, that’s my horse packing gear from start to finish. Hope it helps some of you get started on your own adventures.
Stay tuned for some posts that will go into more detail on particular subjects, such as pack-breaking horses, loading up, tying the Diamond Hitch, navigation, knot-tying, rope braiding, etc. Let me know your questions and I will try to address them as soon as possible.
This is the third in a series of posts about my learning and experience in horse packing.
In this post we will cover general camp gear that I take on my horse pack trips. I have talked, in the previous posts, about saddle horse gear and pack animal gear. Now we’ll talk about the people gear.
Let’s start with lists.
Camp Gear:
Cooking and eating items
Aluminum or stainless steel cook kit (including at least two pots, a coffee pot, and a frying pan)
Single-burner propane cook stove
Propane cans and base
Metal silverware (fork, spoon, knife)
Spatula
Plastic cups (stackable are best)
Tin plates (one per person)
Dishwashing soap (biodegradable)
Rag (for dishwashing, etc)
Roll of paper towels
Salt and pepper and other spices
Camp utility items
foldable shovel (such as a military surplus pack shovel)
Camp axe or hatchet
Limb saw
Camp shower bag
Water filter and extra filter(s)
Solar chargers and associated cables
Accessory high-capacity batteries
GPS unit
Binoculars
Small caliber rifle and ammunition if small-game hunting is a possibility, large caliber rifle or shotgun and ammunition if in Grizzly Bear country
Plastic tarp (for rain protection in camp)
Canvas tarps (for pack protection and bed protection)
collapsible water bucket
Nose bags for horse feed
Fence tool and a few T-post clip
Farrier kit
First Aid kit
When I first started horse packing, the temptation to say, “The horse will be carrying it,” was strong, so I packed not only what I thought I would need, but also what I might need, and then some of what I probably wouldn’t need, but thought I might just take anyway, because if I did need it, it would be nice to have. However, at the end of the first leg of my Mexico-to-Canada horse pack trip, when Dad and I went over our gear and took inventory of what we really needed, as evidenced by what we actually used, I started seeing the folly of taking along unnecessary camp and personal gear.
For example, I packed a small camp lantern that used a special canister of fuel and had a tiny little globe and an itsy-bitsy mantle in side. We never even unboxed the thing during the entire trip. When we got home and unpacked, I found the thing smashed to bits, still in its box.
So, over the intervening years, I have put together a list of gear that I actually use on my horse pack trips.
Starting with the cooking gear seems to flow well. Not a lot is required for the kind of horse packing I do. Again, this is for long-distance packing and not for packing in to a base camp. Think of my style of horse packing like you would a long-distance backpacking trip. You go light, utilitarian, and discard what you don’t really need.
For my pack trips, I have relied heavily upon dehydrated and freeze-dried foods. These require re-hydration with boiling water. In order to prepare a decent meal, I have found that two cooking pots are nice to have, so that two different courses can be prepared simultaneously. Actually, it’s not quite simultaneous – one can be cooling while the other is cooking. Remember, we are using a single-burner cook stove.
My packing cook kit
I have also found a small frying pan, the one that comes with the cook kit I like, to be useful for breakfast foods, such as dehydrated eggs and hash browns. A small spatula comes in handy for turning those foods, as well. A coffee pot is also handy to have around. It can be placed on a fire to heat water while cooking is done on the burner.
I use a single-burner Coleman stove that is attached directly to the propane can. I use the normal propane cans that can be purchased just about anywhere. Walmart is a good source. The particular stove I use hasn’t been manufactured in many years, though. It is small in diameter and virtually indestructible, which is why I still have it after all these years. I bought it as a Boy Scout when I was about 12 years old. The modern single-burners are quite a bit larger and don’t seem to work any better. I have one of those as well. I took both burners on the first leg of the M2C trip, thinking it would be nice to be able to have two burners going at once – cooking on one and hot chocolate water on the other – but in practice, we didn’t use it. Now I take just the smaller one.
Metal silverware is very handy. It doesn’t melt if it gets too close to the flame, cools quickly, cleans easily, and bends instead of breaking. I like the sets that fit together into one (left) the best. Each person keeps his/her own. I keep mine in my saddle bags
Camp silverware
I have a large porcelain covered steel cup that I have had since I was a kid, which I used to take on all my camp trips. I had a nylon thong with a metal clip tied to it, with which I would clip it to the outside of my backpack, so as to have it handy at all times. I have since decided that plastic stackable cups are much handier. Besides, the ones I use also have volume measurement marks on them, so they are handy for measuring when making meals from dehydrated ingredients.
To round out my cook gear, I take along a rag and a small squirt bottle of biodegradable dishwashing soap. The rag also helps keep the pots and pans from rattling, once they are packed back into their kit. A rag makes less trash than paper towels. However, I have found that a roll of paper towels tossed into the packs sure comes in handy now and again for the cook.
Finally, no camp cook gear would be complete without salt and pepper containers. I prefer plastic ones with snap-on caps. That keeps the salt and pepper in its place and seals them from moisture.
Now for the general camp gear.
The first leg of our big pack trip took us through the deserts of southern Arizona and up through the elevations of the Chiricahua Mountain range. Not knowing what to expect, but having learned by experience that most trails in the USFS and BLM lands are not well maintained, I thought a camp axe and limb saw would be important to us. That turned out to be the case. There was at least one day in the Chiricahuas during which we spent more time clearing dead trees from the trail than actually traveling on the trail. We would never have made it through without our axe and saw.
My 16″ and 26″ Estwing pack axes.
However, when packing in lower areas, or in areas that are well-traveled and maintained, such as on a trip I took through the Bob Marshall Wilderness Area, a camp axe was more of a luxury than a necessity. However, a camp hatchet was quite useful in making camp firewood. A good camp knife, of the Bowie style, was also quite useful, but that is considered to be personal gear, rather than general camp gear.
Having said all that, I will note here that during the first leg of our Mexico-to-Canada horse pack trip, which took exactly 28 days and spanned 355 miles, we built exactly five camp fires. Prior to the trip, both Dad and I had visions in our heads of father and son, sitting by the camp fire, talking about the mysteries of life. Fact is, we were so tired at the end of each day, except on rest days, that we just made dinner and hit the sack! The conclusion being, a camp axe or hatchet as camp gear is useful depending on the terrain, vegetation, and travel you will be doing. If your potential firewood is nothing more than juniper branches or greasewood twigs, you can break those with your hands and feet. If you don’t think you’ll need an axe or hatchet, don’t take it.
The same can be said for the limb saw. I have one that slings comfortably beneath my stirrup leather in its sheath, but it seldom gets removed. It’s useful for clearing smaller trees from the trail and for making firewood, but its primary use is pruning trees along the trail for trail maintenance. So, the purpose of your travel comes into play here. If you are horse packing with the intent to accumulate trail maintenance hours for your Back Country Horsemen Association, it’s a handy tool.
My limb saw
A foldable shovel is useful for a number of things, not the least of which is digging a hole and burying your morning business affairs, before heading out for the day. It is also useful for preparing a bed area at camp, as well as a safety measure alongside your camp fire. I never take a horse pack trip without one.
Foldable mil-surplus shovel
Mine is a foldable military surplus style shovel. I used to have a canvas military surplus cover for it, but that article is now laying somewhere along the Mogollon Rim on the General Crook Trail in Arizona. Since I lost it, I have found the cover to be superfluous – just extra weight. I don’t miss it.
Modern horse packing differs markedly from the old days, particularly with regard to the electronics we like to take along. I have found a cellular telephone is not only a handy safety device, with regard to communication, but a wonderful camera. I have found my iphone 7 to be indispensable on my pack trips. In fact, most of the photos you see on my website were taken with an iphone. I have a protective cover on mine, but it is not waterproof. I keep it in a pocket in my jeans or in my chaps, where it remains safe from moisture and from harsh treatment that might damage it. It is also always handy to pull out for that once-in-a-lifetime photo opportunity.
I also have a DeLorme/Garmin GPS unit that communicates with my iphone. My unit not only tracks my location and travel data, but also allows me to send and receive texts via satellite, so I can let my wife and my mom know where I am and that I’m ok (I’m 60 years old, but she still worries about me).
DeLorme InReach Explorer
It also enables my other followers, here on Western Trail Rider, to follow my progress in real-time, by clicking on the “Trail Map” button on the main menu of this website. The subscription rate for those services is quite high and the minimum time frame is one month, so I don’t enable them on every trip.
The various electronic devices one might take on a pack trip require power. I have started carrying large-capacity accessory batteries on my pack trips, which allow my iphone and GPS unit to be recharged two or three times before the accessory battery needs recharging. I have three solar panels, ranging from 10 to 13 amps each, made by Goal Zero, which I use to recharge things when possible at camp.
My solar panels
However, I have found their usefulness to be limited, due to the fact that I try to be making tracks each morning by 9:00am and don’t normally stop to make camp until around 4:00pm or so. At those times, the sun is at such an angle that there is insufficient charging time to make any progress in charging my accessory batteries or devices. These panels are most useful on rest days, when I can set them out all day long and change their angle periodically to keep them directed as much as possible toward full sun. Of course, their usefulness depends on sunshine. Clouds spoil everything.
I have also, occasionally tied a solar panel onto the back of my saddle, over the saddle bags and successfully put enough charge into my cell phone to keep it alive, but it is not very efficient, as there is little ability to keep it faced directly in to the sun.
Solar panel tied behind the saddle
I have found the bag-style water filtration systems to be excellent for my style of horse packing. You simply fill the bag with water and hang it on a tree in camp. One bag will fill two military style canteens and do for cooking needs for the evening. A straw-type or pump filtration system takes a long time to fill anything, but they are handy to have when no running water can be found. I have found that unless the water is very clean to begin with, the filters in any of these systems will not last very long. In the higher elevations of Arizona, where we found no running streams, Dad and I resorted to getting our drinking water from stock ponds, filtering it through paper towels held on a bandana, before boiling it. Surprisingly, it didn’t taste too bad. I’d hate to have to do that in an area with a lot of cattle, though. The bag filter I prefer is made by Katadyne, but there are a number of good brand names available.
I own a camp shower bag, although I have never used it. I guess this is an optional thing, depending on your personal needs/desires. I have bathed in streams and puddles, but have never used the shower bag. Guess I should try it sometime. The extra space and weight to carry it along is negligible.
I have traditionally used canvas tarps to cover my panniers on pack trips, then tied everything together with a diamond hitch. However, with hard panniers, particularly when there was no threat of rain, I have simply hung the panniers and put a top-pack over them, strapping the top-pack on with it’s own straps. I still carry the canvas tarps, however, because I use them for my bed. My tarps measure about 7X8 feet or 8X10 feet (I have two sizes) and they are made of heavy canvas, 18 ounce or so, and treated.
When I make up my bed area, I clear out offending rocks and clumps, create a shallow dip for my hips, then lay down a canvas tarp. Over the canvas, I then lay down a couple saddle pads, then my sleeping pad and bag on top of that. I use a good camping air mattress and a good, lightweight sleeping bag. I then cover them with a second canvas tarp. This arrangement keeps my bed warm and dry, even in a steady rain. When the canvas gets wet, it tightens and stiffens up. I can then kick up under it and it forms a dome over my sleeping bag and effectively runs the water off.
Our bedding, perfect for viewing the stars
On a recent trip, however, a friend introduced me to the military surplus Gore Tex sleeping bag systems. These systems include a good sleeping bag with an outer Gore Tex cover that has water resistant zip and snap closures. I bought one and have found it to be pretty darn unbeatable as a sleeping system. I now place my air pad and sleeping bag inside the outer Gore Tex cover and just leave them there, rolling the whole shebang up together. The unit packs easily on top of a pack animal or left loose inside a top pack and adequately protects the sleeping bag and air pad. I may eventually stop taking my canvas tarps altogether, because they weigh a ton!
A plastic tarp is light weight and very handy for a rain fly when needed. It is also useful for covering pack gear while in camp to keep the dew and little critters out of the panniers. I usually carry a plastic tarp in the 10X12 size range.
Camp on the Gila River
Coming down the home stretch, I have always carried a set of binoculars with me on my pack trips. I have used them for everything from spotting game, to trying to locate landmarks, trails, and roads. Having said that, I do not consider them to be a necessity, but a desired luxury item. I like to have them along, but I seldom get them out and use them.
Now for the firearms. I generally take a handgun, worn on a gun belt. I prefer my replica 1873 Colt revolver in .45 Colt. I like it because it is a cowboy weapon and keeps with my penchant for old-time stuff. I even made the holster for it. Why do I carry it? Mostly because I like to. I have never needed it on the trail, and if I needed it for bear protection, I hope it’s not a Grizzly, because that’s just not the right caliber for that kind of threat. It is a reasonable caliber for self-protection and for plinking, and could be used to put down an injured animal, but not at all practical for much else on a horse pack trip. It’s just my preference. It’s cowboy!
I have often carried a .22 LR lever-action rifle on my pack trips, particularly when there was the possibility of small game hunting for camp meat. I have never actually bagged any small game on my pack trips, however, on one trip I was very glad I had it along. During 2016, while on a pack trip, my primary saddle horse got tangled in his lead rope in the middle of the night and panicked. Before I could free him, he had broken his front left leg. It broke my heart to have to put him down that night. I was glad I had the .22 LR rifle with which to put him down, rather than to have to put a .45 Colt bullet into his head.
The collapsible water bucket is handy around the camp for fire safety and occasionally for watering the horses. The nose feed bags come in handy for feeding pelletized feed, when it becomes necessary to haul feed for the stock. In some parks, feed bags are required, so as not to spread non-native plant seeds and waste in the environment. They also keep horses from wasting feed. They are light and don’t take up much space, so if I have to carry feed with me, I always carry them.
A tool Dad and I have found indispensable on our back-country camp trips is a good fence tool. In the back country, particularly when bushwhacking (no trail), coming upon a fence line can be a game-changer. Now most ranchers will make a gap/gate in a fence line at reasonable places where they can pass cattle through the fence line, but in the past few years, the Bureau of Land Management has built some fences that go for miles upon miles without a gate in sight. In such cases you have the choice of wasting as much as an entire day trying to find a gap in the fence or you can use your handy fence tool to remove a few fence clips or pull a few nails and lay down the fence to allow your horses to cross over. It’s not as difficult as it may sound. You simply look for a rise in the terrain, where the fence’s tension will tend to pull the fence wires down, remove the fence clips from three or four T-posts, or nails from wooden posts, then have one of your group stand on the wires while your stock passes over. Afterward, you simply reattach the fence wires to the posts and go on your way, leaving the fence probably better than before.
On my longer horse pack trips I will carry a minimal farrier kit. The kit includes basic stuff: a shortened rasp (handle cut off), a hoof knife, a hammer, and a small box of #5 city head shoe nails. Other items may be added to taste, but these basic tools will get you through in a pinch. On very long trips, I also take spare shoes, one for the front and one for the rear for each horse. These spares have been pre-formed and labeled for each horse. On one pack trip that lasted more than 15 days, I replaced three shoes on two horses. On another pack trip my own horse lost three shoes and I had no spares to replace them. Luckily, by taking it easy on him, we were able to make it back out to our destination. For the benefit of those who swear by barefoot horses, a barefoot horse carrying a load will not make a long pack trip. Take it from me. One or two days max in our western mountains without shoes or you risk bruising the soles of their hooves and causing abscesses or road founder. That is for horses. Mules can go longer unshod under most circumstances. I had one pack mule that lasted about 170 miles before her hooves wore so short and she became so tender, she had to be shod.
A first aid kit for both the stock and the humans is a necessity. Without going into everything in my kit, I will mention just a few things. I carry bandaids, of course, and larger bandages for humans, as well as gauze and wraps for horses. I have pre-packaged suture kits to close cuts. I carry antibiotic salves for both horses and humans, as well as a home made sulphur and alum “yellow medicine” concoction we came across many years ago from an old horseman, that is useful and effective for healing scrapes, rub sores, and minor cuts on horses and humans (I will give that recipe in another post at some point) and a container of bute for the horses. I like the powdered bute that is mixed with water in a large syringe and administered by squirting it down the horse’s throat. They will often not eat pills or powder mixed into their feed, so it’s hard to know whether they got a full dose. I also carry a bottle of penicillin and a #20 hypodermic in case of serious infection (I once had a mare get stuck in one of her teets by a mesquite thorn, which became infected and swelled up nearly the size of a football overnight), however penicillin should be refrigerated, so you may have to toss it after the pack trip. Learn how to use these medications. Don’t just experiment and see what happens.
My first aid kit is contained in a plastic ammo box container that has proven to be very durable, riding in the bottom of a pannier.
So, that’s a pretty complete list of my general camp gear for my style of horse packing. I’m sure I’m forgetting a few things, but then I figure they’re probably items I can live without for a week or so. 🙂
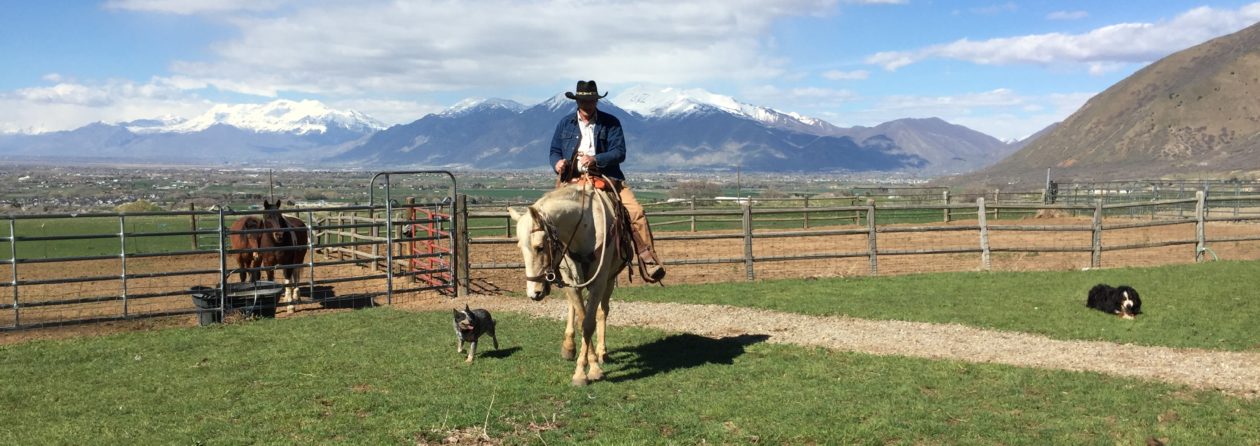


 Y
Y


You must be logged in to post a comment.