Now that my wife and I are settled in a house here in Salem, Utah, I have been able to get at least some of my tools out of storage and into my little workshop out back. Some of the first things I brought are my saddles and leather working tools.
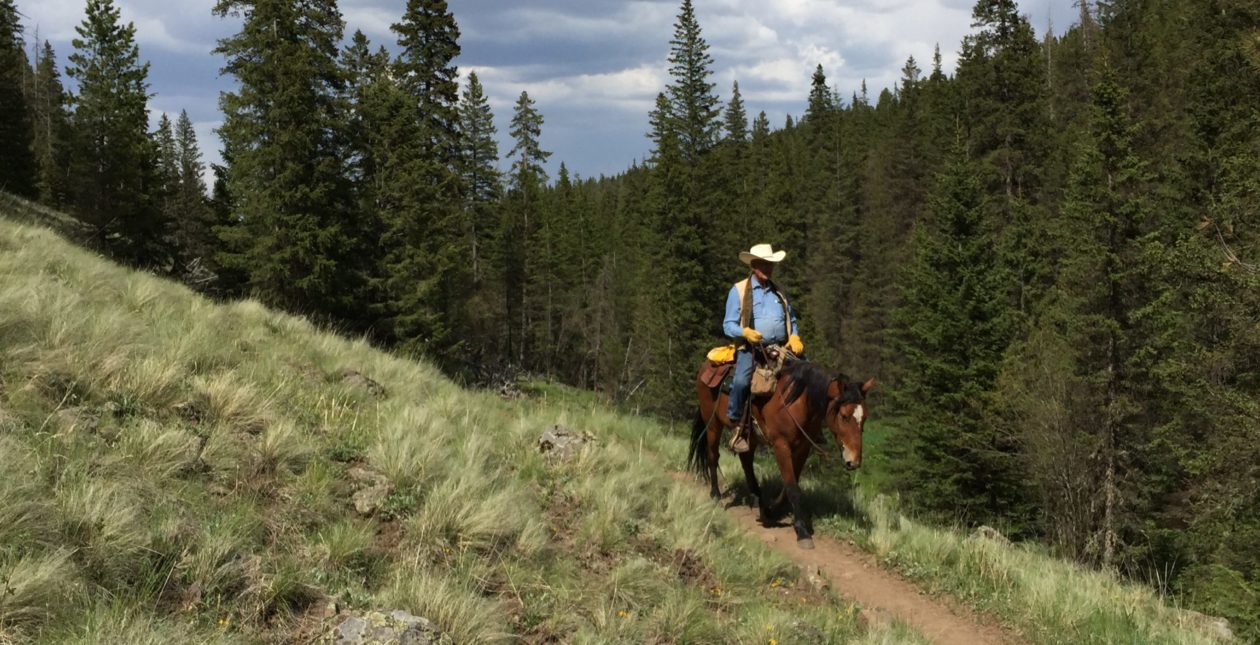
 A couple weeks ago I finished the work on my old Bighorn saddle, which needed to have the horn tightened up, new fleece, and new saddle strings. I finished that project and put the saddle immediately back to work on my new Missouri Fox Trotting Horse, Ranger. After having my last horse, Penny, beat my good Hamley Ranch Saddle to pieces, I decided that the Bighorn saddle was going to be my breaking and training saddle from now on.

Last week I got to looking at my old Hamley and decided it was time to start the repairs.
The saddle was in need of new saddle strings, new rear rigging leathers, new stirrup leathers, a new cantle binding, and possibly new fleece, as well as repair to a tear on the front left side of the seat jockey. I also need to soak and flatten both the rear jockeys and the skirts, as they have curled up pretty badly.
Just so you know why I didn’t just sell the old saddle, or hang it up for decoration, this particular saddle came to me from my wife’s family. It belonged to her uncle, Earl Richins. I got it because there was no one else in the family who would get any use from it. A couple years ago I contacted Hamley, which is still in business in Bend, Oregon, about the saddle. For a nominal fee, they took the saddle’s serial number and researched their files. They provided me with a Certificate of Authenticity for the saddle, which showed the saddle was made for Earl G. Richins, who paid $154.50 for it in 1947. It is a family heirloom and I intend to continue passing it down. I also intend to make it mine and hope that whomever I pass it to will make it theirs and use it as well. I’ve no use for a decorative saddle.
A little over a year ago I had a mare that was prone to panicking. She would occasionally just go bananas if I got her into a position where she didn’t understand what was happening and felt trapped. While working with her one day, trying to teach her to sidle up to a gate, so I could open it, she went berserk. She went back, fell over, lunged up, crashed into the gate, then over again she went. Then she jumped back up and crashed into a fence where a tree was overhanging. I had come off the first time she went down, so I was just standing by watching the rodeo, waiting for her to get finished with her tantrum. After crashing through the tree branches, she finally stopped and settled down. I went to her to make sure she wasn’t hurt, which she wasn’t, just a little shaken up. However, my saddle was another story completely.
When I got over to Penny, I could see a stick about the diameter of my thumb sticking out of the cantle binding of my precious antique Hamley saddle. Not only that, but as I checked for further damage, I found both rear rigging leathers about to tear away from the cinch ring, a large new scrape on the pommel, and a scratch across the cantle, where my spur had raked as I came off. It was only a day or so later that one of the stirrup leathers gave out and broke. So my Hamley was out of commission. After evaluating the work that would be required to “restore” the saddle to “collector” condition, I decided that it was simply out of my price range. Judging by what I have priced at Hamley and other saddlers, it would run in the area of $3500 to have the saddle restored. I decided that I would do the repairs myself and bring the saddle back to usable condition. I decided that as an aspiring saddle maker, this would be an excellent learning experience. While some may criticize me for learning on my Hamley saddle, in my opinion it was simply too far gone to be worth the expense of sending it back to Hamley for repair/restoration.
So, here I am about ready to do the repairs. By this time I have acquired most of the tools necessary for saddle making. I still lack some of the more expensive gadgets, such as a leather splitter, and I could always use a few more punches and strap-end cutters, but I have enough to do what must be done on the Hamley.
Last week I started on the repairs. I started by disassembling the saddle, as much as was necessary, so I could take a good look and evaluate all that needs to be done. Turns out the tree, a bullhide-wrapped wood tree, is in excellent condition. I was surprised to find that Hamley uses bronze stirrup hangers, rather than having the stirrup leathers pass over the saddle bars. The tree is solid as the day it was made and the bars are in good condition. I removed the old saddle strings, pulled the few nails holding the skirts to the bars, then removed the skirts. I removed the rear jockeys, then the rear rigging leathers. The stirrups had been removed months ago. The last thing I removed was the cantle binding. I pulled the seams loose and cut the threads with a sharp knife. I used a pair of pliars to remove the remaining thread from the stitching holes in the cantle. Click on an image for a slide show with the photos in full-size.


I decided the first project would be the cantle binding, as I dreaded it the most. The cantle binding is one place that really shows the craftsmanship, or lack thereof, of a saddle maker. This was to be my first cantle binding and I didn’t expect it to come out perfect, but I hoped it would come out well.
I started by reading up on the topic in the reference books I have bought along the way, including the three-volume set by Al and Ann Stohlman and another book by Davy Jones on saddle making and repair. I decided to follow the directions given by the Stohlmans.
I cut the new cantle binding out of 7/8 oz skirting leather, making the piece about 1-5/8″ wide by 30″ long, which were measurements I took off the saddle itself. I then made a stitching groove along both edges, about 1/8″ from the edge, as this would be a binding with exposed stitching on both the front and back. I edged and buffed the edges and skived the ends thin. I then soaked the binding in luke-warm water for a few minutes, until it stopped bubbling. After stripping off the excess water with my fingers, I put the binding into place on the cantle, stretching it tight and placing a 1/2″ #12 tack at each end, down under where it would be hidden by the seat jockey. I formed it as much as possible with my fingers, so that the edges fit nicely into place on the cantle where the old binding had been. I then let the binding sit until almost dry, going back and forming it with my fingers now and then as it dried.
Before the binding was completely dry (you want some moisture left in the leather), I removed it and finish trimmed the long end to fit properly, then re-skived that end. I applied rubber cement liberally to both the cantle and the cantle binding, however, as directed by the Stohlmans, I did not apply rubber cement to the very front portion of the underside of the cantle binding, so that it could be adjusted easily as it was put into place on the cantle. I then carefully placed the cantle binding into place on the cantle, working it into place with my fingers. A rub stick would have helped as well here, but I didn’t have one available. Both ends were tacked into place with two tacks. These will remain permanently.
At this point I ran a #5 overstitch wheel over the binding in the stitching groove to mark where I would cut the stitching holes with the awl. I then threaded two #517 stitching needles and sharpened my awl and went to work. I found right away that it is critical to have a good awl blade and have it razor sharp. There is a talent that is developed in using an awl. I got better as I went, but my first few holes through that thick cantle leather were difficult. I had a hard time getting the awl to penetrate perfectly straight, as I kept applying pressure that was not perfectly straight. I bent my awl blade slightly several times. Once bent, you just cannot straighten an awl blade perfectly. I was able to straighten and resharpen the awl blade enough that it worked, but I had difficulty in getting the awl to penetrate straight and emerge on the backside right where I wanted it to – in the stitching groove. I would watch to see where the blade was going to emerge, then I would pull it back and adjust until it emerged where I wanted it to.
I only got about 1/3 done on the binding that first evening, because there wasn’t enough light in the work area. I just couldn’t see well enough to see where the tip of the awl was emerging and I was tired, so rather than risking a major mistake, I left it for the following day.


 When I got back to the project, of course the binding had dried out completely. I decided to try stitching with it dry, as I didn’t like the way it came out while working on it damp. I found that when the leather was damp I tended to tighten the stitches too much and the leather would bunch a little, making the work look a bit rough. I found that when I stitch with the leather dry I liked the look better.
One saddle maker, Dusty Johnson, recommends drilling the stitching holes with a Dremel-type high-speed tool. He told me that by drilling the stitching holes, rather than cutting them with an awl, he is able to complete the stitching on a cantle binding in a matter of a half-hour, rather than about two hours with an awl (it took me much longer). I used Dusty’s technique to make my chaps and I find it makes my stitching look much more professional. I may try that the next time, but I was afraid it would show up on this binding where I changed methods. I finished the cantle binding stitching with an awl and with the leather dry.
 Another thing I am learning, slowly but surely, is to be consistent and apply the correct amount of pressure when I tighten each stitch. Toward the end of the stitching I pulled two stitches through the binding leather. They are visible if one looks, but not bad enough that I would tear it all off and start over…at least not on this saddle. All I can guess is that I came upon a weak area in the binding leather in that place, as I applied no more pressure there than anywhere else on the binding. It is possible I was applying too much pressure all along in tightening my stitches.
 I also found I tend to mark my cantle binding with my fingernails and tools as I stitch. This is something I really need to pay attention to , especially while working damp leather. Anything with an edge or corner that touches damp leather will leave a permanent impression. This is not a problem on this saddle, because it’s going to get a lot of marks on my pack trips anyway, but if I were doing this as a gift or a commission, it would look pretty poor. It gives my work a used look when it is brand new.
 At the end of the stitching I learned another thing. I did not pay enough attention to the angle at which I was inserting the awl while stitching around the binding. I ended up finishing the stitching on the front, but still lacked nearly 1/2″ in the back. I ended up creating another two stitches in the back, running them through existing stitches in the front, while creating a lock-stitch at the same time.
I will likely stain the cantle binding to try to get it closer to the color of the old original leather. I haven’t yet decided whether to do that or just let it age naturally with neatsfoot oil.
All-in-all, while I am not completely pleased with the appearance of my work on the cantle binding, I know it will be serviceable and it was an excellent learning project. I am sure my next cantle binding will reflect improved craftsmanship on my part. Below is a gallery of all the pictures I took for this post.


Next up: The rigging leathers.


You must be logged in to post a comment.