This evening I was writing in my journal and put to paper some thoughts about my love of trail riding and working with my horses. Thought I’d share them.
I used to tell myself that when I rode my horses I could think more clearly and that a good ride was what I needed to help me consider and have deep thoughts about any particular trouble or concern that was upon my mind at the time.
I was deceiving myself. It was just another excuse to go for a nice ride.
Riding my horses is my escape. It is freedom. No, it is more than that.
When I ride my horse, all of life’s worries, concerns, trials, and tribulations just seem to fade off into the background. When I am on the back of my horse, there are no worries. There is no trouble. Things seem to be right in the world.
When I am riding the trails on my horse I am not old; there is no age. There are no struggles. No aches and pains. I have no appointments. I am not late for anything. I have not missed any calls. Nobody needs to get in touch with me. I am not in a hurry for anything. My greatest concern revolves around whether to take the right fork or the left fork of the trail…if in fact the trail should have a fork…not that it matters. There are no decisions to be made that have any greater import than those necessary to continue the ride.
There is only myself and my horse and the relationship between us.
I think that’s what I enjoy the most – the relationship between myself and my horse. I like the partnership between the horse and me that riding requires. I enjoy the challenge, for both my horse and myself, that a particularly difficult section of trail may present and the feeling of having successfully negotiated it. I find myself bragging to others about my horse’s sure feet and solid mind and the trails we have been over. It gives me a sense of pride, approaching what I feel when my children are successful in their endeavors.
I love the feelings I get when my horses first begin to understand and willingly submit to new training elements I introduce. I even enjoy the occasional disagreements we have about how something should or should not be done.
Although I am not always as patient as I should be, neither are my horses. They forgive me and I them and we continue forward, one hoof in front of the other. One breath at a time. Passing from one scene into another. One valley to the next. Sometimes just to see what’s on the other side of the next hill or around the next bend in the trail.
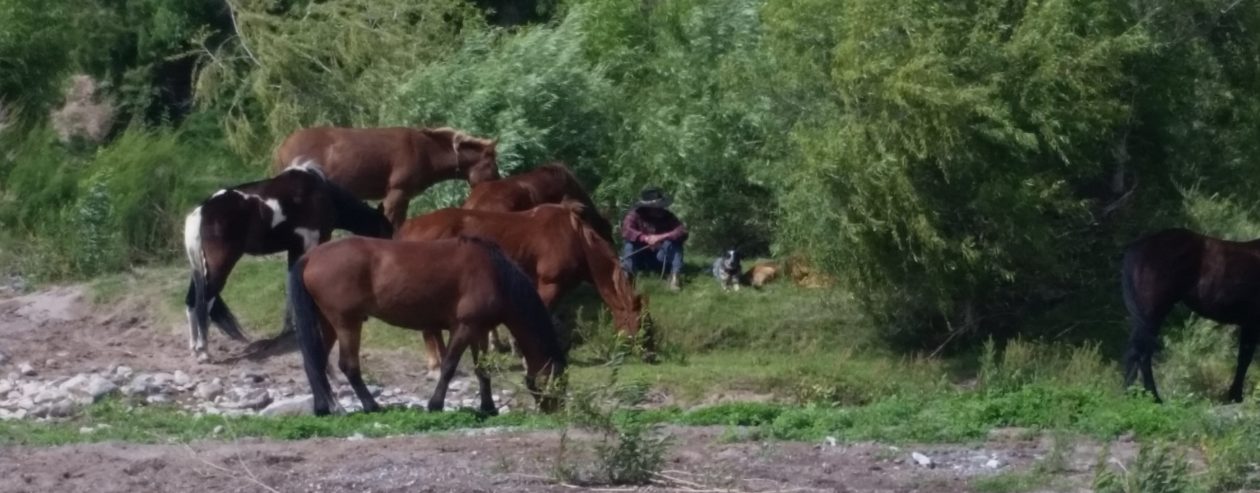
It has taken me a long time to find the two horses I now have, Lizzy and J Golden. I have never been much of a horse trader, but I have bought and sold a few while looking for a pair with the qualities I have sought. Highest on my list of qualifications? They must enjoy the trail as much as I. I think Lizzy and J do.
Lizzy
Me on my favorite trail/mountain horse, Lizzy, in Casto Canyon, central Utah, 2016
Pic by Ashley and Ryan Berg on the Mogollon Rim
Camp near “Sink Hole” just of of the “Rim Road”
Lizzy and her colt, Chief
I once read a bumper sticker with the following phrase:
“Not all who wander are lost.”
When I am on a horse, the ride is the destination; where we are headed is irrelevant.
Seems I have been so busy with life that I seem to be forgetting to live.
Hehehe. That sounds really good and rolls off the tongue nicely, but it really isn’t the truth. The truth is that I have, in fact, been busy, but not so busy that I couldn’t take the time to hammer out a few posts. I have been lazy and remiss. That is the fact. My mind has simply been on other things.
So, I’ll catch everybody up on what has been going on and what I have planned for the not-too-distant future.
Chief, brand new, not even an hour old.
First off, I’m sure my readers are aware that my mare Lizzy had her colt on September 14. He’s now two months old and growing fast. He’s a handsome fellow and will be a credit to his sire and dam. He was born a sorrel and white tobiano, but has since changed colors drastically, to black and white. He is still showing some sorrel highlights and there is some sorrel still in his mane and tail, but I’m pretty confident he’ll end up black and white. His registered name will be Touch the Clouds, named after a Sioux war chief from the late 1800s, known for his great height (he was about 6’5″ and 260 pounds by one account) and strength. His barn name is Chief. I have the papers in process, but had to call the Missouri Fox Trotter Horse Breeders Association and have them hold off when he started changing colors. His photos and description would have been wrong! I sent in a DNA kit as well, so he’ll be “gold-papered.”
Chief at one month, changing colors
Over the past several months I have been working to earn money to pay for some improvements on my place in Eagar, Arizona. I had actually planned to spend the money on refurbishing my horse trailer and finishing out the camper compartment this year, but after spending some time in Eagar with my parents and spending some time walking over and dreaming about my 20 acre parcel there, I decided my priority should be getting that place to where it can be productive and actually pay for itself.
So, a couple months ago I bought a load of 4-1/2″ pipe, so I could rebuild some fences, start a pipe fence on one side of the place, and build some corrals and a pole barn. Dad and I got started on it a few weeks ago.
In the process, I came across a tractor in Eagar that had been sitting in a yard for a long time. I made the owner an offer, which she accepted, and I took it home. Drove it home, actually…well, to my place there in Eagar. So I am now the proud owner of a 1962 John Deere 3010 Diesel tractor and several implements, all in need of some tender loving care to make them work again. I don’t know what it is about old stuff, but I thrill over making broken stuff work again.
My JD 3010 Diesel with post hole digger
The tractor is now running and working, after adding about $2,500 in parts to the initial cost of $1,500 (and $500 for the implements). I’m told I’m still under the value of the tractor, so I’m happy.
Last month I bought a new heavy-duty three-point post hole drill and a couple augers, which ran about $1200. Dad and I punched a bunch of holes with it and set some fence corners and line posts as well as all the upright posts for a pole barn and corrals. I also spent about $1,500 for lumber for the barn and shed roofs. Now I need to save up some money for the metal roofing and siding and some pipe for the pipe corrals and fences.
The corrals will be 16′ wide and 42′ long with a 32′ X 16′ hay barn at the east end and a shed roof covering the south end of the corrals. I like the plan and will likely expand it to add more corrals as the need arises.
Setting posts for corrals
As I increase my little herd, currently three horses and a colt, most of them will be kept on the place in Eagar most of the year. Several close relatives also keep their horses there. I hope to end up with several more horses and a couple mules eventually.
The plan is to split the 20 acres into four 5-acre pastures, with the southernmost being used for barns, corrals, arena, training area, and trailer parking. The other 15 acres will be pasture, which I hope to be able to irrigate from a well. There is a dry irrigation pond at the northwest corner of the place that used to have tail waters from two irrigation ditches running into it. A number of years ago the ditch company put those ditches in pipe and the former owner of my place sold off the irrigation shares, so the pond is dry. My intention is to hire somebody to expand and deepen the pond and level out the banks, so that it actually resembles a pond about an acre or so in extent. I hope to have a well drilled near it and install a windmill on it to fill the pond and maintain a constant flow. I will then irrigate the whole acreage from the pond.
My place, looking northward
My place has a well down at the southwest corner that has been tested at 65 gallons per minute. I’m in the process now of getting it back into working order – new pump and controller, well head, etc. However, 65 GPM is a bit low to effectively irrigate the whole 20 acres. If I can fill that pond from a separate well with a windmill on it, like plan to, I can irrigate directly from the pond at the flow rate I need to maintain the proper pressure and flow rate to the sprinklers.
As I was working all this out in my head (since I don’t actually have the money to do it right now) it occurred to me that my place might make a good place for folks coming to the White Mountains with their horses to stop over. I participate in a number of forums and facebook pages about horses and I have noted that every day there are folks seeking “horse camps” where they can park their living-quarters trailer overnight as they pass through the area, or for several days while they ride local trails. I posted a query to one of those groups to try to gauge the interest and see whether it would be a good idea for me to try to place several short-stay RV spaces on my place for horse-campers. I was surprised by the response. It appears there is plenty of demand for such a place, even in little old Eagar, Arizona! There just aren’t enough places that cater to horse folks.
I also received more than one query in the responses about long-term horse boarding on the place. Maybe I’ve found a way to make the place support itself after all.
So, my plan is to approach the Town of Eagar and find out whether they will allow me a permit to install maybe 10 short-stay RV slots on the place, along with a bathroom and shower, with full hookups and a dump station. If the town allows it, I will start with five spaces and go from there. l’m not sure they will allow it. If not, I’ll just look at boarding horses. We’ll see how it goes.
And now for the grand finale – for this post, at least. I have set the dates (tentatively) for the next leg of my Mexico-to-Canada trek. Dad and I have discussed ways to make our pack trip a bit easier for our better-halves to deal with. We decided that if we cut it up into legs of 7-10 days, rather than a month at a time, we might just be able to finish the ride before we’re both too old to ride.
So, since we had to stop in 2016 at Flagstaff, Arizona, having made a grand total of 555 miles since we started (at least that’s what the GPS said), we plan to start right where we stopped and go to the North Rim of the Grand Canyon. Yes, we will be crossing the Grand Canyon on this leg…finally! As close as I can figure, the distance to the South Rim is about 108 miles. The distance rim-to-rim is about 22 miles or a bit more, so we’re looking at a grand total of about 130 miles. Toss in two rest days and maybe another day at the Grand Canyon as a fudge-factor, and I think this will be a 10 or 11-day trip.
So, I will be applying for a back-country camp permit for the Grand Canyon for May 1 and 2, 2018. Which means we’ll be departing Flagstaff on April 23, 2018. If we have a mild winter, that time frame should have good grass growing along our route to keep the horses in weight without us having to haul all our feed and should have the water sources along the route full. At the same time, it should get us through the Grand Canyon before the mad summer rush begins.
We will end this third leg of our trip at the North Rim, where we’ll be picked up to return us and our horses home. That should have us home by the weekend of May 5.
A couple of my riding friends have expressed a wish to make the trip with us, so this should be fair warning to them! I’ll get in touch with you shortly, so we can all plan toward it.
Over the past several months, a number of friends and followers of my blog have asked how they might contribute to helping Dad and me get underway on the second leg of our Mexico-to-Canada horse pack trip. I have always been pretty much a “do-it-yourself” kind of guy, having been raised by a father who was that way, so asking for assistance is sometimes difficult. However, we have been the grateful recipients of help in many ways, including support on the trail, guides, farriers, transportation, gear, stopover points, and also a bit of financial help.
Over the years, I have enjoyed the good feelings I get when I have had opportunity to share in another’s success by helping in any way I can. Sometimes the only way I can help is by a small financial contribution. While time is always more valuable than money, good causes are always worthy of help and sometimes there is no other way for me to contribute positively than to donate financially. Well, maybe it’s our turn to be on the receiving end.
This adventure of ours has been far more expensive than I had anticipated. I have had to draw from family savings because the expenses have exceeded the income I have been able to bring in from my current post-retirement work. I purchased almost all our gear last year, including a well-used 4-horse trailer. Our total expenses for last year’s trip exceeded $23,000.
This year I purchased about $1,500 worth of gear as well as a new horse for the trip, as I had to replace my Fox Trotter mare, who is game, but proved not to be the right horse for the trip. Many of the expenses for this year’s trip have been unanticipated. Last month, on the return from our tune-up trip to Moab, Utah, I blew the engine in my truck. The rebuild and other repairs associated with getting the truck ready for this year’s trip have run in excess of $10,000 over the past two months. Since I bought the horse trailer I have blown four tires on the rear axle. Two were brand new tires. Last week I took the trailer in to have it checked, to see what might be the cause. The problem was diagnosed as a slightly bent rear axle. Having a new axle installed, along with having the front bearings repacked and the brakes and backing plates replaced, ran me $2170. The trailer is still at the shop with further adjustments being made. Hopefully, this will fix the problem of having to buy a new set of trailer tires every other trip. Last week I replaced four tires on my truck. There went another $1,000.
My plan for the year was to be able to cover all our expenses for gear, vehicle, fuel, etc, and have $5,000 in my trip account before I started. All the above unanticipated expenses have shot that plan all to heck and I’m back into family savings. My good wife, bless her heart, is still supportive of our trip.
Recently we received good news that much of our horse feed would be donated by an anonymous donor. Friends and family are donating time. Still to come are expenses for fuel for the trip, including fuel for our support help, horse feed, people feed, and other expenses we will incur once we actually start making tracks.
For those of you who have been following the blog and enjoying our father and son adventure through my writing and who have been asking how you may help, I have created a “Donate” button on the website. It connects to my PayPal account. You will find a “Donate” menu item on the main menu. It will take you to the page with the PayPal Donate button. For those who wish it, I will keep the donations confidential. For those who don’t mind, I will create a list of contributors to post on the website after the ride this year is done.
Those of you who have been following my blog awhile know that I did quite a bit of research on various configurations of pack saddles before finally settling on the Decker-style Phillips Formfitter pack saddles, from Outfitters Pack Station, for our Mexico-to-Canada horse pack trip. As Dad already had two crossbuck pack saddles, we ended up using my two Deckers with manties and Dad’s two crossbucks with Utah-style paniers. It’s time for my comparison and evaluation.
Crossbuck pack saddle tree
To provide a little background, crossbuck pack saddles, sometimes called sawbuck pack saddles, have been used in North America for at least a couple hundred years. They consist of two crossed wooden “crutches”, similar to the way a sawbuck is built, which is where the name comes from (a sawbuck is two crossed beams over which a log is laid to be cut with a saw). Paniers, which are large bags or hard-sided boxes, are hung by straps from the crossbucks. Traditionally, soft paniers, often called “Utah Paniers” were used. These paniers are often covered with a tarp, which is tied in place with a diamond hitch, which improves the water-resistance of the pack and holds items tied on top of the packs.
While hard-sided paniers are available and quite utilitarian, we decided to go the traditional route. That’s what Dad and I have always used and we saw no reason to change. However, during our passage through the Chiricahua mountains, one of the riders who joined us for a few days packed hard paniers on his mule and I was much impressed. In camp, these hard paniers could be converted into seats or tables. I expect I’ll eventually get a set of these and give up on my traditional bent. Also, there are bear-resistant hard paniers available from a number of suppliers, for those areas where they may be required.
Sometime around the turn of the 20th century, a new-style of pack saddle was invented, which is now commonly called the Decker-style pack saddle. The Decker pack saddle, characterized by metal bows, or arches, to which loads are strapped, has proven its usefulness over the past century, due to its versatility. One can hang about any kind of load imaginable from a Decker-style pack saddle with a little ingenuity. This style of pack saddle eventually became the standard in the northwestern United States, while the crossbuck has remained king in the southwestern U.S.. Why this is so, I think I discovered during our pack trip and I will discuss that in another post.
Our mustang, Jimbo, with the mantied load on a Phillips Formfitter pack saddle
For the kind of loads we carried on our pack trip, manties are used to contain the cargo, which are then tied to the Decker pack saddle. Manties are heavy canvas tarps, normally measuring about 7 X 8 feet, in which the cargo is wrapped and tied into a pack. One manty pack is tied to each side of the pack saddle to balance the load. Manties of uneven size and/or weight may be balanced by adjusting the way they are tied to the saddle. While top packs may be tied to these pack saddles, it is not commonly done, however the manties may be tied as large or small as required. The pack saddles I finally settled on have arches that are made to handle not only manties, but also Utah Paniers.
Phillips Formfitter
The Phillips Formfitter pack saddle also has other features that attracted me, such as the adjustable-angle saddle bars and the fleece pads attached to the bars. My reasoning for this selection was that the adjustable bars would answer the problem of the different conformations of the several horses on which we intended to use them. Our remuda consisted of two Missouri Fox Trotters, two Quarter Horses, one mustang, and one mule, ranging from 16 hands to 13, all with very different backs among them.
My concerns with regard to this pack saddle were limited to two things: Would the adjustable saddle bars be able to hold the pack loads in place like a solid pack saddle would? And, would the narrow saddle bars, configured similar to a riding saddle’s bars, sufficiently distribute the loads on the horses’ backs, so as to avoid pressure points and saddle sores?
Before the trip, I discussed these and other concerns about the pack saddles with Wade, at Outfitters Pack Station. We also discussed whether double cinchas, such as are commonly used on crossbuck pack saddles, might be better for our trip. I decided to go with the single cincha, since that is the configuration I have seen on most Decker-style pack saddles. I figured that if they proved insufficient, I could order the double cincha rigs at the end of the first leg of our trip. On the Phillips Formfitter, the cincha rigging is changeable by simply unbuckling one and replacing it with the other. Wade also gave me some advice on setting up the rigging to ride properly on the pack animal.
During the first 200 miles or so of our trip, we knew we would be packing feed for the horses, since there is little feed available for grazing along our route in the lower desert areas of Arizona. We decided on Equidine pellets in 50 pound sacks, as it would be easy to pack in manties and to balance as a load. We started our trip with 400 pounds of feed, split among two pack horses, packed in manties on my Phillips Formfitter pack saddles. With the help of friends, we were able to re-supply with feed as needed. The rest of our gear was packed in paniers on Dad’s crossbucks. Our plan was to have two animals under riding saddle, two packed heavy, and two packed light, then rotate every day or so to keep all the horses adequately rested. We also planned for two rest days per week. On the first day, all the animals were packed pretty heavy, but the feed went down at a rate of nearly 120 pounds per day, so the packs lightened up quickly.
I set my pack saddles up according to Wade’s advice, however, both Dad and I felt the 3/4″ wool felt pack saddle pads we had were insufficient for the loads we were packing on the horses. We decided to place a regular saddle pad over top of the pack saddle pad for extra protection for the pack animals’ backs. As it turned out, that was a mistake with the Phillips Formfitter.
The first day we made approximately 10 miles. In that distance we had to re-settle the decker pack saddles several times. I was beginning to believe I had made a serious mistake in not ordering the double cinchas. By the end of the second day, in which we made over 16 miles, we had stopped and re-settled the Decker pack saddles a number of times. It seemed they would start to turn every several miles, regardless of how well balanced and tied the load was, or how tight the cinch was. We had no such problems with the crossbuck pack saddles, which were padded in the same way.
Saddle sore on the QH Daisy
By the end of the second day, our large, heavy-built Quarter Horse mare had developed a saddle sore high on her withers. After looking at the location of the saddle sore and considering how often we had to re-settle her Decker pack saddle, we determined that we had over-padded the pack saddles, causing them to “woggle” on the horses’ backs. After that, we packed the Phillips Formfitter saddles without the additional saddle pads and had no further problems with the saddles turning or with saddle sores on any of the other horses. After that point, the Formfitter pack saddles stayed in place with the single cincha and performed very satisfactorily. Lesson learned: Do not over-pad with these pack saddles.
Incidentally, we continued to double-pad the crossbuck pack saddles on the mule and one Quarter Horse and had no trouble with the saddles turning or saddle sores.
I was very pleased with the quality and adjustability of the rigging on the Phillips Formfitter pack saddles. I was able to make the saddles fit properly on my 16-hand, tall-withered, short-backed, tall-spined, deep-chested, bony-hind quartered, Missouri Fox Trotter gelding, as well as the 15-hand, long-torso, flat-backed, broad-chested, wide-rumped, Quarter Horse. As for the mustang, he was fairly in-between the other two and we had no trouble at all with fitting the pack saddles to his conformation.
The one horse that had problems with the Phillips Form Fitter rigging was my 4 year-old Missouri Fox Trotter mare. This mare, Lizzy, has a walk to die for under saddle, but it is that same walk that makes her unsuitable as a pack horse. Her long-strided, swinging walking motion caused her to get rub sores from both the breast strap and the breeching, despite the fact that Wade makes those straps with the edges rolled with a light, soft leather. I found Lizzy also got rub sores from my riding saddle breast strap, so it wasn’t the pack saddle rigging at fault, but simply that my mare has such movement in her strides that she simply gets rub sores. Consequently, Lizzy spent more time than anticipated under my riding saddle with the breast strap stowed in the packs. My other Fox Trotter, Ranger, had no such problems and ended up under the pack saddle more than planned.
On the Fox Trotters, we had to set the spider way up on the croop to avoid rub sores
The one piece of rigging on the Phillips Formfitter saddles that caused problems on both Fox Trotters, was the spider, which is the piece that holds the breeching in place on the croop of the horse. It should ride about half-way between the point of the croop and the horse’s tail. This piece had rubbed deep sores on both my Fox Trotters’ rumps before I noticed it. I had to adjust the spiders so that they rode right on top of the horses’ croop to alleviate the problem. When adjusted as it is supposed to ride, the motion and conformation of the Fox Trotters caused the front edge of the spider to dig into the hair and subsequently the flesh of the horses. I think this problem could be remedied with a slight re-design of the spider. The spider is made with two layers of heavy leather with fairly sharp edges. I think a fleece pad under the spider, a different shape, or possibly rolled edges like the breast strap and breeching have, would fix the problem. I must say, however, that the only horses that experienced this problem were the Fox Trotters. The Quarter Horse and the mustang had no problem with the spider, or any other part of the rigging, as-is. I intend to design a removable fleece pad for my saddles, for use with my Fox Trotters.
The Packer’s Field Manual, by Bob Hoverson
I used the book “Packer’s Field Manual,” by Bob Hoverson, as a guide for setting up and using my Decker pack saddles. I found his book to be quite complete and useful. I learned to tie up manties quickly and well, using the knots and hitches he shows in the book. I set up each pack saddle with two “sling ropes” of about 28 feet length attached to the front saddle arch with a loop. Each rope runs through the rear hoops and is looped around each pack in a way that suspends it solidly from the saddle arches. The packs are weighed and balanced using a pack scale before loading, however, if one pack ends up slightly larger or heavier, balance can be achieved by setting the heavy pack a little higher on the saddle, thus changing its center of balance and making the load to ride balanced.
Decker-style pack saddles differ from traditional crossbucks not only in the way they are made, but also in the way they are equipped. While our crossbucks were pretty bare and light on rigging, the Phillips Formfitters were heavy on rigging. They also, as do all Decker-style saddles, use a protective canvas and wood shield, known as a “halfbreed” or “Arapajo”, apparently named for one of the men who originally designed and used this type of pack saddle. The halfbreed is a canvas layer that fits over top of the Decker pack saddle and has sideboards of 1 X 4 pine that protect the horse’s sides from the packs and spread the load. This is particularly important when packing items such as lumber, fence posts, or gravel. By the time we finished the first leg of the trip (355 miles), both Fox Trotters and one Quarter Horse were starting to show the beginnings of saddle sores where the side boards rode against their sides from the heavy loads of the feed sacks. The mustang, on the other hand, showed not a single mark…anywhere.
The Phillips Formfitter pack saddle is made with a leather skirt covering the saddle bars, with wool fleece on the underside. This fleece is intended to increase the padding and keep the saddle in place better. In comparison, our crossbuck pack saddles are simply made of wood. For the most part we had no trouble with the Phillips Formfitter staying in place…at least once we learned not to over-pad them, however, on our mustang we had a problem with the saddle pad crawling out from under the pack saddle. We had to stop and reset his saddle at least twice during the trip to move the saddle pad forward. We did not experience this on any other horse.
One of our crossbucks on Honey
Again, our crossbuck pack saddles were very sparse on rigging. Just a strap for the breast strap and a couple more for the breeching. They were simple to place, rig, load, and remove. They caused no saddle sores on any of the animals, and never threatened to turn and dump a load, despite our mule’s propensity to roll every time we stopped for a rest. We used the crossbucks on both of the two Quarter Horses and the mustang with similar results. Having said that, I must also add that the heaviest load we ever put on the crossbuck pack saddles was about 170 pounds and they often carried under 150, whereas our Phillips Formfitters were often loaded with up to 200 pounds of feed.
One problem we had with Dad’s old pack saddles was the fact that they are both in dire need of having all the leather replaced. Still, they made it through our trip with only one broken strap – a breast strap, which we repaired with a piece of nylon webbing we found along the trail.
Over the 28 days, Dad and I tried to streamline our morning camp-breaking ritual a number of ways, but we found that with four pack animals, and having to pack our camp and make up four manty packs and four paniers, we simply could not do it in less than about four hours. We discovered that packing the paniers was a simple matter of placing things in the bags in a fairly even manner, then weighing each panier with the pack scale and adjusting as necessary, normally a matter of removing an item from the heavy panier and placing it in the light one. Making up manties, on the other hand, was a matter of building two manties at one time, so that we could estimate that each would be fairly equal in size and weight, then wrapping each one and tying it up. Then, after they were completely done, weighing them to make sure the two packs were within one pound or so of each other. If they were significantly different in weight, they were unpacked, adjusted, and repacked. It was easy to balance them when a pack consisted of one or two bags of feed, but when they contained items of camp gear, after the feed was used, then it was a pain. Additionally, tying up the manties is very hard on the hands. The canvas and rope chafed and rubbed my hands to the degree that it became quite painful for about the first two weeks of the trip, until my hands toughened up.
The one thing we found handy about the manties was that we used the canvas tarps as a ground sheet and bed cover (we prefer sleeping out in the open and did not take a tent). By the end of the trip we had decided that for our kind of pack trips, mantying was simply an unnecessary chore. I can see how they would be the way to go for an outfitter with odd-sized items to pack, but for us, it just isn’t practical.
Utah-style paniers on a Phillips Formfitter pack saddle
For the last three days of the trip we decided that we would go with two pack animals and send one crossbuck pack saddle and one Phillips Formfitter home with our two mares. We also decided that mantying packs was a tedious task we could do without. We finished our trip using four paniers, two of which hung on either side of a Phillips Formfitter pack saddle.
In the final analysis, after 355 miles and 28 days on the trail, we learned that while Decker-style packing is very versatile, making up four manties every morning was terribly time-consuming, tedious, and very hard on the hands. Yes, Decker-style packing is versatile, but panier-style packing is much easier and takes less time and effort to pack, unpack, and load on the pack animal. Even with a cover and diamond hitch, the paniers were easier to pack than the manties. Hard paniers would be an even simpler option.
As for my Phillips Formfitter pack saddles, I am pleased with them and they performed well – once we learned the lesson about over-padding them. They are very well made, both with regard to materials and workmanship. However, I cannot say they out-performed the old traditional crossbuck pack saddles. Though, had we loaded up the crossbucks with the weights with which we loaded the Formfitters at times, things might have been different.
I will continue to use the Phillips Formfitter pack saddles due to their adjustability and versatility, but I will use them with paniers unless it is absolutely necessary to use manties. They will go with us when we start again next spring. While we had two horses that experienced saddle sores and rub sores, I cannot blame that on the pack saddles and do not believe they are at fault. These saddles allow me to choose between panier packing, with both soft and hard paniers, or to go with manties for odd-shaped loads.
For the type of horse packing Dad and I do, panier packing will remain our standard. Consequently, as far as utility is concerned, it is a wash between the Decker and Crossbuck pack saddles. While the Deckers are definitely more versatile in the ways they can be packed, we will be using them for handling paniers, which the crossbucks are specifically made for and do very well. Knowing what I know now, I would choose a standard crossbuck pack saddle over a standard Decker pack saddle for the kind of packing I do.
As far as the Phillips Formfitters are concerned, the quality of workmanship and materials, and the adjustability of the rigging and saddle bars are important to me and I remain pleased with them. I will use them pretty much as I would use a crossbuck pack saddle in the future, but will still have the added versatility when needed. In my opinion, the price tag of $699 for a fully outfitted Phillips Formfitter pack saddle is an excellent value when compared with prices for other brands and styles of pack saddles similarly outfitted. I expect mine will cover many miles on my pack animals before I hang up my spurs.
It took us longer than we planned, and my estimated mileage was slightly off, but the first leg of our Mexico-to-Canada horse pack trip is complete.
We departed Eagar, Arizona on Friday, April 10, with the help of family and friends who drove trucks and hauled trailers stuffed with horses and gear. We arrived at our designated starting point just before dark that evening. Dad and I stayed with the horses and my four-horse trailer for the night. One of our drivers headed home, while the others, my sister, brother-in-law, and nephew, got a room in Douglas. They returned the following morning to help us get packed up and started and to haul my truck and trailer back to Eagar.
The following morning, Saturday, April 11, Dad and I arose about sunup and began by feeding the horses and getting our gear out of the trailer and getting it sorted for packing. A couple of US Border Patrol Agents stopped by to visit. They had their horses an we invited them to ride with us a ways. They accepted the invitation, but before we were ready to start making tracks, they got called away to monitor a group of Mexican citizens that appeared to be preparing to illegally cross the border.
We started at the US/Mexico border about 18 miles east of Douglas, Arizona, near where Silver Creek crosses the border. It also happens to be where the monument to the Mormon Battalion stands.
Departure at the Monument for the Mormon Battalion
For those who don’t know the history of the Mormon Battalion, during the Mexican-American War (1846-1848), the whole membership of the Church of Jesus Christ of Latter-Day Saints, also known as Mormons, were making their exodus from Missouri and points east to the Salt Lake Valley, which was then in Mexican territory. Certain individuals in the US Government feared the Mormons were fleeing the United States, due to the persecution they had experienced in Missouri and the lack of any help or redress from the US Government, and that they would become Mexican citizens and fight against the US. The US Government sent forces to stop the Mormons from leaving the US, but once they actually met with representatives of the church, their fears were assuaged. Brigham Young called for volunteers to join the US forces to help fight against Mexico and drive them from the territories later claimed by the US, including most of the current southwestern United States. More than 500 volunteers joined what became known as the Mormon Battalion, leaving their families and friends to make their way west, trusting to the Lord and the other members of the church to care for them.
The Mormon Battalion trekked from Council Bluffs, Iowa to San Diego, California without a single hostile engagement, as Mexican forces fled southward. The battalion raised the first American flag over Tucson, Arizona, opened a southern route for future wagon trains bringing immigrants to New Mexico, Arizona, and California, and was instrumental in the settlement of much of the southwest of the United States of America. Former members of the Mormon Battalion were among the first discoverers of gold in California, which initiated the famous California gold rush.
There are several monuments in the southwest to the Mormon Battalion, and being Mormons ourselves, we felt fortunate to have started our trek at one of these historic sites.
I will mention here our gratitude to the US Border Patrol out of Douglas and Safford, for their assistance in getting permission from several ranchers for us to cross their range. Their help in selecting routes, obtaining permissions, and even guiding us through the Chiricahua Mountains was invaluable to us and to the success of our endeavor. During the first several days of our trip we were visited by their officers several times and were always provided with good information and help for our trip. They also kept us posted on any groups of illegal aliens and suspected drug traffickers they were monitoring, and helped us select routes that kept us out of harm’s way. I will provide more detailed information about their help in future posts.
Our route took us north from the US/Mex border, following Silver Creek to the Bar-M Ranch, where we turned more northeast, crossing US Highway 80 just west of Boss Ranch Road. We followed Boss Ranch Road, crossing Boss Ranch by permission of the owner, making camp in Half Moon Valley. From there we tracked northeastward, up past High Lonesome Spring to Texas Canyon Road. We followed Texas Canyon Road to Rucker Canyon Road ,which we followed northeast to North Fork.
Heading up North Fork Trail in the Chiricahuas
At North Fork we met with Joshua Jensen and Al Smith, who acted as our guides through the roughest part of the Chiricahuas and rode with us for three days. They took us up North Fork to the USFS lookout tower on Monte Vista Peak, then across the Crest Trail, and finally into Whitetail Canyon, through which we departed the Chiricahua Mountains. Both Josh and Al left us at Whitetail Canyon and Dad and I made our way northward to San Simon, where we crossed Interstate 10, passing underneath it traveling along San Simon Wash. We followed San Simon Wash northward toward Safford, until we had to leave it to find water for our horses. We ended up on a ranch road which took us past stock watering wells spaced about five miles, or so, apart and which led generally in the direction we needed to go. Thanks to Ron Mahan, of San Simon, for his help in selecting a favorable route through that dry desert area.
Nearing Safford, Az
We made Safford on Thursday, April 23, which was about 3 days or so behind our planned schedule. We stopped at Joshua Jensen’s place, which he and his wife were gracious enough to allow us to use as a rest stop and re-supply station. While there we had Al Smith shoe our mule. Josh allowed us to use his pickup, so we headed into town for supplies. We also used the assistance of Al Smith to scout a suitable and safe route northward from Safford. With his help, as well as advice from the local Bureau of Land Management agents at the Safford office, we decided to avoid the problems and dangers of following the Gila and San Francisco Rivers, both of which are known to be choked with willows and are notoriously dangerous for livestock, due to quicksands. We determined to take a route that passed south of the Gila, skirting the Gila Box, passing south of Clifton by way of a power line service road and connecting with the Black Hills Scenic Byway. We crossed Highway 191 south of Clifton, then passed through Verde Lee and Loma Linda, finally hitting Rattlesnake Road, which took us into the mountains east of Clifton.
Rattlesnake Road eventually gave way to a USFS road which led up Rattlesnake Canyon to Rattlesnake Gap. This trail was, without any doubt, the steepest climb and roughest mile I have ever taken a horse over. It is one heck of a trail. Once over the top, though, it was a nice ride. I’ll detail that one later as well. I took a bit of video footage of it.
From Rattlesnake Gap, we followed the two-track ranch road, designated as USFS #215, I believe, which joined USFS #212 about 16 miles later, near Martinez Ranch, on the San Francisco River. We then followed the San Francisco west about two miles to the confluence of it and the Blue River, where we turned north to follow the Blue. The topo map showed that the canyon walls of the Blue, for the first two miles were pretty near sheer and quite narrow and that there would be no leaving the river bottom in that space. Not wanting to get trapped in a river bottom choked with willows, we took an old ranch trail out of the bottom up onto Sunflower Mesa. This turned out to be quite fortuitous, as we ended up finding a cowboy camp with a running spring, corral, and even a tent at Pat Corral on Pat Mesa. As it was Friday evening, the hands apparently had gone into town for the weekend. We spent a very comfortable camp night there. We left them a note, thanking them for the use of their camp. They responded through facebook, inviting us back for a visit. I hope we can make it one day. Thanks, Ruth Brockman and the crew from the Turkey Creek Ranch.
The following day we continued north on Pat Mesa, until we reached Pigeon Creek. There we were trying to make a choice whether to continue on the two-track we were following, which was rough and steep, or to go down Pigeon Creek to the Blue and follow the Blue up to Juan Miller Road. The route through the Blue would save us up to four miles, while the road was more sure. We decided to take the sure route and stick with the road.
As we came up out of Pigeon Creek, we met a hiker. As we talked, suddenly the both of us realized we had been in communication nearly 18 months earlier, through the Internet, about routes through this area. Brett Tucker owns the Grand Enchantment Trail website. He is a long-distance hiker who has documented a number of foot trails in New Mexico and Arizona. What a serendipitous coincidence that we would meet on this trail at this point. After talking a few minutes, Brett convinced us to head back down Pigeon Creek to the Blue and follow the Blue on up to Juan Miller Road. We did that, and soon found ourselves starting the most spectacular part of our ride. Thanks again, Brett.
The ride up the Blue was not an easy trail, because we were essentially making our own trail as we went. We found the occasional cow trail, but for the most part we were making our own way. However, surprisingly, the river bottom was neither choked, nor narrow. We had to do very little “brush-busting” to make our way through and the mile-and-a-bit to Juan Miller Road melted away pretty quickly.
Once we hit Juan Miller Road, the only east-west thoroughfare through this part of Arizona, we headed west to hit a four-wheel-drive-only two-track that follows the hills above the Blue northward for about three miles or so, to the Fritz Ranch, an abandoned historic ranch now owned by the USFS. From there we joined Blue Trail #101, which, if it actually existed, would have been a nice ride. However, the trail has not been maintained in many years and following it was impossible most of the time. It was more like following cow trails, and, in fact, probably was exactly that. Again, the river bottom was wide and we had to do little brush-busting. The trail was a little rough on the horses, due to having to follow the river bed at times, where the river rocks made footing uneven and tricky, but at least it was rather level.
About a half mile up the Blue from Fritz Ranch, we made camp Saturday evening and there we stayed for our Sunday rest. It was a nice camp, plenty of grass for the horses, and good water for us as well. We learned to cherish our Sunday rests. They were very important, not only for ourselves, but especially for our stock.
The following Monday we continued up the Blue, enjoying some spectacular scenery along the way. We made 26 miles that day and reached our rest station at the cabin of Dick and Jean Goodman, near the old Blue Post Office, long after dark. Dick and Jean treated us to some excellent rest and even better food. Dick made arrangements for our horses in the corrals of a neighbor. We rested again on Tuesday, which was sorely needed after the previous day’s ride.
Coming out of the Blue on Red Hills Road
On Wednesday we headed north again, on the Red Hills Road. We contemplated taking the Red Hills Trail, but after the Wallow Fire a few short years ago, the best information we had indicated the trails from the Blue to the top were un pretty poor condition, and we didn’t want to have to spend time hacking our way to the top, about 4,500 feet above the river bottom.
We reached the top in the late afternoon and made camp near a set of corrals just south of Beaverhead on highway 191. A friend had left us a bale of hay at the corrals, which was a welcome supplement to our horse feed, after such a hard climb. Thanks Jimmy Joy.
This was one of the nicest camps we made during the trip and we celebrated with a campfire, one of three we made during the entire trip (all our cooking was done on a single-burner propane stove). Our elevation was about 8,500 feet, as I recall. The following morning I was treated to watch about 8 elk pass calmly through the woods near our camp.
Camp at the corrals on Highway 191
From that camp, we followed USFS #26 Road for about 10 miles, where it dead-ended into #24 Road. We followed #24 north to #25J, where we took that road as a means of getting off #24, which is one of the main roads through the White Mountains of Arizona. We found a nice camp with a spring near by for the horses. The night was cold at over 9,000 feet, and we got rained on during the night. In the morning there was ice on our tarps. Still it was one of the nicest camps of our trip, meriting a campfire for the evening rest.
Out on top, White Mountains
The following day we made the remaining 22.5 miles into Eagar, arriving in the early evening before dark. We had pushed hard during the day, to outrun the weather moving in. We heard thunder and had a bit of snow fall on us. At over 9,000 feet elevation, cold weather is nothing to mess with. Our horses were tired as we made our way down into Eagar. We turned them loose in my 20 acre pasture for a well-deserved rest and headed to my parents’ home.
The first leg of the trip was over. By my GPS we traveled 355.2 miles. It took us 28 days – four weeks to the day.
Now for decision time.
This first leg of our Mexico-to-Canada pack trip was designed to be a “shake-out” for us. Our plan was to take our rest here in Eagar, evaluate ourselves, our horses, and our gear, then make decisions and adjustments for the rest of the trip. We hoped to continue our trip after a few days’ rest.
We learned a lot during this first 355 miles. We learned that we had grossly overestimated our travel miles per day and underestimated the miles of our route. We now know that 15 miles per day is a realistic figure to plan on. As for our route going forward, much of our travel will be on the Arizona Trail, which is fully documented for mileage, somewhat maintained, and planned out, and the roughest part of our trip is now behind us. However, we are currently more than seven days behind our projected schedule, which means our plans for crossing the Grand Canyon are not going to work out. I’m going to have to cancel the reservations at Mather Campground and reschedule.
We learned that my traveling companion, Clancy, my Blue Heeler, simply cannot make the miles. He’s good for a day or two, but he simply cannot make multiple days of 15-20 miles. I ended up having to carry him on my horse several days, which caused sore backs on my Fox Trotters. We ended up sending him home with my mother from Dick’s place on the Blue. Clancy will have to miss out on the rest of the trip.
We learned that at least two of our horses are not the right horses for this kind of pack trip. The Quarter Horse mare I borowed got saddle sores right off and no matter how lightly we loaded her, we could not get her over them. She’s going to have some healing to do. My Fox Trotter mare, Lizzy, has a very fast walk and she loves to really move out, which I love, but her motion as she walks causes our pack saddle rigging to rub sores on her. Once her back got sore while she was under my riding saddle, we couldn’t even pack her lightly, because the pack saddle rigging would rub her raw in places. We sent the two mares to my pasture in Eagar from Dick’s place on the Blue. Thanks Kelly LeSueur, for coming to pick them up.
We learned that with four pack horses, there simply isn’t any way for us to break camp in the morning in less than 4 hours, costing us a lot of miles on the trail each day and a lot of extra work. While it was necessary for us to haul feed with us (we hauled up to 400 pounds of pelletized feed at a time) in the low desert areas of southern Arizona, once we got up into the higher latitudes and elevations, there was plenty of grass for the horses. We hope we can continue the trip with four horses, rather than six.
We had a couple of near disastrous wrecks during our trip, one of which eventually resulted in one of our best horses turning up with a limp the last 1/2 mile going into Eagar. Additionally, my two Fox Trotters have lost weight in their backs, which makes their already prominent spines contact the underside of my riding saddle, where the skirts are laced together under the cantle. They both currently have sore backs. The two animals who have come through entirely unscathed are my mustang, Jimbo, and the mule, Honey. Both have trimmed down and look like true athletes, solid and strong. These two are the only animals ready to start the second leg of our trip at this time.
As for ourselves, Dad and I both feel healthier, if a bit tired, now, than when we started. Both of us lost quite a bit of weight, and our muscles have begun to “leg-up” and become stronger. We have come through this with no injuries, no rubs, no health problems of any kind. Just tired. Nothing a rest won’t cure. You might recall that I am 56 years of age and Dad turns 81 in about 12 days. I am amazed at Dad’s condition and resilience. He says he’ll be ready for the second leg of the trip next year.
Lastly, this trip has cost me nearly $20,000 so far. Help and sponsorships I was hoping for didn’t come through. I am simply out of money.
All of the above factors, and others yet unmentioned, have brought us to the decision to stop here at Eagar, Arizona for this year and continue the trip next year.
This will allow us to make the necessary adjustments we have identified, such as acquiring a couple of horses that will be better suited for the trip, making a few minor changes in our gear, make better plans and reservations for crossing the Grand Canyon, and allow me to go back to work to pay off money I have borrowed for this trip as well as to put together a money reserve for next year’s trip. I have already purchased most of the gear we will need, so the funds required will be quite a bit less than for this leg of the trip, but I may still need to look for another horse or two. This is the wise course for us. This is what we need to do if we want to eventually complete this trek from Mexico to Canada.
Our thanks go out to all who have supported us, particularly those who have actually put out their time, efforts, and money to help us. We are grateful for all the prayers that have gone up in our behalf. We can say unequivocally that we received continual help from above, even miraculous help at times, and we thank the Lord for this.
I maintained a journal during the trip, so stay tuned for future posts with much more detailed information about our trip, out experiences, and reviews of the gear we used. I have a lot of video footage as well as a multitude of photographs, however the Internet connection at my parents’ home is somewhat slow. I may have to wait until I get home to Utah to get them uploaded.
What a trip! What an experience! Can’t wait for next year! The hardest part of the trip is now done.


You must be logged in to post a comment.