I’m sitting here at midnight and can’t seem to get my mind to slow down. I have a thousand thoughts running through my head about the upcoming adventure. There’s a lot to be done in the next thirty days.
Today I received the last piece of horse gear I’m going to buy for the trip. I bought, through Outfitter Supply, a Five Star 1″ wool felt saddle pad with a spine relief cut-out. I like the look of it and have high hopes it will save my Fox Trotter’s back when he starts losing weight during the trip. On the first leg last year, both my Fox Trotters lost weight in the latter part of the trip, causing their spine to contact the underside of the saddle. They both got a sore spot that turned to a calcium deposit from pressure on their spine from the saddle cantle area late in the trip. Hopefully, this saddle pad with the spine relief will alleviate that problem.
Five Star spine-relief saddle pad
I have had a pretty tough schedule this past month, earning money to finance the trip and trying to get in some good rides to start “legging-up” my horses, as well as getting my truck and trailer into road-worthy shape. On the way home from my trip with Dad to Moab a few weeks ago, I blew the engine in my truck. I just got it back this evening with a rebuilt engine, new A/C system, and new injectors. Hopefully it’s ready to go. I actually got it back over a week ago, but it had an oil leak, then on the way home from the trip to Swinging Bridge last week the radiator fan stopped working and I nearly ruined my new engine. I took it back to my mechanic, who got everything squared away and I got it back this evening, hopefully for good.
In the next month I will need to accomplish the following, while keeping up my work and other duties as well:
Buy 4 new tires for my pickup
Get horses shod
Get health inspections on the horses for their travel to Arizona
Pay ahead on my DeLorme Explorer account (my GPS unit)
Contact news outlets regarding our pack trip
Purchase horse and people feed for the trip
Get the trailer brakes adjusted and bearings repacked and check front axle
Put pockets on Dad’s chinks
Make a rifle scabbard
Finish documenting the first leg of the trip on the blog!!!
Replace latigo and billets on my saddle
Replace saddle string on my saddle
Check on my hotel reservations in Panguitch
Get our trip support arranged arranged for
Yep. Lots to get done.
I’m going to do my best to get the rest of last year’s ride fully documented on the blog before we start the second leg on May 23 this year, so stay tuned.
A couple weeks ago, I was searching the Internet for any new developments with regard to electricity production that would work for our pack trip. As you might recall, I bought two solar panels for the trip last year, which worked very well, except on days in which we were riding in the trees and when there was significant cloud cover. There were a few days in which all my battery-powered tools were useless. I missed getting some pretty good photos because of that. Also, if batteries were discharged at the end of the day, the appliance was useless until the next time I could get sunlight to charge with.
So, I was looking for some way to charge things at night, or in the evening. I came across this handy little portable generator that uses heat from a camp stove burner to generate enough electricity to charge one item fairly quickly.
Mini O, by Ajirangi
It is called the Mini O, made by Ajirangi, Inc. I purchased mine through Amazon and it shipped from Korea, where it is manufactured. I found the price to be very reasonable price at $85.00 (compare to a regular laptop plug-in charger from Apple for $80). Shipping was a very reasonable $5.49, and the item arrived in good condition, very well packed, in about two weeks (received it today).
The specifications indicate 5W, 5V/1Amp (max), which should charge a cell phone or my GPS unit in a reasonable amount of time to at least a functional level. I am curious as to just how long it will take to charge my iphone 6 from dead to 100%. It will certainly take some propane. I don’t expect to have to use this thing every night, but it will certainly be handy for those few nights when we really need it.
Siliconized rubber upper
The unit has a machined aluminum base with a collapsible upper body of heat resistant siliconized rubber. The upper body is made to extend upward, forming a container into which water is placed. The unit is then placed on a propane burner. As the water heats, electricity is generated and transferred to the electronic device to be charged via a USB cable.
Compact, about the size of a good hamburger
When not in service, the unit folds compactly into a size comparable to a decent hamburger. A durable, padded vinyl case with a zipper closure is included.
As an unexpected and unadvertised bonus, I received an LED lamp that can run off the charger. The lamp has its own cord and switch, as well as a small hanger, so that it can be hung from a tent pole or hung from a tree branch…as long as it is a pretty low branch. The cord is only about five feet long.
5V LED lamp included
I looked at several other designs that use similar technology, such as one unit that uses a metal tongue that extends into a flame or over a burner and can be used while cooking on the burner. However the other units were obviously made for backpackers, very lightweight, and I was concerned about its durability when packed and unpacked daily into/out of paniers among other gear on a long horse pack trip. The fact that the Mini O has no framework or moving parts, and the fact that it packs away into a very compact and tough container, won me over. It just looks like it could survive a long horse pack trip.
We’ll see how it works in the field in the next several weeks. I’ll give a full report on it then.
As we left it last week, Dad and I had made camp on a small knoll about two miles west of Texas Canyon Road, Chiricahua National Monument, Arizona, on the fourth night of the first leg of our Mexico-to-Canada horse pack trip.
The fifth day began as all the others did, with us waking up about 5:15am. We rolled out of bed, took care of our morning oblations, fed the horses, and Dad started cooking while I started breaking camp. As usual, I set my solar panels up to catch as much sun as possible while we packed up for departure, in order to have battery for the cameras and GPS.
We had all the horses loaded up and ready to move by 9:00. As Dad was mounting Jimbo, he lost his balance and fell pretty hard. He shook it off and I held Jimbo while he got in the saddle. Dad got lined out with his pack animals and I went to bridle and mount Ranger. I got up into the saddle and was trying to get Lizzy and “that stupid mare” lined out when I just happened to notice something on the ground underfoot of my horses. On closer inspection, it turned out to be a smart-phone. I jumped off and picked it up, amazed that the horses hadn’t stepped on it. Of course, it was Dad’s phone, which had slipped out of his pocket when he went down. It was lucky I found it, and luckier that it hadn’t been smashed by a horse’s hoof. It was just another lucky break for us…or maybe it was another one of those little helps from above. We had a number of those kinds of things happen for us.
Scenery along Rucker Canyon Road
We were on the trail by 9:15am. We had a short uphill to climb, but after that we were moving pretty much downhill toward Texas Canyon Road. We hit the road before noon and headed north toward the North Fork of Rucker Canyon, following the dirt road.
Shortly after we hit Texas Canyon Road, we had our first near tragic wreck of the trip.
I had dismounted to open a gate to bypass a cattle guard. Before dismounting, I tied Lizzy’s lead rope to my saddle horn with a clove hitch, so I could lead Ranger through the gate with the pack horses following. This was a metal gate, rather than a barbed wire “gap”, like we normally ran into. I unchained the gate and opened it toward us, rather than away, without thinking. I swung it wide, then led Ranger through. As I led him through the gate, it swung back and caught Lizzy at the shoulder, right in front of her pack saddle, pinching her between the gate and gate post. Ranger, then, feeling the tug behind him, began pulling hard against the pressure. I finally saw what was happening and had started to pull Ranger back, when Lizzy began pulling back as well. Between the two of us pulling, Ranger’s front end came off the ground and he fell sideways to his left, toward the cattle guard. When he fell, his front left foreleg went into the cattle guard to above the knee, with his right front folded under him.
Scrape on Ranger’s front left from the cattle guard
I was still pulling back on Ranger’s lead rope, now from directly behind him, while Lizzy, still pinched in the gate, pulled from his left side. I held tight, fearing that if the lead rope, or saddle horn, or cincha, or anything else, were to break, Ranger would lunge forward and end up with all four legs into the cattle guard.
Suddenly, with both Lizzy and me pulling and Ranger struggling, he again started coming over backward, causing his left front leg to pull straight up and out of the cattle guard. Rather than falling over backward, though, he stood up on his hind legs and walked backward, relieving the pressure on Lizzy.
Then, as suddenly as it all started, it was over.
After calming the horses, I checked Ranger over carefully, and found he had scraped some hide off his front left foreleg, but there were no serious injuries. He could easily have broken his leg. Lizzy was uninjured.
Once again, thank you, Lord.
Lesson learned: Always open gates away from you!
Eating Beanie-Weenies with a wooden spoon
Somewhere along the road, we stopped to give the horses a rest and took our lunch. Our usual lunch was beef jerky and a Cliff Bar, but on this day we had Beanie-weenies. With our eating utensils neatly packed away on a pack horse, we took the opportunity to engage in one of our very own Henrie family traditions: we made wooden spoons and ate our beanie-weenies with them. That tradition dates back to my very first mountain trail ride with Dad, while I was in high school. My brother and I were on a hunt trip with Dad in the Blue Wilderness Area in Arizona. We were riding our horses up out of the Blue on the Red Hills Trail (the trail, not the road). When we stopped for lunch, we had a can of Van Camp’s Pork and Beans, but nothing to eat it with. Dad used his pocket knife to open the can, then carved us a wooden spoon. Thus began the tradition. No Henrie can truly say he’s been wilderness camping until he/she has eaten beans with a hand-carved wooden spoon.
We arrived at our day’s destination about 3:00pm, after 13.6 miles, making exactly 50 miles from our starting point five days earlier. We picked out a campsite with plenty of grass and picketed the horses. There was a small corral in which we allowed Jimbo and Honey to graze. We set up our camp and relaxed awhile before our new riding companions arrived.
Camp at North Fork of Rucker Canyon
Josh Jensen and Al Smith arrived just an hour or so later with their mules. They were both pretty excited to be able to participate with us on this part of the ride.
As I mentioned in an earlier post, several months before, during the planning of our route, I advertised that anybody who wanted to ride with us for a portion of the trip was welcome to join us. Joshua answered the call and we began planning out the route through the Chiricahuas together. Lucky for us he and Al came along. Joshua happens to be a member of the US Border Patrol Mounted Patrol for the Safford District. Al Smith is his good friend, whom we invited to join us as well. Between the two of them, they know the trails in the Chiricahuas. Some of those trails have suffered from several major fires in recent years. Many of the trails are impassable, and some have disappeared entirely. Without the help of Joshua and Al, we never would have found our way through those mountains. Joshua was also able to track any USBP activities in the area and steer us clear of any drug trafficking and illegal alien groups passing through the area.
Additionally, with Joshua’s help, we were able to stage horse feed resupply points, without which we would have been helpless, as there was precious little grass in the Arizona desert areas we passed through between the border and Safford. We had left twelve bags of feed at Joshua’s house in Safford before the trip, which made for three feed resupply stops. We fed the last of the feed we had packed from the US/Mexico border that evening and the following morning. Joshua brought eight bags of feed in his truck. The plan was for us to load four bags to get us through the mountains. We would get the remaining four bags when we got to his truck as we emerged from the mountains, where he and Al were to leave us. We would resupply again at his house in Safford when we arrived there, packing out the last of the feed, which would get us into the higher elevations, where we expected to find sufficient grazing for the horses.
Joshua brought us something else that evening. As a “thank you” for us letting him and Al join us for the ride, he cooked up T-bone steaks, potatoes and cheese, and fetuchini, with brownies for desert. All cooked over an open fire (except the brownies), it was fabulous. Much better than the dehydrated meals we had been living on.
My journal for the day makes a couple comments I thought I would provide in their entirety:
[Begin journal comment]
As of today we have made 50 miles exactly.
Dad rode Jimbo today. Jimbo got a little excited a couple times, but Dad rode him out and after that Jimbo did great. He’s a good horse. Strong, sound, not a mean bone in him, and sure-footed. He’s doing better with his skittishness every day.
Ranger
Ranger and Lizzy did well today. I sure enjoy Ranger. He and I are really bonding. I enjoy riding Lizzy, but Ranger is starting to act like I’m his herd leader. Even when he gets excited and runs off, he always returns and comes to me. I think he and I are going to enjoy a lot of miles together.
Daisy has a saddle sore coming up. We plan to pony her bareback for the next several days. We’ll leave her pack saddle in Joshua’s trailer and he’ll get it back to us on our rest day, Sunday.
[End journal comment]
Daisy’s saddle sore starting
That evening, while tending the horses, I noticed that Daisy was developing a saddle sore high on her withers. We decided to let her go bareback for several days to let it heal up before it got worse. Due to the location of the sore, it was at this point that we began to think we were over-padding our pack saddles, which may have been what caused Daisy’s saddle sore. The following day we stopped using the extra saddle pad under my Phillips Formfitter pack saddles and happily discovered that our problems of the packsaddles moving and slipping on the horses ceased completely. After that day I don’t believe we ever had to stop to adjust another pack saddle for the rest of the trip.
Lesson learned: Don’t over-pad the Phillips Formfitter pack saddles. Our 3/4″ wool felt and canvas pack saddle pads was sufficient protection and using only those kept our packsaddles from moving around on the horse’s back.
Here are a couple short videos from Day Five I made on Texas Canyon Road.
To review a bit from my last entry about the first leg of our Mexico-to-Canada horse pack trip last year, we left off with the end of Day Three and Dad and I camped in Half Moon Valley, just outside the Chiricahua National Monument.
The XPG Ultralight measures 20″X72″
After a good night’s rest, the cloudy weather having cleared up, we arose early. That was the first night we had a chance to try out our Cabela’s XPG Ultralight Extreme Performance Gear air mattresses under actual pack trip conditions. I have to say, they performed quite well and gave us a decent night’s sleep throughout the trip. Still, they aren’t “Grandma’s Feather Bed”. As we were sleeping out under the stars most nights, the daylight would wake us pretty early and there just wasn’t much sense or enticement for laying in bed any longer.
As became our habit, we fed the horses first-thing, then Dad started breakfast. Our cooking was done on a propane single-burner Coleman pack stove. This proved to be perfect for our needs and will be what we take for the remainder of our adventure. It is a very simple device, compact, and almost indestructible. We would heat water, in an aluminum pot, dump in the ingredients, let simmer until fully hydrated, then put on water for drinks while we began to eat. Didn’t take long to have a meal ready, eaten, and done with.
We had quite the menu. We had purchased a box of dehydrated home food storage meals from Walmart. The food was all self-contained in #10 cans, purported to be about 75 meals, which we broke up into separate freezer bags, so as to be able to pack it more easily. We added some instant oatmeal and a couple dehydrated meals we had left over from previous trips, and the meal package included a couple luxury items, such as freeze-dried beef and strawberries. So, our meal choices appeared, at first blush, to be quite varied and ample. However, we went through the varied part pretty quickly and ended up with three main meals: dehydrated vegetable stew, creamed corn, and hash browns and powdered eggs…or any mixture of these items to try to break up the monotony a bit. Our lunches were generally a bit of beef jerky and a Cliff bar. By the time we finished the trip, we had each lost about 20 pounds and were starved for some real food.
Breakfast on this day consisted of powdered eggs and hash browns, with a little freeze-dried beef pieces tossed in, with some hot chocolate and/or hot apple cider to drink. It wasn’t bad for a camp breakfast.
Breaking camp on Day Four
While Dad did the cooking, I set out my solar panels to charge batteries, started gathering up our gear, and packing manties. As I detailed in another post, this was a tedious and work-intensive operation. Every morning we had to sort our gear into about eight different piles, four for the manties, and four for the paniers. The paniers proved to be much easier, because we could actually store most of the gear in the paniers, so stuff we used during camp time was generally placed back in the same panier after we were done with it, so packing the paniers was a matter of putting the last several items in them. However, with the manties, we used the tarps for ground sheets and bed covers, so every evening the manties were completely undone, had to be reconfigured for balance, and repacked every morning.
Once they were packed, we used a pack scale to make sure they were within a couple pounds of each other. If they weren’t, we would have to unpack two of them to reconfigure them to proper weight, then do it again. Even though I became pretty good at it during the trip, and got faster at it, it was never something I looked forward to. Besides being time and effort consuming, I found tying up the manties really wore on my bare hands. The first few days my hands ached at night to the point I had a hard time going to sleep. After a week I began to develop calluses and tougher skin and it didn’t bother me so bad.
Ranger, my 16-hand Missouri Fox TrotterJImbo, my “free” mustang.
At some point during the packing, I stopped for breakfast, then continued packing. By the time I got the manties ready, Dad had the paniers packed and we got the pack animals loaded, the packs tied on and covered, and got started saddling the saddle horses. On this day I rode my big Fox Trotter paint, Ranger. Dad rode our mustang, Jimbo. We got out of camp and on our way about 9:15am, which was about average for us.
Several miles up the trail, we came to a point at which the map showed that Half Moon Valley trail turned almost directly westerly for a couple miles, then back northeast to join with another trail that then ran northeast for a ways to join Texas Canyon Road. We could see by the GPS and USGS maps that we could also turn north up High Lonesome canyon and go cross-country for about 1.5-2 miles and join another trail that would take us to Texas Canyon road, saving us about 4-5 miles. At four miles per hour average speed, you can see the shorter route made sense. Turned out to be a rough couple of miles. At the end of this post are links to three videos I shot during that short bushwhacking session. They are long and unedited, but shows the country we went through.
During this trip there were several things that happened that I firmly believe were providential. Dad and I both got the feeling, starting right with our planning and preparations, that we had help from the “other side” on a number of occasions. We seemed to have at least one such occurrence everyday of the trip. Being religious ourselves, it was easy to believe that we had a few of our forefathers riding along with us, cheering and helping us along the way. It was almost as if the Good Lord was rooting for us, two of the least of his children, trying to connect to our pioneer past. On this particular day, two of those things happened.
Filling canteens in the creek at High Lonesome CanyonFilling canteens with a pump filter
As we arrived at the cutoff we had decided to take up High Lonesome canyon, we found a clear, running stream there and took the opportunity to fill our canteens. We used Dad’s pump filter, which is a pretty slow operation for four two-quart canteens. While we were pumping water, I allowed Ranger, my 16-hand paint Fox Trotter, who was my saddle horse for the day, to wander and graze, along with Honey the mule. The rest of the stock we tied. Ranger, being the wanderer he is, tried to cross under the neck and leadrope of Dad’s little gelding, who was a pack horse for the day. They got tangled up and began to struggle. The branch Little Black was tied to broke, spooking both horses, and off they went, galloping over the hills in the distance. I could see all sorts of stuff trailing along behind Ranger and I was already thinking of all my expensive gear in his saddle bags and on his saddle, including my new binocs, my GoPro camera, my solar panels, an axe, camp saw… I just shook my head. Luckily, our spooky mustang, Jimbo, was Dad’s saddle horse for the day, and was tied (we had learned at least that much). I grabbed him up, jumped into the saddle and headed off to see if I could find the horses, which were long out of sight.
I hadn’t gone more than 50 yards, when I heard Ranger whinnie. I watched for a minute and located both Black and Honey, standing together several hundred yards up a hillside, in a little hollow. About the time I located them, I saw Ranger coming out of the trees heading back toward me. He approached at a hard trot, with my axe dragging behind, banging between his rear legs. I could only cringe as I envisioned the damage to his legs.
Ranger trotted up to me with a half-panicked expression (if horses really have those) on his mug that said, “Help me! I’m hung up!” I dismounted from Jimbo and caught Ranger’s lead rope and prepared for what I would find. I was astonished to find that when Ranger and Black got tangled up and started struggling, my axe, which had been hung on the saddle through a two-inch brass ring tied into the front saddle string, had gotten snagged in Black’s pack rigging. When Ranger tore loose, the saddle string broke, dropping the axe, which then became tangled in the bridle, which was hanging on the saddle horn. The bridle came loose, but remained suspended from the horn by the reins. The reins were long enough that the axe, tangled in the bridle, dragged the ground right between his hind legs. With all Ranger’s galloping around in sheer panic, the axe remained hung up in the bridle, banging around between Ranger’s hind legs, and the reins remained intact. The heavy leather axe cover had remained in place all that time and the rubber handle prevented any bruises or cuts to Ranger’s legs. My saddle bags were still in place, as was my camera and solar panels, which were tied behind the saddle. In the end, the only item I lost from Ranger’s panicked breakaway was half of a saddle string. Even the brass ring was still on the axe. What a relief. After leading him back to where Dad was finishing up with the canteens, I went after Black and Honey. They waited patiently for me and came without a problem. I checked them over and it appeared we had lost nothing from their packs.
Thank you, Lord.
It wasn’t until that night that I discovered my heavy Carhart coat, that was stashed in a panier on Honey, was missing. Oh well. I’m sure it will be well received and used by whoever finds it. Interestingly, or maybe providentially, at camp that evening, we found an insulated vest someone had left, which got me through some pretty cold mornings and evenings as we crossed through the Chiricahuas.
The second thing for which I credit providential intervention happened while we were traversing from Half Moon Valley trail up through High Lonesome canyon. I’ll let the videos speak for themselves, as far as describing the country. Although one cannot get the true perspective of the angles and steepness of the hillsides we were traversing, at least you can see the country. I decided to try my chest mount for the GoPro camera for the first time. I had no opportunity to try it previous to that point, so I had no idea how it would turn out. Turned out I mounted the camera improperly and it was nearly disastrous for me.
After passing through some extremely difficult and steep terrain for over a mile, we stopped to rest the animals. I looked down to turn off my camera and it wasn’t there. Here we were in the first week of our Mexico-to-Canada horse pack trip and I had lost our video camera, in which I had invested over $1,000. I can’t express how upset I was with myself. As I thought back over the trail, I quickly realized that my chance of going back over our trail and finding it was about one-in-a-million. I couldn’t figure out, for the life of me, how the camera had come off the mount. I was pretty down-in-the-mouth, as they say.
Heading toward Texas Canyon Road after passing through High Lonesome
I looked all around myself, the saddle, and the surrounding area, then dismounted. I was standing by my horse, telling Dad I had lost the camera, when I heard a “plop”. I looked down and there was the camera at my feet. How it got there I did not know, but I sent up a prayer of gratitude right then. After we finished the ride and I had a chance to actually view the video recording, I discovered what had happened. I had improperly installed the camera on the chest mount, missing the hole with the mounting bolt, so that the camera was only held in the mount by friction. Just before we stopped for rest, the camera hit the saddle horn, as I leaned under a branch while going uphill. The camera fell off the mount and ended up falling between my canteen and the horse, where it became lodged, and hidden, until I dismounted and moved the canteen. You will see all that happen in the videos.
Thank you, Lord.
We only made 9.4 miles that day, having passed through some very tough terrain and steep elevation changes, as we made our way toward Texas Canyon Road. The sun was setting when we picked out a decent campsite on a small knoll, about two or three miles west of Texas Canyon Road. We passed a pond about a quarter-mile before stopping, so the horses were well-watered. The fourth video below is one I made at that campsite as we cared for the horses and made camp (it was posted on a previous blog post as well). It was a very long and tough day for us, despite the low mileage recorded for the day.
We enjoyed a restful evening under the stars on a clear, cold night on a small knoll in the middle of nowhere. Ahhh! That’s what it’s all about!
I recently received an email from a friend who posed several questions to me about our pack trip gear and some other things. As I typed out my responses I realized this information might be useful to others. I decided to post it as a blog post (he requested his name not be used). I reconfigured the email to take less space here on the blog.
On 01/25/2016 4:46 pm, [my friend] wrote:
Tony,
Your blogs are great and I enjoy every one — many thanks. Kinda curious about your mustang plan, whether you’re calling upon WWMR in Loa or whether there’s time for you to buy one from the feds and soft break. That sounds tough given your 7/4 deadline, but I kind of suspect you’d prefer to DIY.
I’ve been following your gear notes carefully. Here’s something that might interest you: Cavalry Bed Rolls by Ellis Canvas Tents out of Durango, CO.
Their concept looks good, but I think the system can be simplified and improved. First, the foam mattress adds unnecessary bulk. A Therm-A-Rest offers as much or more padding but weighs less and goes flatter. Second, it would pair nicely with a simple wool surplus military blanket with sheet. This combo would roll up smaller than the foam and sleeping bag getup, and sleep comfy, too. Throw it open in the morning to air out while you’re eating and packing, then zip, roll as a unit, and lash on. Good for a variety of climates right down to cold.
Given any thought to your brand for your Eager acres/ranch?
[end of email]
Thanks for the email and the compliments on the blog posts. I’ll try to post at least one per week until I get through the “pack trip chronicles” and hope I can keep people interested.
I’ll answer your questions in order.
I made the decision last year that at least one of my Missouri Fox Trotters was not going to make the rest of the trip. My mare, Lizzy, got a lot of rub sores from the pack saddle rigging, due to her long-strided, swinging walk. Additionally, both my Fox Trotters began to lose significant weight on their backs toward the end of the trip, making their already prominent spines stand out even more, which caused both to get sore-backed and raised a calcium deposit on their backs. You can see it in the photo gallery below on Ranger.
Ranger’s lump on his back
Five Star 3/4″ saddle pad
The only horse that came out of the first leg of the trip unscathed was Jimbo, my mustang.
Ranger, my “free” mustang.
That being the case, I decided that I would look around for mustangs to replace my Fox Trotters. At length I decided to take Ranger with us on the second leg of the trip and just replace Lizzy. So, I’m looking for one mustang. I have spoken with West Taylor, who is helping me watch for a good one.
Yes, I would prefer to be able to pick one out from the BLM pens and break and train it myself, but I just don’t have the time to do it. Not only that, but I just don’t bounce as well as I used to, so I’m not excited about having to break a bucker at this time in my life. Training is another matter. I can do that…if I have time. There are plenty around that have been saddle broke and are being sold cheap (in fact, Jimbo was given to us free) by folks who thought they could handle a green mustang, but have since changed their minds, so I’m watching for a good one. Jimbo turned out not only to come to us without price, but in turn, has turned out to be priceless to us. He’s a good, solid, reliable horse. That’s just what I need when we start down into the Grand Canyon.
What I can’t afford is to have an unpredictable horse that might, at some unsuspecting moment, buck either myself or my dad off. There is simply no leeway for that. So, that’s why I have been talking to West Taylor. I don’t have time to be breaking a new mustang and he’s pretty good at what he does, exceptional, in fact.
So, we’ll see what happens. Fact is, I’m short one horse right now.
Your suggestions for the gear are all good. Those bedrolls do seem very convenient. We have looked at them, but at length decided to go the way we’ve always done. That is simply laying out a ground sheet, tossing our bedrolls on top, and using a canvas tarp over top of the beds. Here’s why: We use one of the canvas tarps that go over our horse’s packs as a ground sheet and another to cover us. The canvas is waterproof when in contact with water, but breathes, which keeps our sleeping bags dry (a plastic tarp causes moisture to gather from your own body moisture and makes a wet sleeping bag). We use air mattresses that create almost no bulk when packed and yet allow us to sleep much more comfortably than the roll-up foam mattresses. Foam is a better insulator than air, but our air mattresses are so thin that it’s not an issue.
Additionally, we don’t have to have a canvas bedroll that would just be one more piece of canvas to pack around, adding extra bulk and weight. We try to make as many gear items do at least double-duty as possible. The “cowboy bedroll” as they are called, can only do one thing, protect your bedding.
Our beds, airing out in the morning.
For those who are wondering, the canvas we use for our pack covers and bed ground and top sheets are 15-20 oz tight-weave canvas that has been treated with a waterproofer. The brown canvas tarps sold by Tractor Supply are excellent for this use. They breathe when dry, but when dampened, as with dew or rain, the weave tightens and becomes waterproof, but still breathes. It can wick water through if something is touching it, but that’s normally not a big issue. We have found that once the weave tightens up, the canvas stiffens and we can simply kick up under it and it will form sort of a dome over our sleeping bags, running the water off and keeping us dry. We just have to make sure the top sheet is wider than the ground sheet, so that water running off the top sheet runs onto the ground and not onto the ground sheet and under our beds. If we are expecting rain we also normally put up a plastic rainfly to protect us from the bulk of the rain water. This system has served us very well for many years. We have always preferred sleeping out, rather than in a tent.
As for the idea of using the cowboy bedroll with a simple wool army blanket and a sheet, that would be fine for summer at lower-to-mid elevations, but I found out last year that it can get mighty cold at 9,000+ feet, even in mid-summer. While we realize that the old cowboys often did with a lot less than that, you can bet every one of them would have jumped at the chance to trade their wool blanket for my sleeping bag on a cold night! I took my light summer bag last year to save on bulk and nearly froze when we were at elevation in the Chiricahuas. One night our canteens froze before we went to bed and I was nearly froze solid before morning! I Had to trade out my light bag for my heavy bag once we got to Dick’s place on the Blue River. I was much more comfortable after that.
WTR logo
Last question was about a brand for my place in Eagar, AZ. Yes, been thinking about it. My daughter Amy designed one a while back. I still haven’t decided. She designed a pretty nice logo, as well, which I plan to put on my horse trailer as soon as I get time/money to refurbish it. She also made me a few T-shirt transfers with the logo on it. I guess I should make a few T-shirts for the trip!
Thanks for your questions. Maybe this information will help someone else along the way in their packing experience.
For the next installment of our travel log of the first leg of our Mexico-to-Canada trip, I’ll cover days two and three. We had originally planned to take rest days on Sundays and one weekday. As things turned out, we were behind schedule from the start, so we eliminated the weekday rest, but our Sundays were spent in rest, relaxation, and thanksgiving.
This first Sunday of our trip was particularly restful, not only for us, but for Clancy and the horses as well. It allowed us all to recoup our strength and recover from muscle soreness of the first day’s exertions. We hadn’t intended to stay Sunday at the Bar-M Ranch, but when we woke up on Sunday morning, it was raining outside. We were glad for the blessing of having been able to spend a restful night in beds in the Bar-M bunkhouse.
Shortly after Dad and I got out of bed, Jesus dropped by with breakfast for us, compliments of Araceli. It just doesn’t get any better than that for a 3,000-mile horse pack trip! We asked Jesus if we could stay over another night. He acted like he was surprised we would even ask and replied that of course we could stay.
Dad relaxing at the Bar-M
Dad and I spent the day just relaxing. We held a short religious service, to thank the Lord for having blessed us to be able to make this trip as father and son, and to ask for his continued help and blessing. Clancy spent most of his day just laying at my feet. He was pretty sore and tired from yesterday’s mileage. The pads on his feet weren’t as tough as they might be, since most of his life prior to the trip had been spent in places with grass and mud, rather than rocks and cactus.
We learned from Jesus that the ranch was owned by a family named Keifer or Cafer. It comprises over 40 sections of deeded land. The family also owns several other ranches in Arizona and New Mexico. We were appreciative of the generosity of the ranch in allowing us to cross their land, using their facilities, and staying in their bunkhouse. This stop, after our first day of the trip, was truly a blessing to us. It made a lot of difference to us going forward. Without that day of rest, I’m not sure Clancy would have been able to make the rest of the trip. The generosity and warmth shown us by Araceli and Jesus was truly a breath of fresh air in our day and age, here in the United States.
Bar-M Ranch, northeast of Douglas, AZ
By the end of the day, the weather cleared up. The horses looked good and Clancy had recovered and didn’t appear to be sore anymore. That evening Jesus dropped by and brought some cookies for us. He passed on Araceli’s goodbyes and told us he and she both would be leaving early in the morning. Araceli had to head back into Douglas for work and he would be heading to another ranch to look after about 800 yearling calves that required some work. We said our goodbyes and settled-in for another restful evening.
The following is from my journal for Day Three (Monday) of our trip. I was already starting to lose track of time, as my journal has the date as Tuesday, April 13. I wrote the entry on the morning of Tuesday, April 14, 2015:
04/13/15 Tuesday Half Moon Valley, Chiricahua Mountains, Arizona
Leaving the Bar-M ranch
We made 16.5 miles yesterday. No major mishaps. Horses are getting settled-in and becoming trail-wise. We passed through some tough country with the ground covered with volcanic rock and thickets of mesquite and catclaw. We were very glad to have good, heavy chaps.
We made the 4-5 miles to highway 80 around 2pm and were trying to find our way through the fence, when Jesus drove by on his way back to the Bar-M. He stopped and talked a bit and let us know we had missed the only open (unlocked) gate for several miles (actually we had hit the fence line probably a quarter mile east of the gate and turned the wrong direction. He told us there was no other open gate heading west for many miles). We decided to lower the fence where we were and travel along the highway shoulder to Rucker Canyon Road. It was providential that Jesus met us there, because farther along, the fence had been rebuilt and we would have had a tough time with it. [Jesus had another ranch hand with him and they helped us lower the fence and stood on the wires while we got the horses across.
Traveling alongside I-80, just west of Boss Ranch Road
At that point the fence was quite old and the wires were loose. We simply unclipped the ties with our fence tools, lowered the wires, had Jesus and his hand stand on the wires while we crossed, then retied the fence wires to the posts, leaving it in better condition than before. About a half mile further on, the fence had been newly rebuilt and the wires were “high and tight” and would have been nearly impossible for us to cross it. We passed several gates along the way, but they were all we padlocked.]
We crossed the fence, said our goodbyes to Jesus and headed on. A bit later we had to re-set the pack saddle on Daisy. While doing that, Jimbo spooked and ran off, with Ranger tied in tow, and Daisy and Lizzy following (we were left standing by the fence with Black and Honey). It looked bad for us, but they stopped about 100 yards away and [when I approached them] Ranger came to me. I got them all caught up and we walked back to where Dad was. We got everything settled and went on. That was the only mishap we had yesterday.
Jimbo is getting more confident and trusting and less skittish every day. He’s going to be a great trail horse.
Joel Tanner and Cody Winn, USBP Agents at Boss Ranch Road
A couple miles along, we came upon Boss Ranch Road. We found an unlocked gate there, so we decided to cross teh highway. It was a good decision. Just after we closed the gate, two USBP agents, pulling a horse trailer, stopped to talk. One was Joel Tanner, whom we met at the border (he was one of the two who stopped by our camp on Day One), and the other was Cody Winn. Cody was able to give us some instruction on the best trail for us to get up into Rucker Canyon. We took his advice and ended up in Half Moon Valley to camp.
We passed Boss Ranch and got permission to cross his range. He wasn’t happy about it at first, but warmed up to us after a few minutes (he was concerned about our stock transmitting disease to his stock. After I assured him we had current health certificates and were not from the area, he relaxed a bit and gave us permission to pass).
Clancy kept up well and showed no foot soreness. I put booties on him as we left the ranch, but they seemed to bother him, so I removed them. Turned out he never needed them. Once we got camp set up and laid our beds out, Clancy settled down right between us and never moved again the rest of the night.
Camp at Half Moon Valley
Dad slept like a log, but I had a lump right under my back that made it hard to sleep. I decided that I’ll take my heavier sleeping bag once we get to Eagar. I didn’t get cold, but cool enough to keep me awake at times.
All the horses are well. No sore feet, no sore backs. Our gear is performing well. The DeLorme Explorer is posting to our website as it should.
My Phillips Formfitter pack saddles are doing well, but you really have to make sure the manties are packed well and are exactly the same weight and loaded exactly the same way, or the saddle will turn. We had to re-set Daisy’s saddle, packed with 100 pounds of feed each side, four times yesterday. It turned on her three times. Luckily, she was calm and did not react. We also had to re-set Ranger’s, packed with 50 pounds of feed each side twice, but his didn’t turn, just started leaning. I don’t think that would be such a problem if the saddle bars were fixed, rather than able to swivel. However, the value is in that they can adjust to the horse’s back – so they fit about any conformation – and they move as the horse moves. We have had no sore backs even with heavy loads. (Note: we found later that the Phillips Formfitter saddles were turning due to the extra saddle pad we had put under them. Once we removed the extra pad, they stopped moving on the horses’ back. The problem was not the saddles, but that we had over-padded them.)
My solar panels set out to charge my iphone
The GoalZero solar chargers work well. We have been setting them up to charge in the mornings. I have been afraid to mount them on the pack horses for fear of losing or breaking them (our original thought was to mount them on top of the packs on the pack horses, so that they were charging our gear throughout the day, but we had been passing through some pretty dense thickets and it seemed unwise to try it).
I have been using the GoPro Hero 4 Silver camera to record portions of our ride, but have only used the hand-held extension (selfy staff) as a mount. I don’t see the value in mounting it on my head or chest, because we wouldn’t get anything but what’s ahead of me and nothing of ourselves or pack train. I have resisted the temptation to mount it on a pack saddle for the same reason as the solar panels. maybe later on, when we are better settled on the trail.
Had some cell coverage yesterday. Joshua [Jensen] said he and Al [Smith] will meet us Wednesday, rather than Tuesday, so he can get better prepared. That will give us a rest day tomorrow. Today I think we will only need to make about ten miles or less, so it shouldn’t be a tough day. Hope not, anyway.
Day Four coming up.
(End of journal entry)
Again, I had lost track of the days. This was written on the morning of Tuesday, April 14. Joshua and Al met us in Rucker Canyon the following evening.
Just for interest, those of you who are readers of Louis L’Amour western novels (as my dad and I are) will recognize some of the names of places we passed through during this portion of the trip from the novel, High Lonesome. We camped in Half Moon Valley on Monday night and passed through High Lonesome Canyon the following day, drawing water for our canteens from the creek that flows through it. You’ll see some videos of that area with my next post.
I failed to mention a couple things that happened during that day that were significant to us. The route from the Bar-M to I-80 was cross-country. There was no road that went the direction we needed. We just headed out across the low, rolling hills. Being ranch land, fences are a fact of life. Most of the fences we came across were old enough that we were able to find places where they were down, where we crossed. One fence we crossed under in a dry creek bed, where we were able to lift the wires high enough for the horses to pass under. Others we took down, passed over, then repaired the fence. We took with us fencing tools and several bags of fence clips. We always made sure to leave the fence in better condition than we found it in. Each time we had to cross a fence it cost us 15-20 minutes and brought with it the risk of the horses getting tangled up with each other and in the fence. It also meant Dad and I had to dismount and remount, tie the horses, keep them from getting tangled up, and work on the fence. Being a couple old farts, that was significant additional labor to us, what with our heavy chaps and all. Crossing fences was a real headache.
I mentioned that we passed through thickets of mesquite and catclaw. Catclaw is commonly known as “wait-a-minute” bush. It grows about four to six feet tall and is covered in thorns that look exactly like cat claws. The horses’ coat offers some protection for them, but even they try to avoid the stuff. For us, the thorns grab, then break off in the skin, which then gets infected like a sliver. We were both very grateful for our heavy batwing chaps. The mesquite thickets are just as bad, except that they grow much taller than the catclaw. The mesquites had needle-sharp thorns about two inches long. I even had a couple of these penetrate my chaps. We saved some of these for tooth picks. Pushing our way through some of these thickets, too large to go around, was tough work. We stayed to stream beds (called “washes” to westerners) as much as we could, when they headed the right direction, but even that was tough going.
Here’s a short video of the area south of I-80. Here’s one of the area north of I-80 , on Boss Ranch Road, heading into the Chiricahuas.
Most of the land down there where we were crossing is volcanic. Even where the land is relatively flat, it is very tough on the horses, due to the fist-sized volcanic rocks that cover the ground. It wasn’t so bad once we got into the Chiricahuas, but we were lucky to get past those first two days of travel without laming a horse.
I just posted a couple new videos to my youtube channel (it’s under “Tony Henrie”).
The first is a blurb about our experience on the trail with regard to horse packing with both Decker-style pack saddles and manties and with the traditional crossbuck pack saddles and paniers, sometimes called Utah Paniers.
We found manties to be more versatile when packing odd-shaped items or a lot of odds and ends, but we found them to be a lot of extra work in comparison to using paniers. Our choice for the style of packing we do: Paniers and crossbucks. Our Decker pack saddles are configured to use either paniers or manties.
The video was taken about 19 days into the trip. We were near the Double-C Ranch, south of Clifton, Arizona in an area they call the Black Hills.
The second video is a short view of a steep portion of the Crest Trail in the Chiricahua Mountains, coming down through the Painted Rock passage. The video really doesn’t give much of a true perspective on just how steep that section of trail was. Keep an eye on how short the switchbacks are. The grandeur of the view off both sides of the Chiricahuas from the range’s own backbone was really something to see. I had to take the video with my iphone6, because my GoPro Silver ran out of battery about ten minutes before we descended this section.
This was about Day-6 of our trip. Many thanks to our guides, Joshua Jensen and Al Smith. We never would have made it through the Chiricahuas without their help.
I have been reviewing and preparing to edit the all the video footage from our trip. This is not going to be an easy project. I expect it will be easier once I figure the software out. I’m also finding it hard to edit the videos. I just want to watch it all! Even the slow, boring parts hold meaning and excitement for me. Don’t worry. I’ll cut them down to a reasonable size and still catch all the best parts.
Way back when, quite a while ago, I bought a couple nose bags to test them out before my dad and I set off to begin our big Mexico-to-Canada pack trip. I wrote a blog post on them. I ended up buying another feed bag, this one from Outfitter’s Supply, just before the trip. Here’s my evaluation of all three feed bags.
Before I start, I should let folks know that Kevin, at Outfitter’s Supply gave me a nice discount on a fairly large order I placed with him, including this nose bag. However, the facts of the matter will speak for themselves. My evaluation was not influenced by the discount.
I guess the first question to answer is this: Why use nose bags? I have used a number of ways to feed horses while on pack trips or overnighters. Dad and I, over the years have settled on feeding some form of pelletized alfalfa feed to our stock while on outings. We particularly like Equidine. Pelletized feed is easy to load and haul in a truck or trailer and far less messy than hay. It is easy to pack on a pack animal, whether packed as bags in manties or simply poured into the bottom of paniers. It can even be used as protection for other items that can be placed down into the pellets inside the paniers. We have fed alfalfa pellets by pouring a pile on top of a saddle pad or simply right on the ground. However, our experience tells us that the best way to feed pelletized feed on a pack trip or campout is to use nose bags.
When we head out for a pack trip or overnighter, we seldom know what sort of accommodations we will have for our horses at night. On our pack trip we normally tied one horse to a nearby tree or shrub and let the rest roam. We had no problem with horses trying to leave the group. On other trips we have had horses tied separately to trees, on a highline, staked, or even tied to a trailer. We have found that no matter how the horses are secured, when fed on the ground or on a saddle pad, there is waste. They seem to be able to scatter the feed until they cannot reach it all, then they trample it into the ground. When they are allowed to roam, the alpha horse will move from place to place, sampling each of the feed piles and causing the rest of the horses to move from place to place as well, resulting in the horses fighting and the one on the bottom of the totem pole getting less feed. With nose bags, waste is almost totally eliminated. Horses tend to feed more calmly and take their time feeding. They cease to move around as much and they do not fight over feed. So, for our pack trips and other outings with horses, unless we are feeding hay, we always use nose bags.
Nose bags from Trailhead Supply
The first nose bag is a nylon mesh bag with nylon straps and plastic buckles, which I knew as soon as I received it that it would not be sufficiently durable for our pack trip. It is, however, perfectly fine for a weekend outing or for short pack trips where a failed nose bag would pose no problem. The price I paid for it, $14.95, from Trailhead Supply reflects that as well, so I was not disappointed in it, just realistic in understanding that it was not made for what I was intending to use it for. You can read my writeup on it in the blog post I linked above. For my purposes here, just know that particular nose bag did not go on the pack trip with us.
Breathing panel a little low on the bagSteel adjustment buckle
The other nose bag I bought from Trailhead Supply, however, was much more substantial. You can read my initial impressions in the same blog post linked above. This nose bag was priced at $21.95 when I bought it in February 2013, however it no longer seems to appear on their website. This feedbag has a leather bottom and a leather vent for breathing. It has a heavy leather hanger that is adjustable via a nickel plated steel buckle. At the time I bought it I questioned the wisdom of having the breathing vent so low on the bag, as I figured it would get covered by feed. I was told by an experienced packer that the vent was located low on the bag to prevent the horse from drowning, should it try to drink with the feed bag on its head. While that explanation made sense to me, I still wished the vent were a little higher. I have seen horses stop eating because they had a hard time breathing with feed in the bag.
This nose bag just barely fit the horse with the smallest head
This bag did, in fact, go with us on the trip. However, shortly before I left on the trip, I found it was way too small for the head of my 16-hand Missouri Fox Trotter gelding. In fact, it barely fit on the head of my smaller Fox Trotter mare. This nose bag fit my mare on the last hole on the hanger strap. Even on her, the bag fit so tightly around her nose that I was concerned that she would not feed with it on. Those fears were unfounded, however, as she did fine with this bag and it made the entire trip without problem. This nose bag simply would not fit a mule. It would be adequate for a small horse.
Outfitter’s Supply’s canvas/leather feedbag
The fact that this nose bag would not fit my gelding, necessitated that I look for another brand of nose bag for my gelding. Eventually, I settled on the top-of-the-line nose bag from Outfitter’s Supply. This nose bag carries a premium price, at $64.95, but Kevin was gracious enough to give me a substantial discount to help us get outfitted for the trip.
This nose bag is everything I think a nose bag should be. It is made of heavy canvas, large enough for even a mule, with plenty of adjustment in the heavy leather hanger. The hanger straps are stitched the full length of the bag, tying into the heavy leather bottom. Large copper rivets reinforce all critical points. The breathing vent is situated well above the bottom, providing plenty of room for a good scoop of alfalfa pellets and room for the horse to breathe.
This one fit the largest horse we had
I can also attest that the vent is low enough on the bag to allow for drainage of water. Our horses all drank from the troughs, streams, ponds, etc, almost every time they were fed, with the bags in place. My big Fox Trotter was no exception. The water drained off with no problems and no anxious moments for the horse.
The one complaint, if you can call it that, was that the hanger on this nose bag would occasionally unbuckle itself while I was putting it on the horse. I think that is due to the roller buckle. While roller buckles are normally seen as an upgrade from regular buckles, in this case I think a regular buckle might work better, because they aren’t so easy to unbuckle. The fact is, you don’t often need to re-size a nose bag. Still, that is a very minor criticism, and I bow to the fact that Outfitter’s Supply makes these bags to suit the U.S. Forest Service specifications, after having handled repairs on their nose bags for a number of years. I expect this nose bag to be part of my horse packing inventory for many years to come.
Dad’s homemade nose bags aren’t pretty, but they work like a charm
Incidentally, my dad happens to have a heavy-duty industrial sewing machine and a large supply of heavy canvas. Dad sewed up his own nose bags for the rest of our remuda.
They weren’t very pretty, but they did the job and lasted the entire trip….and they were priceless…er…I mean “free”.
Dad’s homemade nose bags aren’t pretty, but they work like a charm
This one fit the largest horse we had
This nose bag just barely fit the horse with the smallest head
This is essentially the second part of my gear review of the pack saddles Dad and I used on the first leg of our Mexico-to-Canada pack trip we started in April. This post, however, is specifically about paniers vs manties.
Decker-style pack saddle with mantied cargo
For the neophyte, a manty is a heavy canvas tarp, normally about 15 oz. canvas, about seven feet wide by eight feet long into which a cargo load is wrapped up like a package and tied with a manty rope, which is a half-inch diameter rope about 25 feet long. One mantied load is tied to each side of a Decker-style pack saddle. A panier is a large canvas or nylon bag or hard-sided box into which items are packed. One panier is then hung on each side of either a Decker or crossbuck pack saddle by straps or Decker hooks. Crossbuck pack saddles are specifically made to handle paniers, while a Decker-style pack saddle can handle either.
Utah-style paniers on a Decker-style pack saddle
To summarize what I said in my last post about this topic, Dad and I made 355 miles in 28 days with five horses and a mule. We rode one horse each day and packed the other four animals, two under crossbuck pack saddles with paniers and two under Decker-style pack saddles with mantied loads. By the end of this first leg of our trip, we both came to the conclusion that for our purposes, mantying our loads was simply an extra chore every morning and was far more difficult and time consuming than packing paniers. By the end of the trip we had sent two pack horses home, along with our manties, and continued with two pack horses, each carrying Utah-style paniers.
Crossbuck pack saddle on our mule, Honey
Decker-style packing and tying up cargo in canvas manties came into vogue in the northwestern U.S. during the first twenty or so years of the 20th century and has continued to reign supreme for all kinds of packing and outfitting there. However, in the southwestern U.S., crossbuck pack saddles with paniers has remained the standard, carrying on the traditional style of packing that far predates Decker-style pack saddles. When I made the decision to use Decker-style pack saddles and manties on our pack trip, it was partially from a desire to broaden my packing experience, but also with a question in mind as to why Decker-style packing has never taken hold in the southwestern United States. By the end of our trip, I had gained the experience I wanted, and I think I answered the question – at least to my satisfaction. Keep reading.
After packing about 200 miles through the low deserts of southeastern Arizona, through the Chiricahua Mountains, and on up through the volcanic mountains between Safford and Clifton, I came to the realization that each time I laid out a manty on the ground to start packing, I ended having to brush all manner of “ouchies” from the manties as I wrapped them around my load. Now, for those unfamiliar with the desert southwest, in the immortal words of Rooster J. Cogburn, “Everything out here will either bite you, stick you, or stab you!” Unless you have actually experienced horse or other kinds of packing and camping in the desert southwest, you really cannot comprehend the full truth of that statement.
There is no square foot of ground, at least not that I have seen, in the desert southwest that is not covered with all manner of seeds, thorns, insects, cactus, and other pricklies, each with its own means of causing pain and discomfort to the human hand. Unless, that is, you are in pure sand…which then presents its own set of problems. In other words, every morning I found myself picking stickers and cactus spines out of the manties, out of our gear, out of the ropes, and out of my hands, as I tied up the manty packs. I have never encountered that kind of nuisance in the mountains of the northwest, or even in the higher mountains of Arizona. I am convinced that this is the primary reason that Decker packing and manties never took hold in the southwestern United States. A secondary reason might possibly be, though I have not researched it, that in the northwestern areas there are more national forests, national and state parks, and other forested areas managed by the US government, wherein materials such as building materials, gravel, lumber, etc, have had to be hauled into remote areas by mule trains for the construction of ranger stations, bridges, trails, etc. Decker-style packing lends itself much better to cargoing odd-shaped loads than paniers.
Take a look at this short youtube video I made, in the mountains near the Double C Ranch, just south of the Gila Box State Park, southwest of Clifton, Arizona, about 200 miles into our trip. You’ll have to turn the volume up, as I didn’t have an extension microphone for the GoPro camera. In this video I demonstrate how I tie up a manty to prepare a sack of feed to be loaded onto a Decker-style pack saddle.
In preparation for our trip, I purchased two manties from Outfitter’s Pack Station, at $54 apiece. They are the 7’X8′ size, with hemmed borders. I also purchased from them a pair of Utah Paniers, which they call Utah Meat Bags, priced at $250. Wade and Simone gave me a substantial discount on these items, for which I am grateful. I already had a pair of 18 oz canvas tarps measuring 6’X8′, which I used for the second set of manties. Dad had an old pair of canvas panier bags for our second set of paniers.
Every morning, for the first 25 days of the pack trip, I tied up four manties and Dad and I loaded them onto two pack horses with Decker pack saddles. We then loaded four paniers, including my Utah bags, and lifted them into place on the crossbuck pack saddles. We agree that loading and unloading the paniers is much easier than manty packs. I found that tying up manties was terribly hard on my bare hands. The rubbing and chafing of the ropes and canvas while tying up the manties left my hands swollen and painful until they finally toughened up about two weeks into the trip. That was not because my hands are soft. I am a wood worker, a leather worker, a horseman, I do general construction, electrical, plumbing, and about anything else a “Jack-of-all-Trades” does, and I purposely do these things bare-handed, specifically to keep my hands tough. I am here to tell you that tying up manties every morning is TOUGH on the hands!
There is one thing in which manties have an important safety factor over paniers. That is in crossing water. There is a danger with paniers, particularly when they are not covered with a tarp and diamond hitch, in crossing water. If the horse loses its feet, or if the water is sufficiently deep to rise above the top of the paniers, the paniers will fill with water, effectively becoming a “sea anchor”. Pack animals have been swept downstream and drowned due to this. A manty, on the other hand, is quite water resistant when tied properly, and will resist filling with water while a pack animal regains its feet or crosses a deep spot. Not that items within will not get wet, but the pack will not fill with water. We had one instance in which a pack horse laid down in the Gila River, in water about 18″ deep, and tried to roll his pack off. One manty pack was completely submerged for a second or two. The pack remained in place as we got the horse up and the contents were dry when we unpacked them that evening.
The Utah Meat Bags are huge bags, measuring about 32″ tall, 23″ wide, and about 10″ deep at the bottom (deeper at the top). These bags are made of a very heavy woven nylon fabric, commonly known as “iron cloth.” They have very heavy leather adjustable straps, with steel roller buckles, as well as heavy leather corner reinforcements. These are perfect for hauling game meat, ergo the name, as they are easily washed with soap and water. Blood and other contaminants wash right out without leaving a stain. For our purposes I was impressed with the size of the bags, which easily contained the gear we had to fill them. Once the top strap was tightened, the bags closed over our gear, thus eliminating the need for a cover tarp and diamond hitch…at least when the weather was clear. The adjustable hanger straps allowed us to adjust the height at which the bags hung from the pack saddle, which was important when we switched the bags from our crossbuck saddles to the Decker saddles. This made it possible to hang the bags at the most comfortable height for the pack animal.
I was very pleased with the quality of construction of the Utah bags. We really put them through their paces. They were rubbed on rocks, poked by tree branches of burned trees, rubbed on blackened, rough tree bark, brushed against cholla cactus, run into gate posts, and rolled on. The handled all this with no problem, no tears, no fraying. The only hole in them came from a metal grill that poked a small hole in one bag. There was no fraying or propensity to unravel. The hole remained a simple small hole throughout the trip. Eventually…if I ever remember to do it…I will take a heated nail and melt the edges of the hole to ensure it will never get worse. Dad’s canvas paniers have lasted almost 40 years, but they are nearing the end of their useful life. He has patched and stitched them so many times that they resemble a patchwork quilt in some places. They are a true testament to the durability of canvas paniers, however, I believe my iron cloth paniers will outlast them.
My manties, on the other hand, sustained several small rips and tears from rocks and branches. They also became quite soiled from dirt and rubbing against burned trees in the Chiricahuas. These rips and tears will continue to fray throughout the life of the manty, as they cannot be sealed with heat. I have a rip-stop fabric glue for them, but in my experience, that will only work for a limited time and will need reapplication occasionally.
My Utah Meat Bag paniers hung from a Phillips Formfitter pack saddle
As I mentioned before, by the end of the trip, we let the manties go home early with a couple horses, and we put a Decker-style Phillips Formfitter pack saddle on my mustang, Jimbo, and hung the Utah Meat Bags on it. For our style of packing, we found this much easier than tying up manties every morning.
For my kind of horse packing, I expect I will be putting a lot of miles on my Utah bags over the coming years.
Those of you who have been following my blog awhile know that I did quite a bit of research on various configurations of pack saddles before finally settling on the Decker-style Phillips Formfitter pack saddles, from Outfitters Pack Station, for our Mexico-to-Canada horse pack trip. As Dad already had two crossbuck pack saddles, we ended up using my two Deckers with manties and Dad’s two crossbucks with Utah-style paniers. It’s time for my comparison and evaluation.
Crossbuck pack saddle tree
To provide a little background, crossbuck pack saddles, sometimes called sawbuck pack saddles, have been used in North America for at least a couple hundred years. They consist of two crossed wooden “crutches”, similar to the way a sawbuck is built, which is where the name comes from (a sawbuck is two crossed beams over which a log is laid to be cut with a saw). Paniers, which are large bags or hard-sided boxes, are hung by straps from the crossbucks. Traditionally, soft paniers, often called “Utah Paniers” were used. These paniers are often covered with a tarp, which is tied in place with a diamond hitch, which improves the water-resistance of the pack and holds items tied on top of the packs.
While hard-sided paniers are available and quite utilitarian, we decided to go the traditional route. That’s what Dad and I have always used and we saw no reason to change. However, during our passage through the Chiricahua mountains, one of the riders who joined us for a few days packed hard paniers on his mule and I was much impressed. In camp, these hard paniers could be converted into seats or tables. I expect I’ll eventually get a set of these and give up on my traditional bent. Also, there are bear-resistant hard paniers available from a number of suppliers, for those areas where they may be required.
Sometime around the turn of the 20th century, a new-style of pack saddle was invented, which is now commonly called the Decker-style pack saddle. The Decker pack saddle, characterized by metal bows, or arches, to which loads are strapped, has proven its usefulness over the past century, due to its versatility. One can hang about any kind of load imaginable from a Decker-style pack saddle with a little ingenuity. This style of pack saddle eventually became the standard in the northwestern United States, while the crossbuck has remained king in the southwestern U.S.. Why this is so, I think I discovered during our pack trip and I will discuss that in another post.
Our mustang, Jimbo, with the mantied load on a Phillips Formfitter pack saddle
For the kind of loads we carried on our pack trip, manties are used to contain the cargo, which are then tied to the Decker pack saddle. Manties are heavy canvas tarps, normally measuring about 7 X 8 feet, in which the cargo is wrapped and tied into a pack. One manty pack is tied to each side of the pack saddle to balance the load. Manties of uneven size and/or weight may be balanced by adjusting the way they are tied to the saddle. While top packs may be tied to these pack saddles, it is not commonly done, however the manties may be tied as large or small as required. The pack saddles I finally settled on have arches that are made to handle not only manties, but also Utah Paniers.
Phillips Formfitter
The Phillips Formfitter pack saddle also has other features that attracted me, such as the adjustable-angle saddle bars and the fleece pads attached to the bars. My reasoning for this selection was that the adjustable bars would answer the problem of the different conformations of the several horses on which we intended to use them. Our remuda consisted of two Missouri Fox Trotters, two Quarter Horses, one mustang, and one mule, ranging from 16 hands to 13, all with very different backs among them.
My concerns with regard to this pack saddle were limited to two things: Would the adjustable saddle bars be able to hold the pack loads in place like a solid pack saddle would? And, would the narrow saddle bars, configured similar to a riding saddle’s bars, sufficiently distribute the loads on the horses’ backs, so as to avoid pressure points and saddle sores?
Before the trip, I discussed these and other concerns about the pack saddles with Wade, at Outfitters Pack Station. We also discussed whether double cinchas, such as are commonly used on crossbuck pack saddles, might be better for our trip. I decided to go with the single cincha, since that is the configuration I have seen on most Decker-style pack saddles. I figured that if they proved insufficient, I could order the double cincha rigs at the end of the first leg of our trip. On the Phillips Formfitter, the cincha rigging is changeable by simply unbuckling one and replacing it with the other. Wade also gave me some advice on setting up the rigging to ride properly on the pack animal.
During the first 200 miles or so of our trip, we knew we would be packing feed for the horses, since there is little feed available for grazing along our route in the lower desert areas of Arizona. We decided on Equidine pellets in 50 pound sacks, as it would be easy to pack in manties and to balance as a load. We started our trip with 400 pounds of feed, split among two pack horses, packed in manties on my Phillips Formfitter pack saddles. With the help of friends, we were able to re-supply with feed as needed. The rest of our gear was packed in paniers on Dad’s crossbucks. Our plan was to have two animals under riding saddle, two packed heavy, and two packed light, then rotate every day or so to keep all the horses adequately rested. We also planned for two rest days per week. On the first day, all the animals were packed pretty heavy, but the feed went down at a rate of nearly 120 pounds per day, so the packs lightened up quickly.
I set my pack saddles up according to Wade’s advice, however, both Dad and I felt the 3/4″ wool felt pack saddle pads we had were insufficient for the loads we were packing on the horses. We decided to place a regular saddle pad over top of the pack saddle pad for extra protection for the pack animals’ backs. As it turned out, that was a mistake with the Phillips Formfitter.
The first day we made approximately 10 miles. In that distance we had to re-settle the decker pack saddles several times. I was beginning to believe I had made a serious mistake in not ordering the double cinchas. By the end of the second day, in which we made over 16 miles, we had stopped and re-settled the Decker pack saddles a number of times. It seemed they would start to turn every several miles, regardless of how well balanced and tied the load was, or how tight the cinch was. We had no such problems with the crossbuck pack saddles, which were padded in the same way.
Saddle sore on the QH Daisy
By the end of the second day, our large, heavy-built Quarter Horse mare had developed a saddle sore high on her withers. After looking at the location of the saddle sore and considering how often we had to re-settle her Decker pack saddle, we determined that we had over-padded the pack saddles, causing them to “woggle” on the horses’ backs. After that, we packed the Phillips Formfitter saddles without the additional saddle pads and had no further problems with the saddles turning or with saddle sores on any of the other horses. After that point, the Formfitter pack saddles stayed in place with the single cincha and performed very satisfactorily. Lesson learned: Do not over-pad with these pack saddles.
Incidentally, we continued to double-pad the crossbuck pack saddles on the mule and one Quarter Horse and had no trouble with the saddles turning or saddle sores.
I was very pleased with the quality and adjustability of the rigging on the Phillips Formfitter pack saddles. I was able to make the saddles fit properly on my 16-hand, tall-withered, short-backed, tall-spined, deep-chested, bony-hind quartered, Missouri Fox Trotter gelding, as well as the 15-hand, long-torso, flat-backed, broad-chested, wide-rumped, Quarter Horse. As for the mustang, he was fairly in-between the other two and we had no trouble at all with fitting the pack saddles to his conformation.
The one horse that had problems with the Phillips Form Fitter rigging was my 4 year-old Missouri Fox Trotter mare. This mare, Lizzy, has a walk to die for under saddle, but it is that same walk that makes her unsuitable as a pack horse. Her long-strided, swinging walking motion caused her to get rub sores from both the breast strap and the breeching, despite the fact that Wade makes those straps with the edges rolled with a light, soft leather. I found Lizzy also got rub sores from my riding saddle breast strap, so it wasn’t the pack saddle rigging at fault, but simply that my mare has such movement in her strides that she simply gets rub sores. Consequently, Lizzy spent more time than anticipated under my riding saddle with the breast strap stowed in the packs. My other Fox Trotter, Ranger, had no such problems and ended up under the pack saddle more than planned.
On the Fox Trotters, we had to set the spider way up on the croop to avoid rub sores
The one piece of rigging on the Phillips Formfitter saddles that caused problems on both Fox Trotters, was the spider, which is the piece that holds the breeching in place on the croop of the horse. It should ride about half-way between the point of the croop and the horse’s tail. This piece had rubbed deep sores on both my Fox Trotters’ rumps before I noticed it. I had to adjust the spiders so that they rode right on top of the horses’ croop to alleviate the problem. When adjusted as it is supposed to ride, the motion and conformation of the Fox Trotters caused the front edge of the spider to dig into the hair and subsequently the flesh of the horses. I think this problem could be remedied with a slight re-design of the spider. The spider is made with two layers of heavy leather with fairly sharp edges. I think a fleece pad under the spider, a different shape, or possibly rolled edges like the breast strap and breeching have, would fix the problem. I must say, however, that the only horses that experienced this problem were the Fox Trotters. The Quarter Horse and the mustang had no problem with the spider, or any other part of the rigging, as-is. I intend to design a removable fleece pad for my saddles, for use with my Fox Trotters.
The Packer’s Field Manual, by Bob Hoverson
I used the book “Packer’s Field Manual,” by Bob Hoverson, as a guide for setting up and using my Decker pack saddles. I found his book to be quite complete and useful. I learned to tie up manties quickly and well, using the knots and hitches he shows in the book. I set up each pack saddle with two “sling ropes” of about 28 feet length attached to the front saddle arch with a loop. Each rope runs through the rear hoops and is looped around each pack in a way that suspends it solidly from the saddle arches. The packs are weighed and balanced using a pack scale before loading, however, if one pack ends up slightly larger or heavier, balance can be achieved by setting the heavy pack a little higher on the saddle, thus changing its center of balance and making the load to ride balanced.
Decker-style pack saddles differ from traditional crossbucks not only in the way they are made, but also in the way they are equipped. While our crossbucks were pretty bare and light on rigging, the Phillips Formfitters were heavy on rigging. They also, as do all Decker-style saddles, use a protective canvas and wood shield, known as a “halfbreed” or “Arapajo”, apparently named for one of the men who originally designed and used this type of pack saddle. The halfbreed is a canvas layer that fits over top of the Decker pack saddle and has sideboards of 1 X 4 pine that protect the horse’s sides from the packs and spread the load. This is particularly important when packing items such as lumber, fence posts, or gravel. By the time we finished the first leg of the trip (355 miles), both Fox Trotters and one Quarter Horse were starting to show the beginnings of saddle sores where the side boards rode against their sides from the heavy loads of the feed sacks. The mustang, on the other hand, showed not a single mark…anywhere.
The Phillips Formfitter pack saddle is made with a leather skirt covering the saddle bars, with wool fleece on the underside. This fleece is intended to increase the padding and keep the saddle in place better. In comparison, our crossbuck pack saddles are simply made of wood. For the most part we had no trouble with the Phillips Formfitter staying in place…at least once we learned not to over-pad them, however, on our mustang we had a problem with the saddle pad crawling out from under the pack saddle. We had to stop and reset his saddle at least twice during the trip to move the saddle pad forward. We did not experience this on any other horse.
One of our crossbucks on Honey
Again, our crossbuck pack saddles were very sparse on rigging. Just a strap for the breast strap and a couple more for the breeching. They were simple to place, rig, load, and remove. They caused no saddle sores on any of the animals, and never threatened to turn and dump a load, despite our mule’s propensity to roll every time we stopped for a rest. We used the crossbucks on both of the two Quarter Horses and the mustang with similar results. Having said that, I must also add that the heaviest load we ever put on the crossbuck pack saddles was about 170 pounds and they often carried under 150, whereas our Phillips Formfitters were often loaded with up to 200 pounds of feed.
One problem we had with Dad’s old pack saddles was the fact that they are both in dire need of having all the leather replaced. Still, they made it through our trip with only one broken strap – a breast strap, which we repaired with a piece of nylon webbing we found along the trail.
Over the 28 days, Dad and I tried to streamline our morning camp-breaking ritual a number of ways, but we found that with four pack animals, and having to pack our camp and make up four manty packs and four paniers, we simply could not do it in less than about four hours. We discovered that packing the paniers was a simple matter of placing things in the bags in a fairly even manner, then weighing each panier with the pack scale and adjusting as necessary, normally a matter of removing an item from the heavy panier and placing it in the light one. Making up manties, on the other hand, was a matter of building two manties at one time, so that we could estimate that each would be fairly equal in size and weight, then wrapping each one and tying it up. Then, after they were completely done, weighing them to make sure the two packs were within one pound or so of each other. If they were significantly different in weight, they were unpacked, adjusted, and repacked. It was easy to balance them when a pack consisted of one or two bags of feed, but when they contained items of camp gear, after the feed was used, then it was a pain. Additionally, tying up the manties is very hard on the hands. The canvas and rope chafed and rubbed my hands to the degree that it became quite painful for about the first two weeks of the trip, until my hands toughened up.
The one thing we found handy about the manties was that we used the canvas tarps as a ground sheet and bed cover (we prefer sleeping out in the open and did not take a tent). By the end of the trip we had decided that for our kind of pack trips, mantying was simply an unnecessary chore. I can see how they would be the way to go for an outfitter with odd-sized items to pack, but for us, it just isn’t practical.
Utah-style paniers on a Phillips Formfitter pack saddle
For the last three days of the trip we decided that we would go with two pack animals and send one crossbuck pack saddle and one Phillips Formfitter home with our two mares. We also decided that mantying packs was a tedious task we could do without. We finished our trip using four paniers, two of which hung on either side of a Phillips Formfitter pack saddle.
In the final analysis, after 355 miles and 28 days on the trail, we learned that while Decker-style packing is very versatile, making up four manties every morning was terribly time-consuming, tedious, and very hard on the hands. Yes, Decker-style packing is versatile, but panier-style packing is much easier and takes less time and effort to pack, unpack, and load on the pack animal. Even with a cover and diamond hitch, the paniers were easier to pack than the manties. Hard paniers would be an even simpler option.
As for my Phillips Formfitter pack saddles, I am pleased with them and they performed well – once we learned the lesson about over-padding them. They are very well made, both with regard to materials and workmanship. However, I cannot say they out-performed the old traditional crossbuck pack saddles. Though, had we loaded up the crossbucks with the weights with which we loaded the Formfitters at times, things might have been different.
I will continue to use the Phillips Formfitter pack saddles due to their adjustability and versatility, but I will use them with paniers unless it is absolutely necessary to use manties. They will go with us when we start again next spring. While we had two horses that experienced saddle sores and rub sores, I cannot blame that on the pack saddles and do not believe they are at fault. These saddles allow me to choose between panier packing, with both soft and hard paniers, or to go with manties for odd-shaped loads.
For the type of horse packing Dad and I do, panier packing will remain our standard. Consequently, as far as utility is concerned, it is a wash between the Decker and Crossbuck pack saddles. While the Deckers are definitely more versatile in the ways they can be packed, we will be using them for handling paniers, which the crossbucks are specifically made for and do very well. Knowing what I know now, I would choose a standard crossbuck pack saddle over a standard Decker pack saddle for the kind of packing I do.
As far as the Phillips Formfitters are concerned, the quality of workmanship and materials, and the adjustability of the rigging and saddle bars are important to me and I remain pleased with them. I will use them pretty much as I would use a crossbuck pack saddle in the future, but will still have the added versatility when needed. In my opinion, the price tag of $699 for a fully outfitted Phillips Formfitter pack saddle is an excellent value when compared with prices for other brands and styles of pack saddles similarly outfitted. I expect mine will cover many miles on my pack animals before I hang up my spurs.
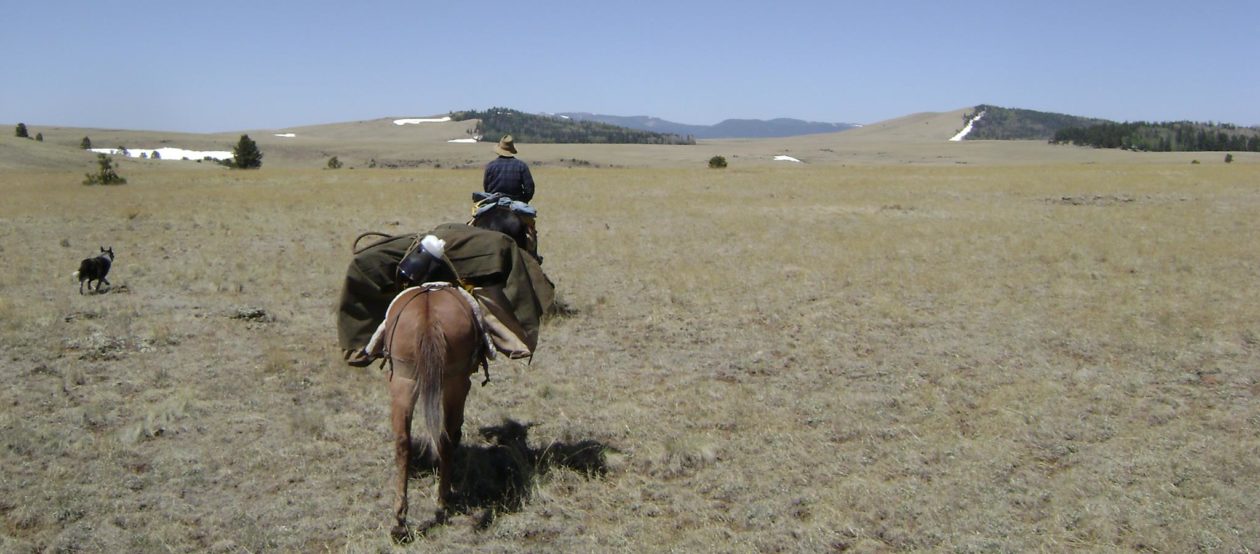


You must be logged in to post a comment.