I spent some time yesterday with my journal, reviewing the past year. It has been a productive year for me. During 2015 I realized a number of personal accomplishments and goals that have opened a number of opportunities to me. I’ll list some of them.
I became an NRA Certified Firearms Instructor (NRA Basic Pistol)
I became a Utah state certified Concealed Firearm Permit Instructor
I became a licensed Armed Private Security Officer in the State of Utah
I became a certified PACSCO instructor for training Unarmed and Armed Private Security Officers for licensing in the State of Utah
I became the Director of Training for Bedrock Protection Agency
I obtained a Private Investigator Agency License in the State of Utah
I became the Private Investigator Agency Licensee for Bedrock Investigations
I started Mountain Enterprises, LLC, registered in both Utah and Arizona, to be the parent company for my business enterprises
I started Guardian Personal Firearms Training, as a firearms training business for the Utah Concealed Firearm Permit courses and other defensive firearms training for private security officers, individuals, and families
I registered Western Trail Rider as a business under Mountain Enterprises, LLC
I made and sold my first three pairs of chaps
I started improvements on my property in Arizona with an eye toward hay production in the future
I finished outfitting and preparations for the Mexico-to-Canada horse pack trip for Dad and me
Dad and I made the first leg of our M-T-C trip, from the US/Mexico border to Eagar, AZ – 355 miles in 28 days.
The most important thing of all, is that my wife and I saw our youngest daughter off to serve a mission for The Church of Jesus Christ of Latter-Day Saints (Mormon). She’ll be serving for 18 months in the Argentina-Mendoza mission.
Suffice it to say, I have been very busy this year. I expect to be even busier this coming year. I have always been very goal-oriented. Keeping a journal has helped me in accomplishing my goals and fulfilling my dreams and desires. Documenting my goals and writing about my victories and failures helps me keep track of my progress…or lack thereof, during the year. Just like everyone else, I make a lot of goals and have a lot of dreams, most of which fall by the wayside each year. Not that they go away, but that either the opportunity did not materialize or I failed to put forth the necessary effort to realize them. As I have aged, I have seen a lot of my dreams come to naught and many of my former desires I no longer wish for. And, surprisingly, a few new desires crop up here and there. Still, looking back through my journals it is plain to see that I have a few interests, dreams, and desires that have persisted throughout my life. These are the ones I have begun to focus on since I retired from government service several years ago. One of these is my love for horses and horse packing. Another is my desire to have a small farm or ranch.
The most important things in my life have always been God and family, yet I often find myself selfishly putting other things before them. As the scriptures tell us, one cannot serve God and Mammon (or worldliness) at the same time. Over the past several years, this has been on my mind a lot. How can I serve God and also support my family and myself? Are my desires and dreams incompatible with service to God? I don’t think so.
I have come to the conclusion that God intends for us to be happy in this life. That doesn’t mean life is intended to be easy, but that we are intended to have joy in this life by making the most of what the Lord gives us to work with. I believe God loves us. I believe He knows “the end from the beginning” – that He knows all things past, present, and future. I believe all things are under His control and in His power. I believe also, that God gave us our Free Will, and that he does not dictate our actions. We have the ability to choose our way and make our own decisions. It follows, then, that whatever opportunities and challenges come to me, ruling out problems I bring upon myself through my own mistakes and unwise choices, are, in fact, given me of God. Which opportunities I choose to follow and how I choose to respond to challenges is my God-given prerogative. My improvement of those opportunities and challenges, therefore, is my service to God. Giving my best effort in all things good pleases God. This is what I believe.
I also believe that as I please God by giving my best effort to improve what he has given me, He will increase my opportunities as my ability to improve them increases. Don’t get me wrong, I don’t think God cares much about whether I make a lot of money in this life. I do believe, however, that improving the opportunities He provides me can result in monetary success as well as spiritual growth. My desire and efforts should be in good service, and let the chips fall where they may.
God has been good to me.
I have but one New Year’s resolution this year and that is to put forth a better effort in everything I do. I want to be more efficient and effective in the use of my time in all aspects of my life. That means I will put forth better effort in my employment, in developing my business prospects, in keeping up my website and blogs, in keeping up my family and church responsibilities, and in improving my own health and personal conditioning. By doing this, I expect that the opportunities I have been blessed with in the past several years will begin to bear fruit in the coming year and going forward. I believe this will be pleasing to my Lord.
Some things I hope to accomplish during 2016 are:
First and foremost, to see that my daughter is supported to the best of my ability on her mission
Secondly, to see that Dad and I make the second leg of our Mexico-to-Canada horse pack trip
After those two:
Put in10 acres alfalfa on the place in Eagar
Get the well repaired and functional
Get irrigation established
Improve fencing
Get a barn put up for hay and tack storage
Buy 4 calves to start on the place
Get regular firearms training classes scheduled and working in Utah and Arizona
Get more NRA Instructor certifications (work toward becoming an NRA Instructor Counselor)
Design and offer advanced defensive firearms courses
Improve the Western Trail Rider website
Take and document at least 3 horse pack trips during the year, other than the M-T-C ride
Completely document the M-T-C ride and all preparations with my blogs, video, and photographs, product reviews, etc
Recruit/approve at least 6 individuals to keep blogs under Western Trail Rider
Increase follower and subscribership on Western Trail Rider to 1,000 and views/clicks to 300 per day
Create a way that outfitters and suppliers can advertise their services and products on the website that will improve their exposure and help the website
So, there it is. That’s my list of things I wish to accomplish over the coming year. There are a few other personal and employment goals, but I’ll keep those in my personal journal.
Good luck with your goals and planning for the coming year and have a Happy and Prosperous New Year.
Dad and I got on the phone together on Christmas Day last week and talked a little about our upcoming pack trip. We’re talking about the second leg of our Mexico-to-Canada pack trip. I have been putting together a route plan and trying to figure out the best time frame to fit it into. Dad made that a lot easier.
Dad was born and raised in Panguitch, Utah. Panguitch, being steeped in pioneer tradition of the LDS faith, holds a Pioneer Day Celebration every year on or about July 24th, the day the first group of Mormon pioneers entered the Salt Lake Valley in 1847, under the command of Brigham Young. Dad graduated high school there in Panguitch, and to this day his graduating class has a reunion every other year. In 2014, twenty-one of his classmates showed up out of a graduating class of thirty-nine. Since he graduated high school in 1952, that’s a phenomenal statistic! Well, last week Dad had a request. He wants to arrive in Panguitch at the end of the second leg of our pack trip, so that he can attend his class reunion and the Panguitch Pioneer Day Celebration.
Well, that’s not too hard. We just figure out the total mileage, our anticipated mileage per day, and estimate the time it will take us to get from Eagar, Arizona to Panguitch, Utah, then simply track it back to determine when we need to depart Eagar to make it happen. Piece of cake!
So, here’s the figuring. The route we are planning has us departing Eagar, AZ and traveling almost due west, following US Route 60 to Show Low, AZ. We figured to follow the highway for that portion for a couple reasons. Firstly, water in that part of Arizona is pretty scarce, so we’ll need to have water delivered to us daily for that portion. Secondly, there is always grass growing alongside the highway, which will help our stock stay in good shape as we start the trip. Thirdly, in this area of Arizona, there are a lot of fences and few trails and the travel time we will save following the highway, rather than backroads, will be important to us later on in the trip. US Route 60 is the most direct route we could take from Eagar to Show Low. It has a wide easement and no travel restrictions, such as fences. It also routes us around the White Mountain Apache Reservation, which is not particularly friendly to horse travel on their lands. This route Just makes sense, despite our preference of following trails or backroads. It’s about 49 miles from our starting point in Eagar to Show Low by that route.
At Show Low, we will turn south and join the Mogollon Rim Road, which travels along the top of the Mogollon Rim, generally in a westward direction. For those unfamiliar with Arizona, the Mogollon Rim is the southern edge of the Colorado Plateau that drops off to the south, creating a steep drop in elevation of up to 4,000 feet in some places. It runs across central Arizona for about 200 miles. The Mogollon Rim Road follows most of the rim. We will be following this road just for a few miles. Just west of Show Low there is a designated foot/horse trail that follows the same direction, just a bit closer to the actual rim. This is what we are hoping to be able to follow. We should be able to find adequate water and feed for the horses along that route, but if not, we are close enough to a decent road that we can have feed brought when needed. We will follow this route for about 100 miles before we join the Arizona Trail and head north again.
The Arizona Trail is a designated trail for non-motorized travel that crosses Arizona from Mexico to Utah. I am a supporting member of the AZT, which has a very active association that maintains the trail. The trail is fully documented by GPS for mileage, water sources, elevation, etc, so there are few surprises there. This is the route the boys from “Unbranded” rode from Mexico to Utah. We will join the route just north of Payson, Arizona, between where you see Pine and Tonto Natural Bridge State Park on the AZT map. From that point, there is no guesswork in the mileage. It will be 220.5 miles from there to the south entrance of the Grand Canyon National Park.
Crossing the Grand Canyon on our own horses is the Crown Jewel of our entire trip. Dad and I have dreamed of this since I was in high school. This is where things get a bit tricky. The earliest the GCNP will allow camp reservations in the park is four months in advance, and if you don’t reserve that far ahead you simply will not get a reservation. Additionally, you cannot stay a night in the park without a camp permit, particularly with horses. The regulations regarding horse travel in the park are quite reasonable and they are strictly enforced. Horses must have been fed weed-free feed for two weeks before entering the park, they must have a current negative Coggins test (one year), and a current health certification within 30 days from a veterinarian. One must also have a reservation for one of the two horse camps within the canyon itself in order to be able to stay overnight in the canyon.
Additional regulations include travel hours on the trails. From the South Rim, private individuals with their own stock must depart no earlier than 1:30pm, to avoid conflict with the outfitters coming out of the canyon with their mule strings in the morning. Heading up the north side, private individuals must depart no earlier than 10:30am. The mileage from the South Rim to the Phantom Ranch at the bottom is 7.4 miles, and from there to the north rim is another 14 miles. Due to the late departure from the South Rim, it will be necessary (a happy necessity, I might add) that we stay one night in the canyon. We hope to be able to secure a reservation at the horse camp at Phantom Ranch.
Once out of the canyon, it is another 12.6 miles to the GCNP northern border. Add that to the 14 miles from Phantom Ranch to the North Rim and it is pretty likely we will be staying another night in camp somewhere before we arrive at the park border, requiring another camping permit reservation.
In talking with the park rangers last spring, I found them to be very helpful, in fact, surprisingly so, with regard to our plans to cross the Grand Canyon on our own horses. They suggested that I make a reservation to camp at the Mather Camp Ground on the South Rim for a week, which would give us some leeway on our arrival date. We will be traveling by horse for about 370 miles and trying to hit a particular date on our arrival at the GCNP. That’s like hitting a full-court shot at the end of a basketball game. If we are unable to secure the camp reservations we need or if we are delayed and can’t make the date of our reservation, they were fairly confident they would be able to fit us in at some point while we waited in camp at Mather. As things turned out this year, we decided against going on after the first leg of the trip. For the second leg, this coming year, I will try to get reservations for one night at Phantom Ranch and another night up on the north side somewhere. I will reserve a site at Mather Camp Ground, which has hookups, bathrooms, etc, on the South Rim for a week in advance of the primitive camp reservations. If things work out well, we will have a few days of rest for us and the horses before tackling the Grand Canyon.
Once we leave the GCNP, we will continue on the Arizona Trail another 66.4 miles to the Utah Border. At that point we join the Great Western Trail. The GWT is a network of multi-use trails on government land (Bureau of Land Management, US Forest Service, and state lands) that stretches the rest of the way from Utah to Canada. It is not well documented and there is no private association that helps maintain the trail system, other than volunteer organizations, such as the Back Country Horsemen of America, which has several chapters in Utah. At this point we are again back to our own reckoning as to the trails we will take and the mileage from point to point.
Our route from the Utah Border will take us northward up Paria Creek to the mouth of Willis Creek. We will follow Willis westward up Willis Creek Canyon, toward Bryce Canyon National Park. Our plan is to join the Grandview Trail below (east of ) Bryce and follow it around the southern end of the Paunsaugunt Plateau, then back northward to Red Canyon. If time allows, we will take a day to ride Bryce Canyon, as well as Casto Canyon and Losee Canyon on the west side of the plateau. By this time we will have joined Casto Road, which is a dirt road that leads right on into Panguitch. Estimated mileage from the Utah Border along this route to Panguitch is 88 miles.
The total mileage, Eagar to Panguitch, as close as I can figure, is about 560 miles. For insurance, I added a fudge factor of 25% to the miles that are not exactly documented by the AZT Association. That brings the mileage, on the long side, to about 620 miles.
During the first leg of our trip we learned a few things that are helping us on our planning for this leg. Foremost, we learned we can plan on an average of 15 miles per day. Some days are better, but some days are worse. When we did our original planning, we figured we would be making 20-25 miles per day after the first week of breaking the horses and ourselves in to the trail. Not so. We had also planned for two rest days per week. As it turned out, we rested only one day per week, trying to make our time schedule, because we found we were averaging only about 15 miles per day. This year we will plan for 15 miles per day and two rest days per week. With that in mind, our total travel time should be between 41 and 43 days, barring any long delays or mishaps. Traveling five days per week, that makes it between eight and nine weeks total travel time.
Scheduling all that out on a timeline, with us arriving at Panguitch on or about July 20, has us arriving at the Grand Canyon on or about June 29. That, in turn has us departing Eagar, Arizona, to embark on this momentous journey, on Monday, May 23, 2016.
That just happens to be the date of Dad’s 82nd birthday.
I have engaged Fifth Mission Marketing to revamp the website.
In the near future we will be remaking the Western Trail Rider website. For about the past year I have been having trouble keeping the website functioning. When I set it up, back in 2012, I had plenty of time on my hands, having recently retired, so I was able to spend the time to create the website using all open-source software, including WordPress for the blog, Coppermine for the member photo gallery, and PHPBB3 for the forums. I was able to tie all three programs together using WP United, which allowed a single log-in to enter each of the aforementioned programs on the website. Then, during the fall of last year, while I was moving, the website came under fire from spammers. While I wasn’t paying attention the site received more than 5,000 spam member registrations on the forums, which I had to delete manually, almost one-by-one, because PHPBB3 didn’t have a function for bulk member deletions. There was so much good information on the forums already that I didn’t want to simply trash it all. I cleaned it all up, but still couldn’t seem to keep spam operators from registering on the site. I just didn’t have the time to monitor it every day to keep up with them.
Then came along several major updates to WordPress, which broke the functionality of WP United, so the programs no longer talked to each other. WP United is no longer supported, so it’s broke for good. Then came updates to the other two programs, by which time I was lost and none of the programs were functioning properly. I hired Fifth Mission to get the website functioning just in time for Dad and I to embark on the first leg of our Mexico-to-Canada horse pack trip last spring. It worked for a little while, but another major update from WordPress while I was out broke things again. Well, I was frustrated and sort of gave up on it for a while, besides, I was fully engaged in building up a new business.
Now that I’m back in gear and working on planning and preparations for next year’s second leg of the pack trip, I’m also working on getting the website back in gear.
Here’s the plan: Fifth Mission will be hosting my website. They will redesign it using a new WordPress theme, adding several new and “high-speed-low-drag” functionalities to the site. The new theme incorporates a photo management function, which will replace Coppermine as the member gallery. There will be a map, sort of like what you see on Google Maps, with small icons on it that are clickable by members. When you click on the icon, you will go to a page that holds photos, comments, and writeups on a particular trail located under that icon on the map. This will take the place of the forums. We are still working out details of how to conduct other discussions, such as gear, trail tactics and strategy, etc., in a forum-style format, but there will be something.
The downside is that all the current website members and followers are going to have to register again. Sorry about that, but in order to keep the spammers off, we are going to have to start from scratch and rebuild everything. This time it will be all under one program and with one company hosting it and watching over me and the website. When there is an update, everything will be compatible and will keep on working. I am optimistic that in this way I will be able to keep things up and running.
So, in the not-too-distant future, look for some major changes on the website.
Stay tuned for new updates on my preparations for the second leg of the big ride.
It’s been since June that I last posted on the blog. No real excuse. I’ve been pretty busy, working off the debt I incurred on the first leg of the trip. I’ve been working more than I anticipated, which I guess is good, but it has turned my focus and energies away from horses and pack trips for the past several months. This afternoon I decided it was time to get going again and get things planned and preparations started. So, this afternoon I spent some time going over the proposed route from Eagar, Arizona to Panguitch, Utah.
Last spring, Dad and I departed the US/Mexico Border, about 20 miles east of Douglas, Arizona, and headed north on April 11, 2015. We spent 28 days making our own route, following ranch roads, county roads, highways, and overgrown and unmaintained mountain trails, on our way northward to Eagar, Arizona, where my parents reside. According to my DeLorme Explorer GPS unit, we made 355 miles on that leg.
We had intended to go on with the second leg of the trip, from Eagar, through the Grand Canyon, and on to Panguitch, Utah, after a short rest and resupply there at Eagar, but by the time we got there we knew we were done. We learned a lot about ourselves, our gear, and our horses on that first leg and we knew we had to make some adjustments before we started the second leg. Wisdom dictated that we stop for the year and start again next spring.
This leg of the trip will start at Dad’s place in Eagar. We will make our way to Show Low, Arizona, about 50 miles west, via US Route 60. The highway is a very direct route and it will help us avoid fences. The right-of-way is quite wide and traffic is fairly light most of the time. There is grass along the highway, whereas it’s tough to find otherwise, so it will help us supplement the horses’ feed. Additionally, we’ll need some logistical help along this route, due to the scarcity of pasture and water, so it will be pretty easy to find us and get supplies to us, making it easier on our help.
I expect we’ll make our way right down the main drag in Show Low, from one end of town to the other. On the west side of town, we’ll continue following US 60 south until we hit the Mogollon Rim Road. We’ll follow that westward, following the Mogollon Rim for about another 130 miles, until we reach the Arizona Trail. That marks the last of our own navigation until we reach the Utah border.
From there, the Arizona Trail is very well documented. The AZT website, of which I am a contributing member, offers all the information one could hope for, including GPS verified mileage, waypoints, water sources, elevations, and even trail stewards, whose names and contact information are posted in connection to their respective trail sections. So, all the guess work is done from there to the Utah Border. Another 220.5 miles will bring us to the border of the Grand Canyon National Park.
Crossing through the Grand Canyon is the “crown jewel” of this trip. This is something Dad and I have dreamed about since we first started talking about it, over 40 years ago. Since the mileage works out to 34 miles from border to border of the park, and since there are camping and horse use restrictions in the park to deal with, there are timing and logistical details that still need to be worked out. We will definitely need to stay a night in the canyon, and possibly one other night in the park. Besides, how could we possibly pass up the opportunity of staying at least one night with our horses in the Grand Canyon? I look very much forward to that.
When I planned for this portion of the trip last year, I found the Park Service people to be very helpful and pleasant to deal with. I was actually surprised at how helpful they were. Their suggestions resulted in my reserving a space at the Mather Campground, where there are horse facilities, for a week. Since I was unable to reserve a campsite in the canyon, they suggested I take the Mather Campground space and simply wait. They were fairly confident a cancellation would occur, allowing them to find us a campsite for ourselves and our horses within that week’s time. Well, it all came to naught last spring, so I had to cancel my campsite reservation.
This year, I will have a better idea of when we should arrive at the park, so I will be able to make reservations with a reasonable chance of making it on time. I plan to make the campsite reservation at Mather Campground for about the time we should arrive and a week after, making the campsite reservations in the bottom of the canyon, hopefully at phantom Ranch, for the end of that week. Thus giving us and the horses a few days of rest before we head down the trail into the canyon. I’ll be making those reservations next month, as they don’t accept the applications more than four months in advance.
Once we reach the northern border of the Grand Canyon National park, we will have another 66.4 miles to the Utah border.
From that point, we will be back on our own navigation. We plan to head north into Paria Canyon, following the river northward to Willis Creek, just south of Cannonvile. We will take Willis Creek westward toward Bryce Canyon National Park, until we join with the Grandview Trail. This trail will take us around the southern end of the Paunsaugunt Plateau, where we will join Casto Road near Red Canyon on the west side of the plateau. From there we will follow Casto Road on into Panguitch, where we will end our ride for the year.
According to my calculations, the entire second leg of the trip will comprise approximately 570 miles. Adding a fudge-factor of 25%, I come up with 712 miles, so that will be our high estimate. However, since the Arizona Trail portion makes up about 320 miles of the trip, no fudge factor is needed for those miles. A closer estimate would be about 631 miles, with the fudge-factor being applied only to the non-AZT portions of the trail.
If we travel at the average rate of 15 miles per day, that makes about 42 travel days. If we take two rest days per week, like we originally planned (but didn’t do), that makes about 8-1/2 weeks of total travel time. We are likely to spend a few days at resupply places here and there, and maybe a week at Mather Campground in the Grand Canyon, I think we can conservatively figure on the trip taking us about ten weeks.
For some reason, I couldn’t get any images to upload. Looks like I’m going to need some more work done on the website. I’ll get some pictures up soon.
Next post, I’ll discuss some of the adjustments we will need to make for this leg of our Mexico-to-Canada horse pack trip.
Way back when, quite a while ago, I bought a couple nose bags to test them out before my dad and I set off to begin our big Mexico-to-Canada pack trip. I wrote a blog post on them. I ended up buying another feed bag, this one from Outfitter’s Supply, just before the trip. Here’s my evaluation of all three feed bags.
Before I start, I should let folks know that Kevin, at Outfitter’s Supply gave me a nice discount on a fairly large order I placed with him, including this nose bag. However, the facts of the matter will speak for themselves. My evaluation was not influenced by the discount.
I guess the first question to answer is this: Why use nose bags? I have used a number of ways to feed horses while on pack trips or overnighters. Dad and I, over the years have settled on feeding some form of pelletized alfalfa feed to our stock while on outings. We particularly like Equidine. Pelletized feed is easy to load and haul in a truck or trailer and far less messy than hay. It is easy to pack on a pack animal, whether packed as bags in manties or simply poured into the bottom of paniers. It can even be used as protection for other items that can be placed down into the pellets inside the paniers. We have fed alfalfa pellets by pouring a pile on top of a saddle pad or simply right on the ground. However, our experience tells us that the best way to feed pelletized feed on a pack trip or campout is to use nose bags.
When we head out for a pack trip or overnighter, we seldom know what sort of accommodations we will have for our horses at night. On our pack trip we normally tied one horse to a nearby tree or shrub and let the rest roam. We had no problem with horses trying to leave the group. On other trips we have had horses tied separately to trees, on a highline, staked, or even tied to a trailer. We have found that no matter how the horses are secured, when fed on the ground or on a saddle pad, there is waste. They seem to be able to scatter the feed until they cannot reach it all, then they trample it into the ground. When they are allowed to roam, the alpha horse will move from place to place, sampling each of the feed piles and causing the rest of the horses to move from place to place as well, resulting in the horses fighting and the one on the bottom of the totem pole getting less feed. With nose bags, waste is almost totally eliminated. Horses tend to feed more calmly and take their time feeding. They cease to move around as much and they do not fight over feed. So, for our pack trips and other outings with horses, unless we are feeding hay, we always use nose bags.
Nose bags from Trailhead Supply
The first nose bag is a nylon mesh bag with nylon straps and plastic buckles, which I knew as soon as I received it that it would not be sufficiently durable for our pack trip. It is, however, perfectly fine for a weekend outing or for short pack trips where a failed nose bag would pose no problem. The price I paid for it, $14.95, from Trailhead Supply reflects that as well, so I was not disappointed in it, just realistic in understanding that it was not made for what I was intending to use it for. You can read my writeup on it in the blog post I linked above. For my purposes here, just know that particular nose bag did not go on the pack trip with us.
Breathing panel a little low on the bagSteel adjustment buckle
The other nose bag I bought from Trailhead Supply, however, was much more substantial. You can read my initial impressions in the same blog post linked above. This nose bag was priced at $21.95 when I bought it in February 2013, however it no longer seems to appear on their website. This feedbag has a leather bottom and a leather vent for breathing. It has a heavy leather hanger that is adjustable via a nickel plated steel buckle. At the time I bought it I questioned the wisdom of having the breathing vent so low on the bag, as I figured it would get covered by feed. I was told by an experienced packer that the vent was located low on the bag to prevent the horse from drowning, should it try to drink with the feed bag on its head. While that explanation made sense to me, I still wished the vent were a little higher. I have seen horses stop eating because they had a hard time breathing with feed in the bag.
This nose bag just barely fit the horse with the smallest head
This bag did, in fact, go with us on the trip. However, shortly before I left on the trip, I found it was way too small for the head of my 16-hand Missouri Fox Trotter gelding. In fact, it barely fit on the head of my smaller Fox Trotter mare. This nose bag fit my mare on the last hole on the hanger strap. Even on her, the bag fit so tightly around her nose that I was concerned that she would not feed with it on. Those fears were unfounded, however, as she did fine with this bag and it made the entire trip without problem. This nose bag simply would not fit a mule. It would be adequate for a small horse.
Outfitter’s Supply’s canvas/leather feedbag
The fact that this nose bag would not fit my gelding, necessitated that I look for another brand of nose bag for my gelding. Eventually, I settled on the top-of-the-line nose bag from Outfitter’s Supply. This nose bag carries a premium price, at $64.95, but Kevin was gracious enough to give me a substantial discount to help us get outfitted for the trip.
This nose bag is everything I think a nose bag should be. It is made of heavy canvas, large enough for even a mule, with plenty of adjustment in the heavy leather hanger. The hanger straps are stitched the full length of the bag, tying into the heavy leather bottom. Large copper rivets reinforce all critical points. The breathing vent is situated well above the bottom, providing plenty of room for a good scoop of alfalfa pellets and room for the horse to breathe.
This one fit the largest horse we had
I can also attest that the vent is low enough on the bag to allow for drainage of water. Our horses all drank from the troughs, streams, ponds, etc, almost every time they were fed, with the bags in place. My big Fox Trotter was no exception. The water drained off with no problems and no anxious moments for the horse.
The one complaint, if you can call it that, was that the hanger on this nose bag would occasionally unbuckle itself while I was putting it on the horse. I think that is due to the roller buckle. While roller buckles are normally seen as an upgrade from regular buckles, in this case I think a regular buckle might work better, because they aren’t so easy to unbuckle. The fact is, you don’t often need to re-size a nose bag. Still, that is a very minor criticism, and I bow to the fact that Outfitter’s Supply makes these bags to suit the U.S. Forest Service specifications, after having handled repairs on their nose bags for a number of years. I expect this nose bag to be part of my horse packing inventory for many years to come.
Dad’s homemade nose bags aren’t pretty, but they work like a charm
Incidentally, my dad happens to have a heavy-duty industrial sewing machine and a large supply of heavy canvas. Dad sewed up his own nose bags for the rest of our remuda.
They weren’t very pretty, but they did the job and lasted the entire trip….and they were priceless…er…I mean “free”.
Dad’s homemade nose bags aren’t pretty, but they work like a charm
This one fit the largest horse we had
This nose bag just barely fit the horse with the smallest head
This is essentially the second part of my gear review of the pack saddles Dad and I used on the first leg of our Mexico-to-Canada pack trip we started in April. This post, however, is specifically about paniers vs manties.
Decker-style pack saddle with mantied cargo
For the neophyte, a manty is a heavy canvas tarp, normally about 15 oz. canvas, about seven feet wide by eight feet long into which a cargo load is wrapped up like a package and tied with a manty rope, which is a half-inch diameter rope about 25 feet long. One mantied load is tied to each side of a Decker-style pack saddle. A panier is a large canvas or nylon bag or hard-sided box into which items are packed. One panier is then hung on each side of either a Decker or crossbuck pack saddle by straps or Decker hooks. Crossbuck pack saddles are specifically made to handle paniers, while a Decker-style pack saddle can handle either.
Utah-style paniers on a Decker-style pack saddle
To summarize what I said in my last post about this topic, Dad and I made 355 miles in 28 days with five horses and a mule. We rode one horse each day and packed the other four animals, two under crossbuck pack saddles with paniers and two under Decker-style pack saddles with mantied loads. By the end of this first leg of our trip, we both came to the conclusion that for our purposes, mantying our loads was simply an extra chore every morning and was far more difficult and time consuming than packing paniers. By the end of the trip we had sent two pack horses home, along with our manties, and continued with two pack horses, each carrying Utah-style paniers.
Crossbuck pack saddle on our mule, Honey
Decker-style packing and tying up cargo in canvas manties came into vogue in the northwestern U.S. during the first twenty or so years of the 20th century and has continued to reign supreme for all kinds of packing and outfitting there. However, in the southwestern U.S., crossbuck pack saddles with paniers has remained the standard, carrying on the traditional style of packing that far predates Decker-style pack saddles. When I made the decision to use Decker-style pack saddles and manties on our pack trip, it was partially from a desire to broaden my packing experience, but also with a question in mind as to why Decker-style packing has never taken hold in the southwestern United States. By the end of our trip, I had gained the experience I wanted, and I think I answered the question – at least to my satisfaction. Keep reading.
After packing about 200 miles through the low deserts of southeastern Arizona, through the Chiricahua Mountains, and on up through the volcanic mountains between Safford and Clifton, I came to the realization that each time I laid out a manty on the ground to start packing, I ended having to brush all manner of “ouchies” from the manties as I wrapped them around my load. Now, for those unfamiliar with the desert southwest, in the immortal words of Rooster J. Cogburn, “Everything out here will either bite you, stick you, or stab you!” Unless you have actually experienced horse or other kinds of packing and camping in the desert southwest, you really cannot comprehend the full truth of that statement.
There is no square foot of ground, at least not that I have seen, in the desert southwest that is not covered with all manner of seeds, thorns, insects, cactus, and other pricklies, each with its own means of causing pain and discomfort to the human hand. Unless, that is, you are in pure sand…which then presents its own set of problems. In other words, every morning I found myself picking stickers and cactus spines out of the manties, out of our gear, out of the ropes, and out of my hands, as I tied up the manty packs. I have never encountered that kind of nuisance in the mountains of the northwest, or even in the higher mountains of Arizona. I am convinced that this is the primary reason that Decker packing and manties never took hold in the southwestern United States. A secondary reason might possibly be, though I have not researched it, that in the northwestern areas there are more national forests, national and state parks, and other forested areas managed by the US government, wherein materials such as building materials, gravel, lumber, etc, have had to be hauled into remote areas by mule trains for the construction of ranger stations, bridges, trails, etc. Decker-style packing lends itself much better to cargoing odd-shaped loads than paniers.
Take a look at this short youtube video I made, in the mountains near the Double C Ranch, just south of the Gila Box State Park, southwest of Clifton, Arizona, about 200 miles into our trip. You’ll have to turn the volume up, as I didn’t have an extension microphone for the GoPro camera. In this video I demonstrate how I tie up a manty to prepare a sack of feed to be loaded onto a Decker-style pack saddle.
In preparation for our trip, I purchased two manties from Outfitter’s Pack Station, at $54 apiece. They are the 7’X8′ size, with hemmed borders. I also purchased from them a pair of Utah Paniers, which they call Utah Meat Bags, priced at $250. Wade and Simone gave me a substantial discount on these items, for which I am grateful. I already had a pair of 18 oz canvas tarps measuring 6’X8′, which I used for the second set of manties. Dad had an old pair of canvas panier bags for our second set of paniers.
Every morning, for the first 25 days of the pack trip, I tied up four manties and Dad and I loaded them onto two pack horses with Decker pack saddles. We then loaded four paniers, including my Utah bags, and lifted them into place on the crossbuck pack saddles. We agree that loading and unloading the paniers is much easier than manty packs. I found that tying up manties was terribly hard on my bare hands. The rubbing and chafing of the ropes and canvas while tying up the manties left my hands swollen and painful until they finally toughened up about two weeks into the trip. That was not because my hands are soft. I am a wood worker, a leather worker, a horseman, I do general construction, electrical, plumbing, and about anything else a “Jack-of-all-Trades” does, and I purposely do these things bare-handed, specifically to keep my hands tough. I am here to tell you that tying up manties every morning is TOUGH on the hands!
There is one thing in which manties have an important safety factor over paniers. That is in crossing water. There is a danger with paniers, particularly when they are not covered with a tarp and diamond hitch, in crossing water. If the horse loses its feet, or if the water is sufficiently deep to rise above the top of the paniers, the paniers will fill with water, effectively becoming a “sea anchor”. Pack animals have been swept downstream and drowned due to this. A manty, on the other hand, is quite water resistant when tied properly, and will resist filling with water while a pack animal regains its feet or crosses a deep spot. Not that items within will not get wet, but the pack will not fill with water. We had one instance in which a pack horse laid down in the Gila River, in water about 18″ deep, and tried to roll his pack off. One manty pack was completely submerged for a second or two. The pack remained in place as we got the horse up and the contents were dry when we unpacked them that evening.
The Utah Meat Bags are huge bags, measuring about 32″ tall, 23″ wide, and about 10″ deep at the bottom (deeper at the top). These bags are made of a very heavy woven nylon fabric, commonly known as “iron cloth.” They have very heavy leather adjustable straps, with steel roller buckles, as well as heavy leather corner reinforcements. These are perfect for hauling game meat, ergo the name, as they are easily washed with soap and water. Blood and other contaminants wash right out without leaving a stain. For our purposes I was impressed with the size of the bags, which easily contained the gear we had to fill them. Once the top strap was tightened, the bags closed over our gear, thus eliminating the need for a cover tarp and diamond hitch…at least when the weather was clear. The adjustable hanger straps allowed us to adjust the height at which the bags hung from the pack saddle, which was important when we switched the bags from our crossbuck saddles to the Decker saddles. This made it possible to hang the bags at the most comfortable height for the pack animal.
I was very pleased with the quality of construction of the Utah bags. We really put them through their paces. They were rubbed on rocks, poked by tree branches of burned trees, rubbed on blackened, rough tree bark, brushed against cholla cactus, run into gate posts, and rolled on. The handled all this with no problem, no tears, no fraying. The only hole in them came from a metal grill that poked a small hole in one bag. There was no fraying or propensity to unravel. The hole remained a simple small hole throughout the trip. Eventually…if I ever remember to do it…I will take a heated nail and melt the edges of the hole to ensure it will never get worse. Dad’s canvas paniers have lasted almost 40 years, but they are nearing the end of their useful life. He has patched and stitched them so many times that they resemble a patchwork quilt in some places. They are a true testament to the durability of canvas paniers, however, I believe my iron cloth paniers will outlast them.
My manties, on the other hand, sustained several small rips and tears from rocks and branches. They also became quite soiled from dirt and rubbing against burned trees in the Chiricahuas. These rips and tears will continue to fray throughout the life of the manty, as they cannot be sealed with heat. I have a rip-stop fabric glue for them, but in my experience, that will only work for a limited time and will need reapplication occasionally.
My Utah Meat Bag paniers hung from a Phillips Formfitter pack saddle
As I mentioned before, by the end of the trip, we let the manties go home early with a couple horses, and we put a Decker-style Phillips Formfitter pack saddle on my mustang, Jimbo, and hung the Utah Meat Bags on it. For our style of packing, we found this much easier than tying up manties every morning.
For my kind of horse packing, I expect I will be putting a lot of miles on my Utah bags over the coming years.
Those of you who have been following my blog awhile know that I did quite a bit of research on various configurations of pack saddles before finally settling on the Decker-style Phillips Formfitter pack saddles, from Outfitters Pack Station, for our Mexico-to-Canada horse pack trip. As Dad already had two crossbuck pack saddles, we ended up using my two Deckers with manties and Dad’s two crossbucks with Utah-style paniers. It’s time for my comparison and evaluation.
Crossbuck pack saddle tree
To provide a little background, crossbuck pack saddles, sometimes called sawbuck pack saddles, have been used in North America for at least a couple hundred years. They consist of two crossed wooden “crutches”, similar to the way a sawbuck is built, which is where the name comes from (a sawbuck is two crossed beams over which a log is laid to be cut with a saw). Paniers, which are large bags or hard-sided boxes, are hung by straps from the crossbucks. Traditionally, soft paniers, often called “Utah Paniers” were used. These paniers are often covered with a tarp, which is tied in place with a diamond hitch, which improves the water-resistance of the pack and holds items tied on top of the packs.
While hard-sided paniers are available and quite utilitarian, we decided to go the traditional route. That’s what Dad and I have always used and we saw no reason to change. However, during our passage through the Chiricahua mountains, one of the riders who joined us for a few days packed hard paniers on his mule and I was much impressed. In camp, these hard paniers could be converted into seats or tables. I expect I’ll eventually get a set of these and give up on my traditional bent. Also, there are bear-resistant hard paniers available from a number of suppliers, for those areas where they may be required.
Sometime around the turn of the 20th century, a new-style of pack saddle was invented, which is now commonly called the Decker-style pack saddle. The Decker pack saddle, characterized by metal bows, or arches, to which loads are strapped, has proven its usefulness over the past century, due to its versatility. One can hang about any kind of load imaginable from a Decker-style pack saddle with a little ingenuity. This style of pack saddle eventually became the standard in the northwestern United States, while the crossbuck has remained king in the southwestern U.S.. Why this is so, I think I discovered during our pack trip and I will discuss that in another post.
Our mustang, Jimbo, with the mantied load on a Phillips Formfitter pack saddle
For the kind of loads we carried on our pack trip, manties are used to contain the cargo, which are then tied to the Decker pack saddle. Manties are heavy canvas tarps, normally measuring about 7 X 8 feet, in which the cargo is wrapped and tied into a pack. One manty pack is tied to each side of the pack saddle to balance the load. Manties of uneven size and/or weight may be balanced by adjusting the way they are tied to the saddle. While top packs may be tied to these pack saddles, it is not commonly done, however the manties may be tied as large or small as required. The pack saddles I finally settled on have arches that are made to handle not only manties, but also Utah Paniers.
Phillips Formfitter
The Phillips Formfitter pack saddle also has other features that attracted me, such as the adjustable-angle saddle bars and the fleece pads attached to the bars. My reasoning for this selection was that the adjustable bars would answer the problem of the different conformations of the several horses on which we intended to use them. Our remuda consisted of two Missouri Fox Trotters, two Quarter Horses, one mustang, and one mule, ranging from 16 hands to 13, all with very different backs among them.
My concerns with regard to this pack saddle were limited to two things: Would the adjustable saddle bars be able to hold the pack loads in place like a solid pack saddle would? And, would the narrow saddle bars, configured similar to a riding saddle’s bars, sufficiently distribute the loads on the horses’ backs, so as to avoid pressure points and saddle sores?
Before the trip, I discussed these and other concerns about the pack saddles with Wade, at Outfitters Pack Station. We also discussed whether double cinchas, such as are commonly used on crossbuck pack saddles, might be better for our trip. I decided to go with the single cincha, since that is the configuration I have seen on most Decker-style pack saddles. I figured that if they proved insufficient, I could order the double cincha rigs at the end of the first leg of our trip. On the Phillips Formfitter, the cincha rigging is changeable by simply unbuckling one and replacing it with the other. Wade also gave me some advice on setting up the rigging to ride properly on the pack animal.
During the first 200 miles or so of our trip, we knew we would be packing feed for the horses, since there is little feed available for grazing along our route in the lower desert areas of Arizona. We decided on Equidine pellets in 50 pound sacks, as it would be easy to pack in manties and to balance as a load. We started our trip with 400 pounds of feed, split among two pack horses, packed in manties on my Phillips Formfitter pack saddles. With the help of friends, we were able to re-supply with feed as needed. The rest of our gear was packed in paniers on Dad’s crossbucks. Our plan was to have two animals under riding saddle, two packed heavy, and two packed light, then rotate every day or so to keep all the horses adequately rested. We also planned for two rest days per week. On the first day, all the animals were packed pretty heavy, but the feed went down at a rate of nearly 120 pounds per day, so the packs lightened up quickly.
I set my pack saddles up according to Wade’s advice, however, both Dad and I felt the 3/4″ wool felt pack saddle pads we had were insufficient for the loads we were packing on the horses. We decided to place a regular saddle pad over top of the pack saddle pad for extra protection for the pack animals’ backs. As it turned out, that was a mistake with the Phillips Formfitter.
The first day we made approximately 10 miles. In that distance we had to re-settle the decker pack saddles several times. I was beginning to believe I had made a serious mistake in not ordering the double cinchas. By the end of the second day, in which we made over 16 miles, we had stopped and re-settled the Decker pack saddles a number of times. It seemed they would start to turn every several miles, regardless of how well balanced and tied the load was, or how tight the cinch was. We had no such problems with the crossbuck pack saddles, which were padded in the same way.
Saddle sore on the QH Daisy
By the end of the second day, our large, heavy-built Quarter Horse mare had developed a saddle sore high on her withers. After looking at the location of the saddle sore and considering how often we had to re-settle her Decker pack saddle, we determined that we had over-padded the pack saddles, causing them to “woggle” on the horses’ backs. After that, we packed the Phillips Formfitter saddles without the additional saddle pads and had no further problems with the saddles turning or with saddle sores on any of the other horses. After that point, the Formfitter pack saddles stayed in place with the single cincha and performed very satisfactorily. Lesson learned: Do not over-pad with these pack saddles.
Incidentally, we continued to double-pad the crossbuck pack saddles on the mule and one Quarter Horse and had no trouble with the saddles turning or saddle sores.
I was very pleased with the quality and adjustability of the rigging on the Phillips Formfitter pack saddles. I was able to make the saddles fit properly on my 16-hand, tall-withered, short-backed, tall-spined, deep-chested, bony-hind quartered, Missouri Fox Trotter gelding, as well as the 15-hand, long-torso, flat-backed, broad-chested, wide-rumped, Quarter Horse. As for the mustang, he was fairly in-between the other two and we had no trouble at all with fitting the pack saddles to his conformation.
The one horse that had problems with the Phillips Form Fitter rigging was my 4 year-old Missouri Fox Trotter mare. This mare, Lizzy, has a walk to die for under saddle, but it is that same walk that makes her unsuitable as a pack horse. Her long-strided, swinging walking motion caused her to get rub sores from both the breast strap and the breeching, despite the fact that Wade makes those straps with the edges rolled with a light, soft leather. I found Lizzy also got rub sores from my riding saddle breast strap, so it wasn’t the pack saddle rigging at fault, but simply that my mare has such movement in her strides that she simply gets rub sores. Consequently, Lizzy spent more time than anticipated under my riding saddle with the breast strap stowed in the packs. My other Fox Trotter, Ranger, had no such problems and ended up under the pack saddle more than planned.
On the Fox Trotters, we had to set the spider way up on the croop to avoid rub sores
The one piece of rigging on the Phillips Formfitter saddles that caused problems on both Fox Trotters, was the spider, which is the piece that holds the breeching in place on the croop of the horse. It should ride about half-way between the point of the croop and the horse’s tail. This piece had rubbed deep sores on both my Fox Trotters’ rumps before I noticed it. I had to adjust the spiders so that they rode right on top of the horses’ croop to alleviate the problem. When adjusted as it is supposed to ride, the motion and conformation of the Fox Trotters caused the front edge of the spider to dig into the hair and subsequently the flesh of the horses. I think this problem could be remedied with a slight re-design of the spider. The spider is made with two layers of heavy leather with fairly sharp edges. I think a fleece pad under the spider, a different shape, or possibly rolled edges like the breast strap and breeching have, would fix the problem. I must say, however, that the only horses that experienced this problem were the Fox Trotters. The Quarter Horse and the mustang had no problem with the spider, or any other part of the rigging, as-is. I intend to design a removable fleece pad for my saddles, for use with my Fox Trotters.
The Packer’s Field Manual, by Bob Hoverson
I used the book “Packer’s Field Manual,” by Bob Hoverson, as a guide for setting up and using my Decker pack saddles. I found his book to be quite complete and useful. I learned to tie up manties quickly and well, using the knots and hitches he shows in the book. I set up each pack saddle with two “sling ropes” of about 28 feet length attached to the front saddle arch with a loop. Each rope runs through the rear hoops and is looped around each pack in a way that suspends it solidly from the saddle arches. The packs are weighed and balanced using a pack scale before loading, however, if one pack ends up slightly larger or heavier, balance can be achieved by setting the heavy pack a little higher on the saddle, thus changing its center of balance and making the load to ride balanced.
Decker-style pack saddles differ from traditional crossbucks not only in the way they are made, but also in the way they are equipped. While our crossbucks were pretty bare and light on rigging, the Phillips Formfitters were heavy on rigging. They also, as do all Decker-style saddles, use a protective canvas and wood shield, known as a “halfbreed” or “Arapajo”, apparently named for one of the men who originally designed and used this type of pack saddle. The halfbreed is a canvas layer that fits over top of the Decker pack saddle and has sideboards of 1 X 4 pine that protect the horse’s sides from the packs and spread the load. This is particularly important when packing items such as lumber, fence posts, or gravel. By the time we finished the first leg of the trip (355 miles), both Fox Trotters and one Quarter Horse were starting to show the beginnings of saddle sores where the side boards rode against their sides from the heavy loads of the feed sacks. The mustang, on the other hand, showed not a single mark…anywhere.
The Phillips Formfitter pack saddle is made with a leather skirt covering the saddle bars, with wool fleece on the underside. This fleece is intended to increase the padding and keep the saddle in place better. In comparison, our crossbuck pack saddles are simply made of wood. For the most part we had no trouble with the Phillips Formfitter staying in place…at least once we learned not to over-pad them, however, on our mustang we had a problem with the saddle pad crawling out from under the pack saddle. We had to stop and reset his saddle at least twice during the trip to move the saddle pad forward. We did not experience this on any other horse.
One of our crossbucks on Honey
Again, our crossbuck pack saddles were very sparse on rigging. Just a strap for the breast strap and a couple more for the breeching. They were simple to place, rig, load, and remove. They caused no saddle sores on any of the animals, and never threatened to turn and dump a load, despite our mule’s propensity to roll every time we stopped for a rest. We used the crossbucks on both of the two Quarter Horses and the mustang with similar results. Having said that, I must also add that the heaviest load we ever put on the crossbuck pack saddles was about 170 pounds and they often carried under 150, whereas our Phillips Formfitters were often loaded with up to 200 pounds of feed.
One problem we had with Dad’s old pack saddles was the fact that they are both in dire need of having all the leather replaced. Still, they made it through our trip with only one broken strap – a breast strap, which we repaired with a piece of nylon webbing we found along the trail.
Over the 28 days, Dad and I tried to streamline our morning camp-breaking ritual a number of ways, but we found that with four pack animals, and having to pack our camp and make up four manty packs and four paniers, we simply could not do it in less than about four hours. We discovered that packing the paniers was a simple matter of placing things in the bags in a fairly even manner, then weighing each panier with the pack scale and adjusting as necessary, normally a matter of removing an item from the heavy panier and placing it in the light one. Making up manties, on the other hand, was a matter of building two manties at one time, so that we could estimate that each would be fairly equal in size and weight, then wrapping each one and tying it up. Then, after they were completely done, weighing them to make sure the two packs were within one pound or so of each other. If they were significantly different in weight, they were unpacked, adjusted, and repacked. It was easy to balance them when a pack consisted of one or two bags of feed, but when they contained items of camp gear, after the feed was used, then it was a pain. Additionally, tying up the manties is very hard on the hands. The canvas and rope chafed and rubbed my hands to the degree that it became quite painful for about the first two weeks of the trip, until my hands toughened up.
The one thing we found handy about the manties was that we used the canvas tarps as a ground sheet and bed cover (we prefer sleeping out in the open and did not take a tent). By the end of the trip we had decided that for our kind of pack trips, mantying was simply an unnecessary chore. I can see how they would be the way to go for an outfitter with odd-sized items to pack, but for us, it just isn’t practical.
Utah-style paniers on a Phillips Formfitter pack saddle
For the last three days of the trip we decided that we would go with two pack animals and send one crossbuck pack saddle and one Phillips Formfitter home with our two mares. We also decided that mantying packs was a tedious task we could do without. We finished our trip using four paniers, two of which hung on either side of a Phillips Formfitter pack saddle.
In the final analysis, after 355 miles and 28 days on the trail, we learned that while Decker-style packing is very versatile, making up four manties every morning was terribly time-consuming, tedious, and very hard on the hands. Yes, Decker-style packing is versatile, but panier-style packing is much easier and takes less time and effort to pack, unpack, and load on the pack animal. Even with a cover and diamond hitch, the paniers were easier to pack than the manties. Hard paniers would be an even simpler option.
As for my Phillips Formfitter pack saddles, I am pleased with them and they performed well – once we learned the lesson about over-padding them. They are very well made, both with regard to materials and workmanship. However, I cannot say they out-performed the old traditional crossbuck pack saddles. Though, had we loaded up the crossbucks with the weights with which we loaded the Formfitters at times, things might have been different.
I will continue to use the Phillips Formfitter pack saddles due to their adjustability and versatility, but I will use them with paniers unless it is absolutely necessary to use manties. They will go with us when we start again next spring. While we had two horses that experienced saddle sores and rub sores, I cannot blame that on the pack saddles and do not believe they are at fault. These saddles allow me to choose between panier packing, with both soft and hard paniers, or to go with manties for odd-shaped loads.
For the type of horse packing Dad and I do, panier packing will remain our standard. Consequently, as far as utility is concerned, it is a wash between the Decker and Crossbuck pack saddles. While the Deckers are definitely more versatile in the ways they can be packed, we will be using them for handling paniers, which the crossbucks are specifically made for and do very well. Knowing what I know now, I would choose a standard crossbuck pack saddle over a standard Decker pack saddle for the kind of packing I do.
As far as the Phillips Formfitters are concerned, the quality of workmanship and materials, and the adjustability of the rigging and saddle bars are important to me and I remain pleased with them. I will use them pretty much as I would use a crossbuck pack saddle in the future, but will still have the added versatility when needed. In my opinion, the price tag of $699 for a fully outfitted Phillips Formfitter pack saddle is an excellent value when compared with prices for other brands and styles of pack saddles similarly outfitted. I expect mine will cover many miles on my pack animals before I hang up my spurs.
Thought I’d take a few minutes this morning to type up a gear report on one of the pieces of gear we took that truly proved its worth and durability on our 355 mile horse pack trip through the rough country of southeastern Arizona: Our Goal Zero solar chargers.
As you might recall from a previous post, I bought two solar chargers made by Goal Zero – a Guide 10 and a Nomad 13. The Nomad is the larger of the two panels, producing up to 13 watts of electricity, while the Guide 10 produces up to 10.
Goal Zero Guide 10
The reason I bought the Guide 10 to supplement the Nomad was that it comes with a rechargeable battery pack of four AA batteries that can be used as an emergency power source to recharge our other electronic devices when no sunshine is available.
Tough covers and clear plastic protecting the solar cells
When I first purchased the chargers I was quite concerned about their durability. They are flat-panel solar panels covered by a tough nylon-canvas material with a clear plastic cover over the solar cells. They both have a zippered pocket on the back, where cords and adapters may be stored. I am pleased to report that these panels have survived the first leg of our trip. 355 miles of the toughest terrain I have ever ridden over.
As I felt I needed to keep these panels accessible at all times, as well as the need to protect them from damage, I kept them in my saddle bags for the entire ride. My original intent was to strap them to the top of our pack saddles, so we could charge batteries and devices as we traveled. However, after our first day out, I let that idea die. We passed under so many low branches of mesquite, ironwood, juniper, ocotillo, and cactus, that I’m pretty sure they would have sustained damage had I tied them to our pack saddles.
My solar panels set out to charge my iphone
What I ended up doing for most of the trip was to set the panels out each morning and evening to catch as much sunshine as possible. Often, we made camp after the sun was low on the horizon, so I didn’t get a lot of charging done in the evenings, but I generally got several hours of good charging time each morning as we broke camp. My solar panels were the last thing to be packed before mounting up.
About the second week, we had a spell when there just wasn’t enough sunshine to keep our batteries charged, partly due to our traveling through trees in the Chiricahuas. I ended up one day with all my GoPro camera batteries discharged, my iphone dead, and my DeLorme Explorer GPS almost dead. Out of necessity I tied the Nomad 13 to the back of my saddle as we traveled in open country from the Chiricahuas to San Simon, AZ. The canvas cases for both units have small loops along outer borders which serve very well for tying them by saddle strings over my coat behind my saddle. While it did not charge very efficiently, due to not being able to always have it directly facing the sun, it was enough to get my iphone up to about a 30% charge after several hours. After that, whenever we traveled in open country I tied the Nomad to the back of my saddle and connected something to it, be it my iphone or the Guide 10 battery pack. In that way we were able to keep the most critical devices with at least a minimum charge the whole trip.
Another benefit of having both the Nomad and the Guide 10 was that the two can be connected together, or “daisy-chained”, by connecting the built-in cables, to increase their charging capacity. This greatly decreased the amount of time needed to completely recharge a device or top one off. When I set the panels out each morning or evening, they were daisy chained and I took pains to make sure the panels were situated to take maximum advantage of what sunshine was available. I found that even on cloudy days, there was sufficient sunshine to produce a trickle of electricity to get some charging done.
Guide 10 battery pack
The item I always gave priority to keep at full charge was the battery pack. The battery pack contained four rechargeable AA batteries and had sufficient depth to bring my iphone 6 from dead to about 95% charge in a matter of about 3 hours. At that point the battery pack would be completely dead. I would make sure it was brought to full charge the following morning. My reasoning for this was that my iphone was the second most important electronic device in our inventory. It communicated with my DeLorme Explorer and provided viewable topographical maps by which we guided ourselves much of the time. Since we didn’t get all the paper maps we should have, we were very reliant on the iphone to keep us going the right direction, particularly at forks in the trails. It also served as a camera for still shots and the occasional short video when I didn’t have the GoPro out and ready. The battery pack gave us some insurance against days without sun and was used a number of times to keep the iphone alive until it could be charged by the solar panels.
Indicator light, USB output, two power inputs, LED flashlight function on the battery pack
One end of the battery pack has a well organized set of power inputs and outputs, as well as an indicator light and LED flashlight function. The USB power output allowed us to use the regular USB charging cords for charging all our devices. The inputs allow charging from the solar panels via a built-in cord or from a 110V wall outlet via a USB charger. When the battery pack is discharged, the indicator light shows solid red. As it charges it shows a blinking red light, which changes to a slow-blinking green, then a faster-blinking green, then finally a solid green when fully charged. The same indicators show as it discharges while charging a device. There is an on/off switch on the left side which also turns the LED flashlight on and off. While I never needed the LED flashlight, I can see where it might come in handy on occasion. The pack also comes with an adapter to recharge AAA batteries. The reserve power of the battery pack was a very important asset for us on the pack trip. In fact, I am considering purchasing a second battery pack.
The most important device we had was, of course, the DeLorme InReach Explorer, however the settings I had in place on it kept it going for up to five days before hitting the critical 20% charge level. Not only that, but it would come back to full charge within about two hours, when connected to both panels in direct sunlight. So, one good morning would have the GPS set to go for nearly a week.
I made sure all our devices were turned off each night and not turned back on until needed the following day. By doing so, and by ensuring that I set the two chargers out each morning, along with the additional charging time on the back of my saddle, the two solar chargers kept all our devices with at least a minimum charge the entire trip, except that one day when I let things get discharged. That one day taught me to become more diligent and organized in keeping things charged and utilizing the sun when it was shining. Additionally, as we took a rest day every Sunday, the solar panels were set out all day and adjusted periodically to maximize their effectiveness in the sunshine, while charging all our devices to maximum capacity (that is, when the sun was actually shining).
As for durability, while stored in my saddlebags, along with a number of other items – flashlights, binoculars, odds and ends, etc – these two solar charges survived multiple instances of my saddle horse laying down and attempting to roll over. I can’t think of many more effective ways to prove the durability of these little panels. After the trial they have been through, I am satisfied that I will have them for many, many more miles into the future.
wear spots on the plastic solar cell protectors
The only thing I have found that would improve the durability and effectiveness of the Goal Zero solar chargers, in my opinion, would be to have a piece of flanel cloth, or similar material, cut to the size of the panels to keep between the clear plastic panels when the units are closed. I found that the clear plastic face of my units became scratched and had a somewhat fogged appearance in places, from the dust that got between them and scratched the surfaces while closed. I’m sure that decreases their efficiency, although I don’t know how much. This little improvement is something I will do for future use. I intend to recommend this as an improvement to the manufacturer.
My overall evaluation of the Nomad 13 and the Guide 10, used both individually and together, and I think I can honestly say they received a baptism by fire, so to speak, is that I consider them to be one of the most critical items of gear we had on the trip. That is not to say they were necessary for our survival, but they were absolutely necessary for the successful outcome of our trip. They proved themselves to be very durable under the most harsh conditions, surviving some pretty rough treatment and kept our critical electronic devices with at least a minimal charge throughout our month-long trip, thus ensuring we had the ability to contact the outside world at any time and that we were able to photographically document much of our trek for our followers.
Overall grade: A+
Goal Zero Guide 10
GOALZERO Nomad 13
Goal Zero Nomad 13 and Guide 10
Adapter cables, AA battery pack, and AAA adapter
Charging cables built-in
Tough covers and clear plastic protecting the solar cells
Guide 10 battery pack
Indicator light, USB output, two power inputs, LED flashlight function on the battery pack
It took us longer than we planned, and my estimated mileage was slightly off, but the first leg of our Mexico-to-Canada horse pack trip is complete.
We departed Eagar, Arizona on Friday, April 10, with the help of family and friends who drove trucks and hauled trailers stuffed with horses and gear. We arrived at our designated starting point just before dark that evening. Dad and I stayed with the horses and my four-horse trailer for the night. One of our drivers headed home, while the others, my sister, brother-in-law, and nephew, got a room in Douglas. They returned the following morning to help us get packed up and started and to haul my truck and trailer back to Eagar.
The following morning, Saturday, April 11, Dad and I arose about sunup and began by feeding the horses and getting our gear out of the trailer and getting it sorted for packing. A couple of US Border Patrol Agents stopped by to visit. They had their horses an we invited them to ride with us a ways. They accepted the invitation, but before we were ready to start making tracks, they got called away to monitor a group of Mexican citizens that appeared to be preparing to illegally cross the border.
We started at the US/Mexico border about 18 miles east of Douglas, Arizona, near where Silver Creek crosses the border. It also happens to be where the monument to the Mormon Battalion stands.
Departure at the Monument for the Mormon Battalion
For those who don’t know the history of the Mormon Battalion, during the Mexican-American War (1846-1848), the whole membership of the Church of Jesus Christ of Latter-Day Saints, also known as Mormons, were making their exodus from Missouri and points east to the Salt Lake Valley, which was then in Mexican territory. Certain individuals in the US Government feared the Mormons were fleeing the United States, due to the persecution they had experienced in Missouri and the lack of any help or redress from the US Government, and that they would become Mexican citizens and fight against the US. The US Government sent forces to stop the Mormons from leaving the US, but once they actually met with representatives of the church, their fears were assuaged. Brigham Young called for volunteers to join the US forces to help fight against Mexico and drive them from the territories later claimed by the US, including most of the current southwestern United States. More than 500 volunteers joined what became known as the Mormon Battalion, leaving their families and friends to make their way west, trusting to the Lord and the other members of the church to care for them.
The Mormon Battalion trekked from Council Bluffs, Iowa to San Diego, California without a single hostile engagement, as Mexican forces fled southward. The battalion raised the first American flag over Tucson, Arizona, opened a southern route for future wagon trains bringing immigrants to New Mexico, Arizona, and California, and was instrumental in the settlement of much of the southwest of the United States of America. Former members of the Mormon Battalion were among the first discoverers of gold in California, which initiated the famous California gold rush.
There are several monuments in the southwest to the Mormon Battalion, and being Mormons ourselves, we felt fortunate to have started our trek at one of these historic sites.
I will mention here our gratitude to the US Border Patrol out of Douglas and Safford, for their assistance in getting permission from several ranchers for us to cross their range. Their help in selecting routes, obtaining permissions, and even guiding us through the Chiricahua Mountains was invaluable to us and to the success of our endeavor. During the first several days of our trip we were visited by their officers several times and were always provided with good information and help for our trip. They also kept us posted on any groups of illegal aliens and suspected drug traffickers they were monitoring, and helped us select routes that kept us out of harm’s way. I will provide more detailed information about their help in future posts.
Our route took us north from the US/Mex border, following Silver Creek to the Bar-M Ranch, where we turned more northeast, crossing US Highway 80 just west of Boss Ranch Road. We followed Boss Ranch Road, crossing Boss Ranch by permission of the owner, making camp in Half Moon Valley. From there we tracked northeastward, up past High Lonesome Spring to Texas Canyon Road. We followed Texas Canyon Road to Rucker Canyon Road ,which we followed northeast to North Fork.
Heading up North Fork Trail in the Chiricahuas
At North Fork we met with Joshua Jensen and Al Smith, who acted as our guides through the roughest part of the Chiricahuas and rode with us for three days. They took us up North Fork to the USFS lookout tower on Monte Vista Peak, then across the Crest Trail, and finally into Whitetail Canyon, through which we departed the Chiricahua Mountains. Both Josh and Al left us at Whitetail Canyon and Dad and I made our way northward to San Simon, where we crossed Interstate 10, passing underneath it traveling along San Simon Wash. We followed San Simon Wash northward toward Safford, until we had to leave it to find water for our horses. We ended up on a ranch road which took us past stock watering wells spaced about five miles, or so, apart and which led generally in the direction we needed to go. Thanks to Ron Mahan, of San Simon, for his help in selecting a favorable route through that dry desert area.
Nearing Safford, Az
We made Safford on Thursday, April 23, which was about 3 days or so behind our planned schedule. We stopped at Joshua Jensen’s place, which he and his wife were gracious enough to allow us to use as a rest stop and re-supply station. While there we had Al Smith shoe our mule. Josh allowed us to use his pickup, so we headed into town for supplies. We also used the assistance of Al Smith to scout a suitable and safe route northward from Safford. With his help, as well as advice from the local Bureau of Land Management agents at the Safford office, we decided to avoid the problems and dangers of following the Gila and San Francisco Rivers, both of which are known to be choked with willows and are notoriously dangerous for livestock, due to quicksands. We determined to take a route that passed south of the Gila, skirting the Gila Box, passing south of Clifton by way of a power line service road and connecting with the Black Hills Scenic Byway. We crossed Highway 191 south of Clifton, then passed through Verde Lee and Loma Linda, finally hitting Rattlesnake Road, which took us into the mountains east of Clifton.
Rattlesnake Road eventually gave way to a USFS road which led up Rattlesnake Canyon to Rattlesnake Gap. This trail was, without any doubt, the steepest climb and roughest mile I have ever taken a horse over. It is one heck of a trail. Once over the top, though, it was a nice ride. I’ll detail that one later as well. I took a bit of video footage of it.
From Rattlesnake Gap, we followed the two-track ranch road, designated as USFS #215, I believe, which joined USFS #212 about 16 miles later, near Martinez Ranch, on the San Francisco River. We then followed the San Francisco west about two miles to the confluence of it and the Blue River, where we turned north to follow the Blue. The topo map showed that the canyon walls of the Blue, for the first two miles were pretty near sheer and quite narrow and that there would be no leaving the river bottom in that space. Not wanting to get trapped in a river bottom choked with willows, we took an old ranch trail out of the bottom up onto Sunflower Mesa. This turned out to be quite fortuitous, as we ended up finding a cowboy camp with a running spring, corral, and even a tent at Pat Corral on Pat Mesa. As it was Friday evening, the hands apparently had gone into town for the weekend. We spent a very comfortable camp night there. We left them a note, thanking them for the use of their camp. They responded through facebook, inviting us back for a visit. I hope we can make it one day. Thanks, Ruth Brockman and the crew from the Turkey Creek Ranch.
The following day we continued north on Pat Mesa, until we reached Pigeon Creek. There we were trying to make a choice whether to continue on the two-track we were following, which was rough and steep, or to go down Pigeon Creek to the Blue and follow the Blue up to Juan Miller Road. The route through the Blue would save us up to four miles, while the road was more sure. We decided to take the sure route and stick with the road.
As we came up out of Pigeon Creek, we met a hiker. As we talked, suddenly the both of us realized we had been in communication nearly 18 months earlier, through the Internet, about routes through this area. Brett Tucker owns the Grand Enchantment Trail website. He is a long-distance hiker who has documented a number of foot trails in New Mexico and Arizona. What a serendipitous coincidence that we would meet on this trail at this point. After talking a few minutes, Brett convinced us to head back down Pigeon Creek to the Blue and follow the Blue on up to Juan Miller Road. We did that, and soon found ourselves starting the most spectacular part of our ride. Thanks again, Brett.
The ride up the Blue was not an easy trail, because we were essentially making our own trail as we went. We found the occasional cow trail, but for the most part we were making our own way. However, surprisingly, the river bottom was neither choked, nor narrow. We had to do very little “brush-busting” to make our way through and the mile-and-a-bit to Juan Miller Road melted away pretty quickly.
Once we hit Juan Miller Road, the only east-west thoroughfare through this part of Arizona, we headed west to hit a four-wheel-drive-only two-track that follows the hills above the Blue northward for about three miles or so, to the Fritz Ranch, an abandoned historic ranch now owned by the USFS. From there we joined Blue Trail #101, which, if it actually existed, would have been a nice ride. However, the trail has not been maintained in many years and following it was impossible most of the time. It was more like following cow trails, and, in fact, probably was exactly that. Again, the river bottom was wide and we had to do little brush-busting. The trail was a little rough on the horses, due to having to follow the river bed at times, where the river rocks made footing uneven and tricky, but at least it was rather level.
About a half mile up the Blue from Fritz Ranch, we made camp Saturday evening and there we stayed for our Sunday rest. It was a nice camp, plenty of grass for the horses, and good water for us as well. We learned to cherish our Sunday rests. They were very important, not only for ourselves, but especially for our stock.
The following Monday we continued up the Blue, enjoying some spectacular scenery along the way. We made 26 miles that day and reached our rest station at the cabin of Dick and Jean Goodman, near the old Blue Post Office, long after dark. Dick and Jean treated us to some excellent rest and even better food. Dick made arrangements for our horses in the corrals of a neighbor. We rested again on Tuesday, which was sorely needed after the previous day’s ride.
Coming out of the Blue on Red Hills Road
On Wednesday we headed north again, on the Red Hills Road. We contemplated taking the Red Hills Trail, but after the Wallow Fire a few short years ago, the best information we had indicated the trails from the Blue to the top were un pretty poor condition, and we didn’t want to have to spend time hacking our way to the top, about 4,500 feet above the river bottom.
We reached the top in the late afternoon and made camp near a set of corrals just south of Beaverhead on highway 191. A friend had left us a bale of hay at the corrals, which was a welcome supplement to our horse feed, after such a hard climb. Thanks Jimmy Joy.
This was one of the nicest camps we made during the trip and we celebrated with a campfire, one of three we made during the entire trip (all our cooking was done on a single-burner propane stove). Our elevation was about 8,500 feet, as I recall. The following morning I was treated to watch about 8 elk pass calmly through the woods near our camp.
Camp at the corrals on Highway 191
From that camp, we followed USFS #26 Road for about 10 miles, where it dead-ended into #24 Road. We followed #24 north to #25J, where we took that road as a means of getting off #24, which is one of the main roads through the White Mountains of Arizona. We found a nice camp with a spring near by for the horses. The night was cold at over 9,000 feet, and we got rained on during the night. In the morning there was ice on our tarps. Still it was one of the nicest camps of our trip, meriting a campfire for the evening rest.
Out on top, White Mountains
The following day we made the remaining 22.5 miles into Eagar, arriving in the early evening before dark. We had pushed hard during the day, to outrun the weather moving in. We heard thunder and had a bit of snow fall on us. At over 9,000 feet elevation, cold weather is nothing to mess with. Our horses were tired as we made our way down into Eagar. We turned them loose in my 20 acre pasture for a well-deserved rest and headed to my parents’ home.
The first leg of the trip was over. By my GPS we traveled 355.2 miles. It took us 28 days – four weeks to the day.
Now for decision time.
This first leg of our Mexico-to-Canada pack trip was designed to be a “shake-out” for us. Our plan was to take our rest here in Eagar, evaluate ourselves, our horses, and our gear, then make decisions and adjustments for the rest of the trip. We hoped to continue our trip after a few days’ rest.
We learned a lot during this first 355 miles. We learned that we had grossly overestimated our travel miles per day and underestimated the miles of our route. We now know that 15 miles per day is a realistic figure to plan on. As for our route going forward, much of our travel will be on the Arizona Trail, which is fully documented for mileage, somewhat maintained, and planned out, and the roughest part of our trip is now behind us. However, we are currently more than seven days behind our projected schedule, which means our plans for crossing the Grand Canyon are not going to work out. I’m going to have to cancel the reservations at Mather Campground and reschedule.
We learned that my traveling companion, Clancy, my Blue Heeler, simply cannot make the miles. He’s good for a day or two, but he simply cannot make multiple days of 15-20 miles. I ended up having to carry him on my horse several days, which caused sore backs on my Fox Trotters. We ended up sending him home with my mother from Dick’s place on the Blue. Clancy will have to miss out on the rest of the trip.
We learned that at least two of our horses are not the right horses for this kind of pack trip. The Quarter Horse mare I borowed got saddle sores right off and no matter how lightly we loaded her, we could not get her over them. She’s going to have some healing to do. My Fox Trotter mare, Lizzy, has a very fast walk and she loves to really move out, which I love, but her motion as she walks causes our pack saddle rigging to rub sores on her. Once her back got sore while she was under my riding saddle, we couldn’t even pack her lightly, because the pack saddle rigging would rub her raw in places. We sent the two mares to my pasture in Eagar from Dick’s place on the Blue. Thanks Kelly LeSueur, for coming to pick them up.
We learned that with four pack horses, there simply isn’t any way for us to break camp in the morning in less than 4 hours, costing us a lot of miles on the trail each day and a lot of extra work. While it was necessary for us to haul feed with us (we hauled up to 400 pounds of pelletized feed at a time) in the low desert areas of southern Arizona, once we got up into the higher latitudes and elevations, there was plenty of grass for the horses. We hope we can continue the trip with four horses, rather than six.
We had a couple of near disastrous wrecks during our trip, one of which eventually resulted in one of our best horses turning up with a limp the last 1/2 mile going into Eagar. Additionally, my two Fox Trotters have lost weight in their backs, which makes their already prominent spines contact the underside of my riding saddle, where the skirts are laced together under the cantle. They both currently have sore backs. The two animals who have come through entirely unscathed are my mustang, Jimbo, and the mule, Honey. Both have trimmed down and look like true athletes, solid and strong. These two are the only animals ready to start the second leg of our trip at this time.
As for ourselves, Dad and I both feel healthier, if a bit tired, now, than when we started. Both of us lost quite a bit of weight, and our muscles have begun to “leg-up” and become stronger. We have come through this with no injuries, no rubs, no health problems of any kind. Just tired. Nothing a rest won’t cure. You might recall that I am 56 years of age and Dad turns 81 in about 12 days. I am amazed at Dad’s condition and resilience. He says he’ll be ready for the second leg of the trip next year.
Lastly, this trip has cost me nearly $20,000 so far. Help and sponsorships I was hoping for didn’t come through. I am simply out of money.
All of the above factors, and others yet unmentioned, have brought us to the decision to stop here at Eagar, Arizona for this year and continue the trip next year.
This will allow us to make the necessary adjustments we have identified, such as acquiring a couple of horses that will be better suited for the trip, making a few minor changes in our gear, make better plans and reservations for crossing the Grand Canyon, and allow me to go back to work to pay off money I have borrowed for this trip as well as to put together a money reserve for next year’s trip. I have already purchased most of the gear we will need, so the funds required will be quite a bit less than for this leg of the trip, but I may still need to look for another horse or two. This is the wise course for us. This is what we need to do if we want to eventually complete this trek from Mexico to Canada.
Our thanks go out to all who have supported us, particularly those who have actually put out their time, efforts, and money to help us. We are grateful for all the prayers that have gone up in our behalf. We can say unequivocally that we received continual help from above, even miraculous help at times, and we thank the Lord for this.
I maintained a journal during the trip, so stay tuned for future posts with much more detailed information about our trip, out experiences, and reviews of the gear we used. I have a lot of video footage as well as a multitude of photographs, however the Internet connection at my parents’ home is somewhat slow. I may have to wait until I get home to Utah to get them uploaded.
What a trip! What an experience! Can’t wait for next year! The hardest part of the trip is now done.
After more than two years of dreaming, scheming, planning, and preparation, the day has finally arrived.
Tomorrow morning, Dad and I will be loading up our five horses and one mule and heading for the US/Mexico border near Douglas, Arizona.
Before I say more, I want to thank those who have helped us make it this far, as well as those who are planning to help us as the trip progresses.
In particular, I want to thank my very special wife, who not only agreed to let me do this, but has been supportive and tolerant as I have prepared for the trip. I know she thinks I’m crazy, but she has supported me nonetheless. I also want to thank my mother, who has been supportive of my dad in letting him go with me, so that we could fulfill this father and son dream that we have held in our hearts for more than 40 years.
Thanks to Nathan, my oldest son, for his financial contribution, as well as Tena Snider for hers. Thanks also to Aaron LeSueur, my nephew, and Kelly and Tina LeSueur, my brother-in-law and sister, as well as Dick Goodman, who will be driving more than 12 hours to drop us off at the border and return our trailers to Eagar, Az. Kelly and Tina will also drive to the Grand Canyon when we reach it, to assist us there. Their enthusiastic support and encouragement has been invaluable.
Thanks to Gwen Kahler, who has offered her home as a stopover/re-supply point when we reach Flagstaff. She will ride with us for a few days as well.
Thanks to one particular US Border Patrol Agent, who will be our guide through the Chiricahua Mountains. He will ride with us several days and will also lend logistical support in re-supplying us with horse feed as we pass through the lower deserts of southeastern Arizona.
Thanks to Tyler Theobald for lending me a good horse for the trip.
Thanks to all the other unnamed folks who have encouraged and helped us along.
OK, now that all that’s said……
Tomorrow morning we will load up and haul out. We should arrive at the border in the late afternoon, after which we will set up an overnight camp. We plan to have the horses packed and be heading northward by about 10:00 am on Saturday. We have contacted the USBP office at Douglas, AZ and let them know who we are and what we are doing. They secured permission for us to cross a large private ranch as we head northward.
We expect to reach the destination of the first leg of our trip, Eagar, AZ, about the end of April. We will have at least four re-supply points along the way and two stopover points, where we may be able to get a nice, hot shower.
At Eagar we’ll evaluate our horses, gear, and ourselves, to see whether we are in shape to make the second leg of the trip, from Eagar to Panguitch, UT, which includes the crown jewel of our trip, the crossing of the Grand Canyon.
I have reserved a camp at Mather Campground in the Grand Canyon National Park, from June 5-12, in hopes that a Backcountry Permit, allowing us to camp within the park boundaries, will come available. The park officials have been very helpful to us, but their horse campgrounds in the canyon have been booked for some time. They are hopeful that once we arrive a cancellation may come up, allowing us one night’s camp in the canyon. We booked the Mather campsite as a place where we can wait to see if a permit comes available. If a permit does not come available for us, the plan is to have Kelly and Tina LeSueur haul two of our horses from the South Rim around to the North Rim. Dad and I will each ride one horse and tow another. We will ride to the bottom, switch horses and ride up the other side in one day. At the North Rim we will be met by Kelly and Tina, then haul out of the park to camp. Our fingers are crossed that a permit will come up. We could use all the positive thoughts you can muster.
We hope to reach the destination of our second leg, Panguitch, UT toward the end of June. As we have never attempted a pack trip of this magnitude, we have limited experience to go on as we try to estimate how much ground we will be able to cover each day. Additionally, there is no way for us to accurately determine the actual mileage of the trip. I look forward to watching the GPS as the miles unfold. I estimate the entirety of this year’s trip (the first two legs of our planned Mexico-to-Canada trip) to be approximately 1,000 miles, or a bit more.
l have gotten so tired of all the preparation as this day has approached, that both Dad and I are very excited to finally be done with the preparation and getting ready to actually start carrying out the plan.
We’ll be driving tomorrow and making tracks on Saturday!
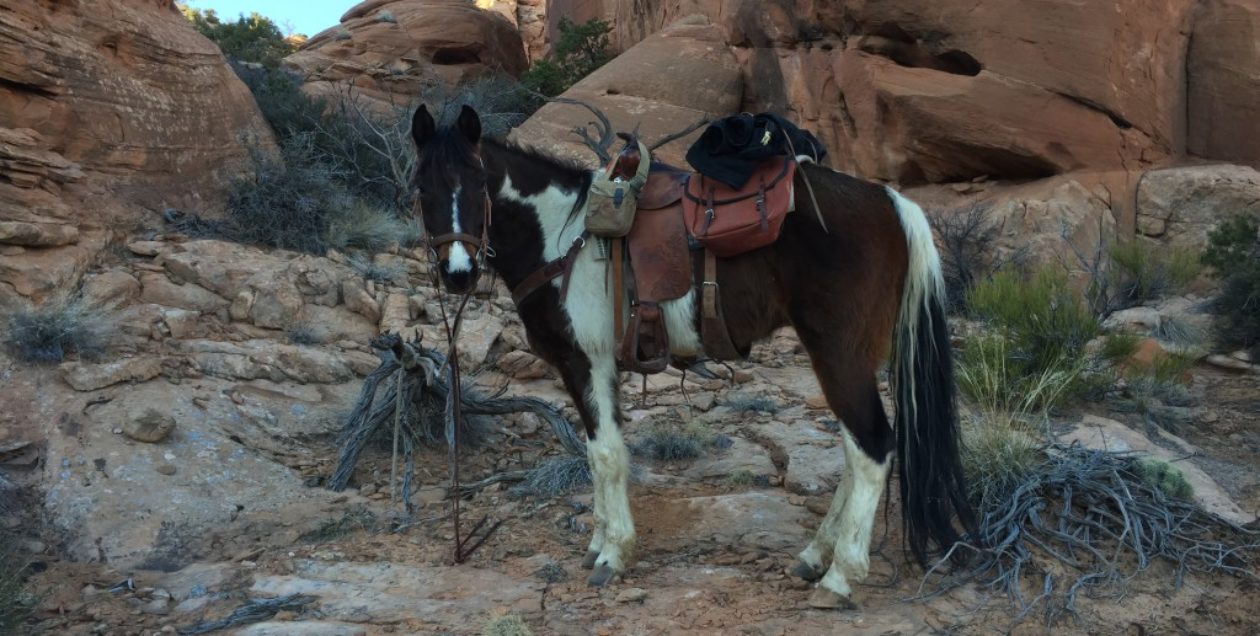


You must be logged in to post a comment.