
A recent post by Jon Tanner on the Horse Trails and Camping Across America facebook group about a ride he took to Robber’s Roost, in southern Utah, brought some comments that showed a wide range of experience (and lack thereof) with regards to ascents and descents on a horse. There have also been a couple other related threads recently with regard to trail riding. Thought I’d offer a post about it, based on quite a few years of experience riding the rough trails, hoping to dispel some of the misgivings and erroneous ideas I saw posted.

When one is riding mountain trails, even ones that are well-maintained, there is always the chance that you might have to deviate from the trail for a short distance to avoid a problem in the trail, be it a wash-out, a fallen tree, or even a dead animal (or maybe a live one!). This could require you to make a steep ascent or descent, or both, to circumvent the obstacle. I was once reading an article in Trail Rider magazine in which the author provided a picture of a mountain trail that was somewhat narrow and a bit washed out, with the caption that the trail “was obviously impassable”. I found that caption to be somewhat humorous, as I run into worse trails on my pack trips quite often. Differences in experience and training, I suppose.

In recent years, many of the older, lesser-known trails in wilderness areas and on public lands outside state and national parks have fallen into decay, as the US Forest Service and Bureau of Land Management no longer maintain them. Often, the only remaining vestiges of a trail are the ancient blaze marks on large pine trees. These are the trails I love the most. These are the trails that take you to places no one has visited in many, many years. In trying to follow these trails, frequent detours are necessary, due to fallen trees and washouts, and more recently, wildfire burns. Most of them, however, are still “passable” with a little care and thought. These are the trails that are not for the faint of heart, and where experience and training, both for the rider and the horse, really pay off.
Imagine running into a washed out trail on a steep sidehill 20 miles into a 50 mile pack trip. Now what do you do? What if you have a pack horse or two in tow, how do you turn them around on a steep hillside? Often, the safest thing to do is to simply keep going and let the horse pick its way around the obstacle, but sometimes it takes an experienced hand on the reins, and even a touch or two with the spurs to safely pick out an alternate route and keep the horse on it.
In my training of trail horses, I make regular steep ascents and descents to teach the horse a couple of things. First, I want the horse to learn that I am in command, no matter where we are and no matter what I ask of the horse. It must learn to trust me…or at the very least to be obedient. Second, I want the horse to learn how to manage my weight on his back during ascents and descents. As the horse gains experience, it will begin to learn to pick out its path and to place its feet well to keep itself balanced with the load on its back.

Some people believe that the horse should be given its head and allowed to choose its own path up or down a grade. Once a horse is experienced, that is somewhat true, but an inexperienced horse can put itself and rider into dangerous situations. An inexperienced horse, when faced with a steep descent, will often get partway down, hesitate, then attempt to turn and head back up to the trail. When this happens, one must have a firm hand on the reins and may need to use a quirt or spurs, or even the loose end of the reins, to coax the horse to continue down the slope. If the horse is allowed to turn and attempt to head back upslope, it puts itself into an imbalanced position, as your weight shifts from his shoulders to his hips, and your weight could easily pull him over backwards, which could very well become a deadly situation for both horse and rider.
A similar situation can occur with an inexperienced horse trying to make a steep ascent. Horses tend to be more willing to make steep ascents, however, a horse inexperienced at carrying the weight of a rider, and up to 75 pounds of tack and gear, up a slope may very well choose a route that is too steep for the load he is carrying. If a horse should choose to abort an ascent and turn and head back down to the trail, the situation is much less dangerous than a change during a descent. A horse can easily turn and head back downhill, even with a load, without much problem. The load of a rider shifting from the hips to the shoulders is much more controllable for the horse than the reverse.

Some have said that a horse should not be allowed to turn sideways on a steep hill. In my experience, the danger comes when the horse attempts to turn in a descent and go back up the hill. I have no problem allowing a horse to turn sideways to rest or to traverse the hill for a short way to access a better descent route. The same in an ascent. The caveat here is the footing. If, as in the photos Jon showed, the footing is the “slickrock” Utah is famous for, straight up or down allows the horse the best chance of remaining balanced if he should slip. If the footing is deep soil, sand, or gravel, I still prefer a straight or slightly angled ascent or descent.
If the ascent or descent is a long one, say 100 feet or more, an angled approach may be the best way, as the horse will be exerting himself a little less, particularly in a long, steep ascent. Again, I have no problem allowing the horse to stop sideways on the hillside to rest.

Back to the topic of allowing the horse to choose the path. It is my experience that an experienced trail horse is very good at watching and placing its hooves, but not very good a picking a path. They tend to look no farther ahead than their next two or three steps..which is exactly what I want them to be doing. Therefore, in my opinion, it is the rider’s responsibility to pick out the best route and the horse’s job to safely get them both there. As a side-note, I have discovered over the years, that the horses that I have left barefoot during their training and for most of the year are better at watching their foot placement than horses that are regularly shod. However, all horses, regardless of training, shoes, or barefoot, seem to get better at watching where they walk after about the second day in the mountains. Many are, as my dad used to call me, “stumble-bums” when they first hit the trails.
Other tidbits:
I like to keep a fairly firm hand on the reins during a steep descent. It allows the horse to use the leverage of your hands on the reins to keep himself balanced and keeps the horse from getting ahead of itself and descending too fast. While this may be hard on the horse’s mouth at times, it can allow a slipping horse to pull itself back into a balanced position. The opposite is true if the horse is asked to jump up or down a drop. In this case a very loose rein should be given, to allow the horse to jump and extend his neck and head without hitting the bit.
When traversing a particularly bad spot in the trail, I will sometimes pull my feet from the stirrups, or at least from the downhill one, and prepare, in case it should be necessary to bail. I want to be able to land on the uphill side of the horse, should it slip and roll over. I have had to make a quick escape from the saddle more than once.

There are times when it is the wisest course to dismount and walk, allowing the horse to make the ascent/descent without the burden of a rider. This is particularly true if the rider is inexperienced or fearful. A panicked rider can easily pull a horse off balance that would otherwise easily handle the detour. However, a person on foot should avoid getting directly downhill or uphill from the horse. If you must lead a horse through a steep descent or ascent, use a long lead rope and try to stay to the side of the horse’s path. The horse will want to follow your path, so stay well ahead of the horse, and if possible, lead the horse on a path slanting up or down the hill. This will keep you from getting directly below or above the horse on the slope. If another horse has gone down before you, simply tie up your reins to the saddle and let the horse follow the other horse down the hill. When leading a horse up an ascent, again, stay to the side of the horse’s path, or at least a good couple yards ahead. If you get directly above the horse on the slope, it may try to turn directly toward you and begin lunging uphill. A lunging horse can easily run upon you and cause you severe injury. If you are following another horse that has gone up before you, again, simply allow the horse to go ahead. He’ll be fine. If your horse has been trained to allow this, you can also hold the horse’s tail and allow him to pull you up the slope. Most horses don’t mind this, especially while they are concentrating on getting up the hill.

In summary, there are times when steep ascents and descents will be unavoidable on the trail. Normally, the best course of action is to remain mounted and let the horse do its job, however, there are times when dismounting may be the best alternative, when done safely. Training and experience are invaluable in such situations and can turn what some may perceive as an “obviously impassable” trail into an opportunity for good photos and a great post on facebook, during a memorable trail ride.
Happy Trails!
P.S.
I would love to have been able to add a bunch of great photos from my rides to go along with this post, but when one is trying to work through a difficult situation like those described, nobody is thinking about the camera! All my pictures are in beautiful spots where everything is peaceful and pretty. That’s something I’ll have to work on in the future.
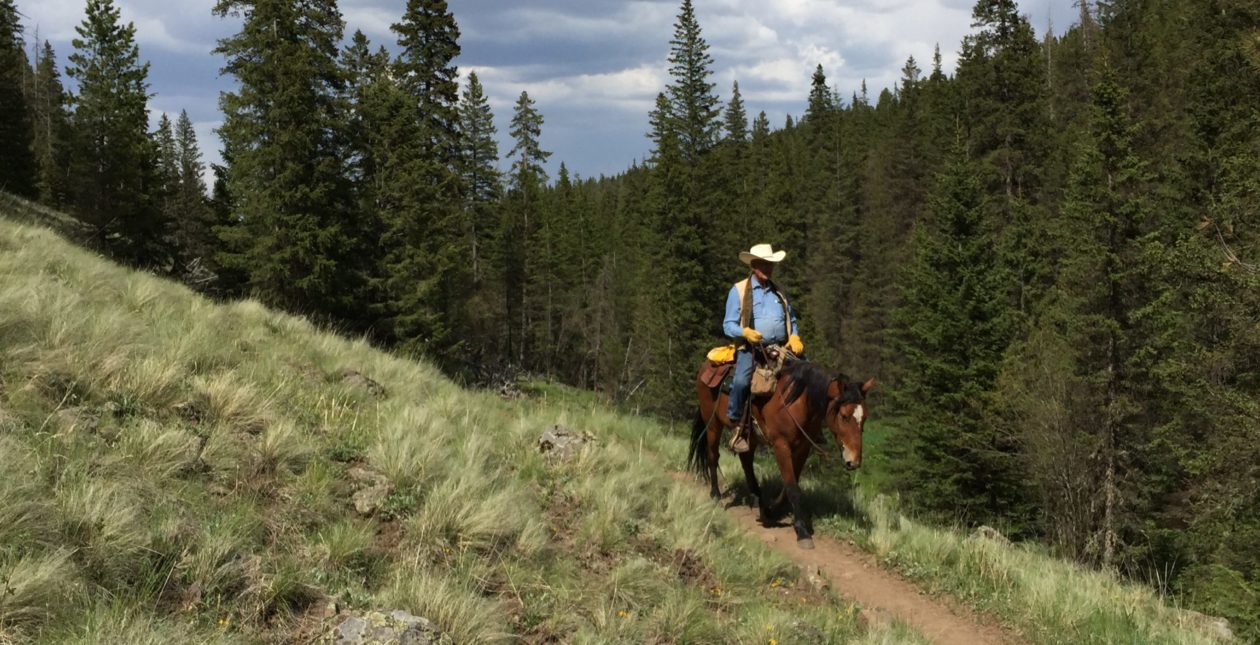
Jon Tanner graciously provided several photos from his rides that worked out great for the post. Thanks much, Jon.
If you would like to see a horse and rider doing a descent even I would wince at, watch the movie “Big Jake”, starring John Wayne. There is no movie magic in that one. Just a gutsy rider on an exceptional horse.


You must be logged in to post a comment.