
It’s been a little while since my last post. Thought I’d explain, so my readers don’t lose hope.
I finished the bathroom project several weeks ago. It turned out very well. I’m happy with it, if I say so myself. You can see it at the link below.
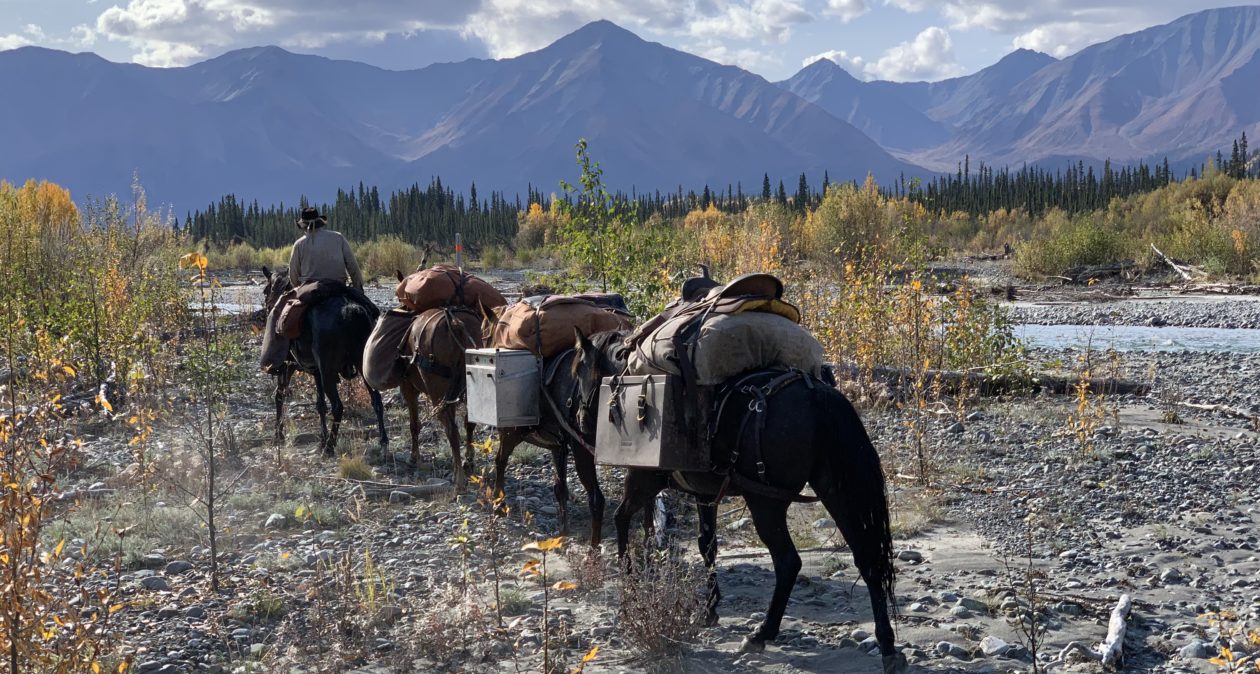
So, I was thinking I would have some spare time to do some work on my gear, make my chaps, work on my saddles…nope. Turns out the Good Lord had other plans.
I have spent almost all my time over the past several weeks helping a couple of senior ladies move their lives from one home to another. It has been an enjoyable experience for me, and a lot of work as well. This has left precious little time and energy to get back to my play-time stuff and keep up on my blog. It is amazing how much stuff we can amass in a lifetime, and how attached we become to it. I don’t mean that in a derogatory way. I think we become attached to the memories connected to the stuff, not necessarily the stuff itself. While I have enjoyed the service, I have felt deeply the sorrow and heart-wrenching emotions these fine sisters have gone through watching me haul their lives away to Goodwill and the dump, as they have divested themselves of all but their essential belongings. It has been a humbling experience.
Howsoever, I have not been totally useless…er…I mean, idle, with regard to my GWT trip.
Last month I bought a book on horse and mule packing, entitled The Packer’s Manual by Bob Hoverson, through Trailhead Supply.

I found it to be a good resource for anyone, experienced or just beginning, who is involved with packing. Hoverson is a confirmed Decker-style packer, and the book is specifically geared toward Decker-style pack saddles and all things related thereto. He spends a chapter on horses and mules, but for the most part the book details all the how-tos and wherefores of Decker-style packing. I recommend it.
Since I have decided I will use Decker-style pack saddles on my Great Western Trail trip, I decided I should start putting my gear together and get some practice in.
First off, I ordered two 150′ hanks of rope, one 3/8″ and the other 1/2″, in accordance with the recommendations Hoverson makes in the book. He likes a synthetic three-strand rope made by New England, called Multi-Line II. After handling the rope, I have to agree with him. I like the rope. It has enough body to hold knots and hitches well, yet is not so hard that it is tough on the hands and gear. According to Hoverson, it wears well and is resistant to sun degradation.
Hoverson recommends the following ropes for each pack saddle:
2 – Sling Ropes, 1/2″ diameter, 24-28′ in length
2 – Cargo Ropes, 3/8″ diameter, 35′ in length
1 – Lead Rope, 1/2″, 12′ long
1 – Pigtail, 3/8″, 7′ long
1 – Breakaway, 1’4 or 3/8″ manila rope, about 3′ long
Each rope gets backbraided with an eye on one end and a simple backbraid on the other. Hoverson refers to these as backsplices (technically, a splice is joining two pieces of rope).


I came just a few feet short of being able to make all the necessary ropes for two pack outfits from the two hanks of rope I bought. I made my ropes to the longest recommendations of Hoverson. Had I made my sling ropes 24′, rather than 28′, I would have been able to get all the necessary ropes from those two hanks. As it is, I have about 19′ of 1/2″ left over for an additional lead. I’ll have to order about 7′ of 3/8″ for another Pigtail and 28′ of 1/2″ for another Sling rope. You can get the stuff by the foot or bulk from Outfitter Supply, but I found the prices to be better from Rigging Warehouse.
I followed Hoverson’s instructions for doing the backbraids and eyes and was able to recover a skill I had as a much younger man, but had forgotten long since. I enjoyed an evening braiding the ends of my ropes and getting all my ropes finished. I will eventually get around to making an instructional video on cutting, backbraiding, and finishing this synthetic rope.

Additionally, I have bought several other items of equipment. I bought a pair of Estwing axes from Home Depot that appear to me to be perfect for packing.

I bought a 16″ one, that will probably go with me on my GWT ride, and a 26″ one that will go with me on my shorter pack trips where I think there may be trail maintenance involved.
I found a decent little 30″ tree saw on Craigslist for $20, and bought it. It will need a new wood handle and to be sharpened and polished, but it will be very handy on any trail.

I will make a leather holster for it and simply hang it from any convenient place on either a pack saddle or my riding saddle. You see it here along side my one-hand log saw that is also in need of polishing and sharpening.
I replaced my old trusty rawhide covered 1-gallon canteen, which seems to have sprung a leak recently. I bought a round 1-gallon and a round 2-quart canteen, as well as a military surplus collapsible 2-quart canteen. I decided to give the MS canteen a try on the trail. It looks like it will hang quite well from a saddle and will likely stand up better to being banged around on the trail than my round canteens, despite it’s definitely “un-cowboy” appearance.

I have used the round canteens on the trail for many years and prefer them, but they are susceptible to being broken by being mashed against trees. The one I wrapped in rawhide many years ago lasted well, though.
I also repaired the water heater in my horse trailer/camper. The previous owners forgot to winterize, apparently, and the 6-gallon tank split. I ordered a replacement on ebay and installed it two weeks ago.

The next project on the trailer is the spring-over conversion for the axles, to raise the back of the trailer up to level it when towed behind my 2005 Dodge 3500 dually. I’m just hoping the horses will still load and unload once the trailer is raised. We’ll see what happens.
So, you see, while I haven’t made a post in a while, I haven’t been totally disengaged.
It may be a while before my next post as well. This weekend I head west to attend the college graduations of two of my kids. My #2 daughter graduates from Brigham Young University at the end of this month, and my oldest son graduates from the University of New Mexico Medical School the second week in May. I’ll also get to spend some time with my parents in Arizona between the two dates and will hopefully get in a nice little pack trip while I’m there.
Stay tuned!


You must be logged in to post a comment.